Do you have a question about the Valor 956 and is the answer not in the manual?
Guidelines for safe lifting and manual handling of the appliance components to prevent injury.
Precautions for handling materials containing RCF to minimize dust exposure and irritation.
Technical specifications including gas type, pressure, input/output, connection, and burner details.
Details on the appliance's gross and net efficiency percentages as measured by BS 7977 - 1.
Installation must comply with UK and Irish regulations, British Standards, and local codes.
Ensuring adequate ventilation for appliance operation as per BS 5871 Part 2 and IS 813.
Information on the ASD's function, importance, and prohibition of alteration or bypassing.
Recommendation for a fireguard compliant with BS 8423 for safety, especially for vulnerable individuals.
Restrictions on installation location, including rooms with baths/showers or using extractor fans.
Steps for preparing chimneys, including sweeping, inspection, and securing dampers.
Ensuring the fireplace opening is flat, sealed, and free from combustible cladding for proper fitment.
Requirements for hearth material, thickness, and placement to ensure safety and prevent carpet placement.
Mandatory and recommended clearances from the appliance to shelves and surrounding walls.
Various installation scenarios including conventional fireplaces, metal flue boxes, and precast systems.
Installing the appliance in a conventional fireplace with a hearth, including hole-in-the-wall variants.
Installing the appliance with a metal flue box complying with BS 715 and BS EN 1856.
Installing the appliance with precast concrete or clay flue block systems conforming to BS1289.
Details on suitable flue types, sizes, installation requirements, and terminal compliance.
Specific restrictions for propane gas appliances regarding room installation below ground level.
List of all included screws, connectors, seals, and accessories provided with the appliance.
Methods for ensuring secure attachment to the fireplace surround or using concealed tension cables.
Testing the flue for adequate draft using smoke pellets to ensure safe operation.
Verifying the proper function of the piezo ignition system and electrode connection.
Procedure for routing and connecting the gas supply pipe for concealed installations.
Steps for removing transit packaging, inspecting the unit, and fitting the rear hotbox grommet.
Instructions for applying the self-adhesive foam seal to the hotbox flanges for proper sealing.
Guidance on fitting the flue restrictor for excessive draught, with conditions for its use.
Step-by-step guide for securely mounting the hotbox to the fireplace surround using screws and wall plugs.
Detailed instructions for attaching and tensioning concealed cables for hotbox stability.
Using floor sealing tape to create a seal between the hotbox base and the fireplace/hearth floor.
Refitting the burner unit, connecting the supply line, and checking gas soundness.
Procedure for igniting the pilot and main burner using the control knob and piezo system.
Steps for adjusting heat settings from HIGH to LOW and returning to pilot or OFF.
Verifying the appliance inlet pressure is set correctly and performing leak detection tests.
Instructions for correctly fitting the burner tray trim to the front of the burner.
Rechecking control operation with fuel effect in place, noting initial vapour emissions.
Detailed steps for lighting the pilot and main burner, including repeating the procedure if necessary.
Guidance on adjusting heat settings, turning back to pilot, and turning the appliance OFF.
Ensuring the firefront has minimum free area for ventilation as per Figure 22.
Instructions for attaching the three-piece magnetic fascia trim to the appliance.
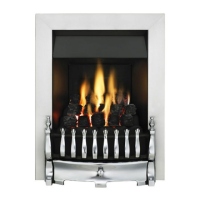
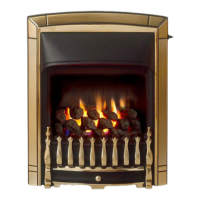
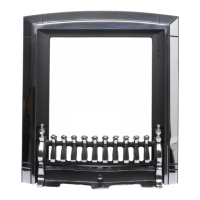
Placement of the Blenheim firefront casting on the hearth, between the fascia.
Placement and securing of Seattle/Siva firefronts, including use of additional magnets for Siva.
Performing a spillage test using a smoke match to ensure safe combustion product removal.
Checking the operation of the pilot safety system and its response to flame loss or ventilation issues.
Verifying and adjusting the burner aeration shutter to the factory-set position if needed.
Step-by-step guide to safely detach the burner unit from the hotbox.
Procedure for removing the pilot unit, noting it's a replaceable assembly.
Detailed steps for disconnecting and removing the gas valve assembly.
Instructions for detaching the main burner from the clamping plate and elbow injector.
Procedure for unscrewing and removing the main burner injector from the burner.
Steps to detach the appliance from the fireplace by releasing cable adjusters and thumbscrews.
Guide on how to safely remove the three-piece magnetic fascia trims.
Emergency procedures to follow immediately if a gas leak is detected.
Table detailing appliance height, width, depth, and mandatory/recommended clearances.
Details of maximum and minimum gas input and output rates for Natural Gas and LPG.
Explanation of the flame sensing and flue blockage safety device and its function.
Step-by-step guide to lighting the pilot flame using the 4-position gas tap and piezo igniter.
Procedure to ignite the main burner once the pilot flame is established.
How to change between heat settings from LOW to HIGH for optimal operation.
Steps to return the fire to pilot setting or turn the appliance completely off.
Alternative method for lighting the pilot using a taper if the spark ignition fails.
Instructions for cleaning metal components, including fascia and firefront, using damp cloths.
Guidance on cleaning ceramic pieces and the burner, emphasizing caution with RCF materials.
Essential checks for flue clearance and annual servicing requirements by qualified engineers.
Information on sourcing and replacing ceramic fuel effect pieces through authorized stockists.
Overview of the standard 12-month warranty, service requirements, and contact information.
Guidance for customers on what to do if experiencing faults, including contacting installer or helpline.
What the warranty covers (manufacturing faults) and what it does not cover (installation issues, misuse).
| Venting | Direct Vent |
|---|---|
| Warranty | Limited Lifetime Warranty |
| Fuel Type | Natural Gas or Propane |
| Ignition System | Electronic Ignition |
| Type | Freestanding |