4
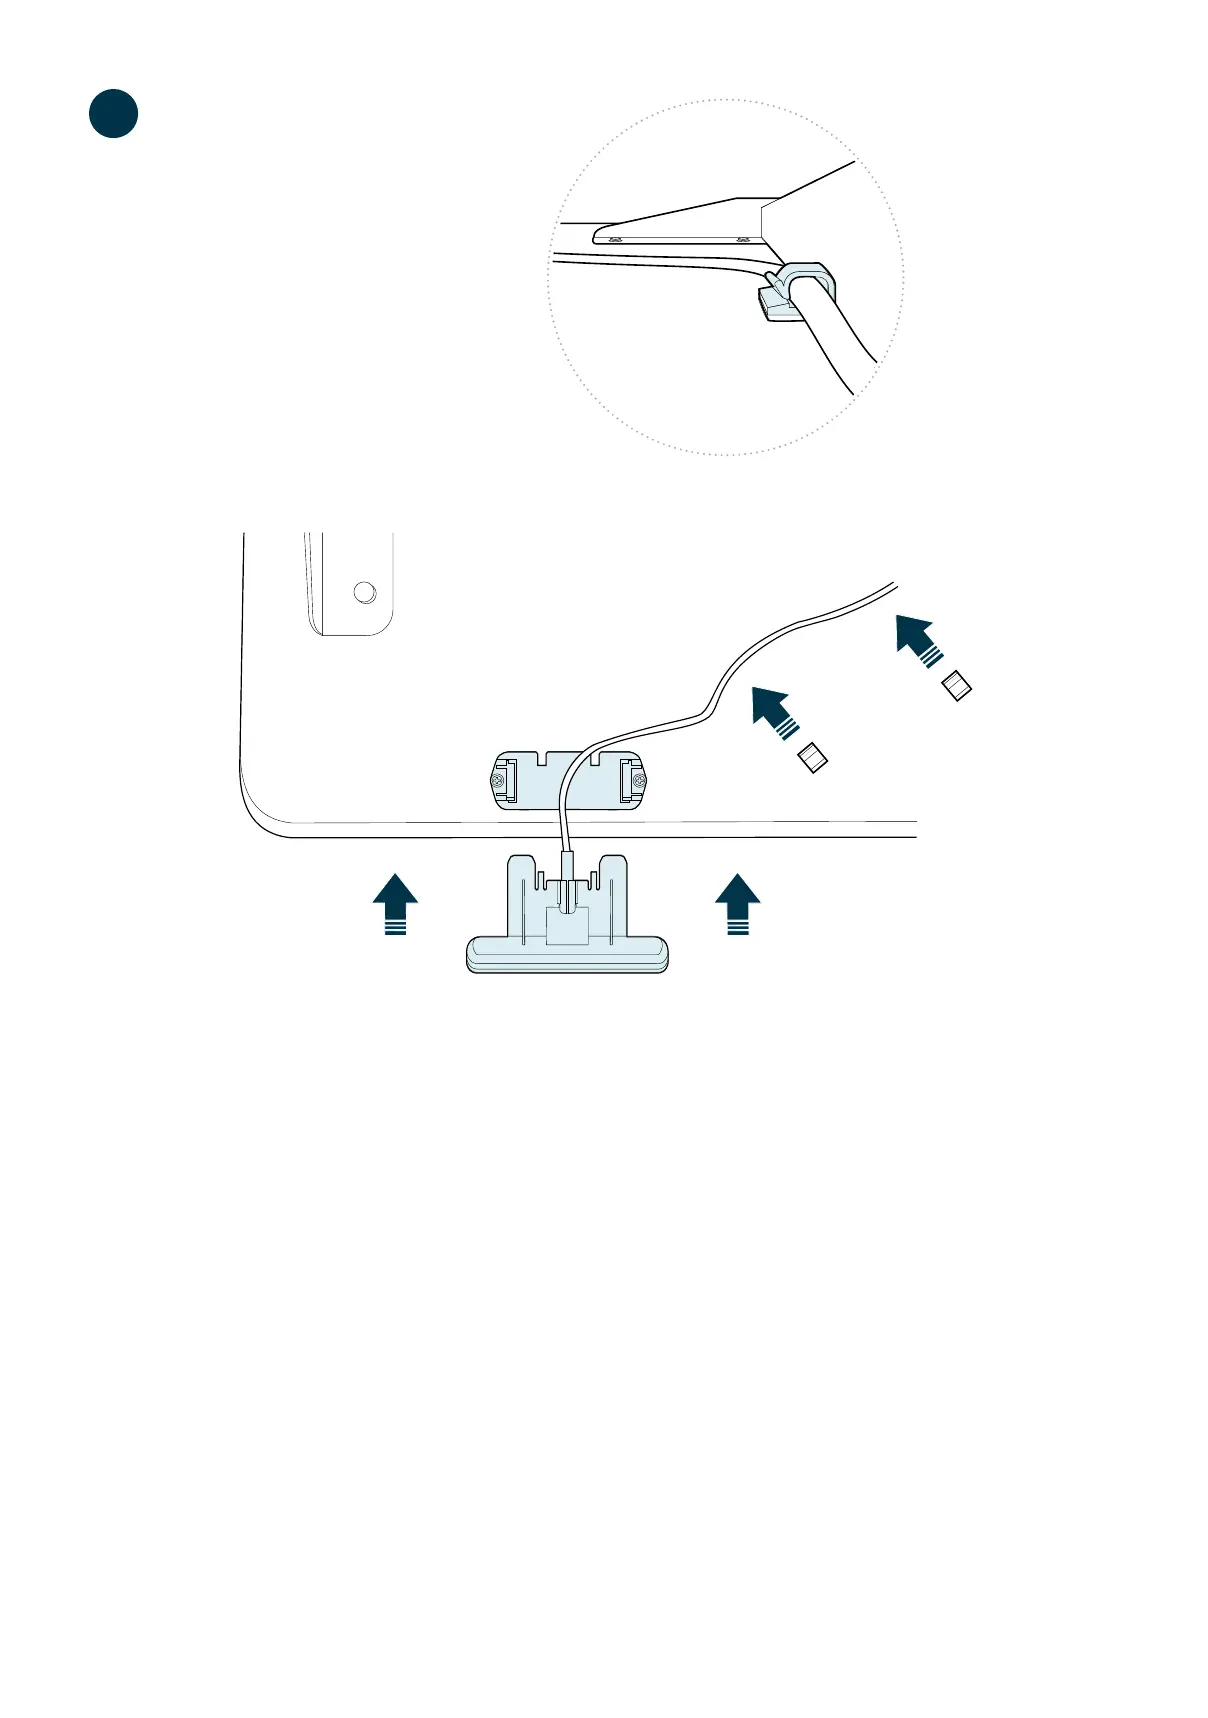
Locate the control panel and slide it into the bracket to aach. Once the panel is in place, connect
its cable to the corresponding control box input, HS.
PLEASE NOTE: The control panel can be placed on the desk’s right or le side, depending on
the user’s preference. If the bracket for the control panel is not on the preferred side, unscrew it,
line it up with the pre-drilled pair of holes on the other side, and screw it in before aaching the
control panel.
You can use the included adhesive clips to secure the control panel cord to the underside of the
desktop to keep it out of the way.
Localisez le panneau de commande et faites-le glisser dans le support pour le xer. Une fois le panneau en place, branchez
son câble à l’entrée correspondante du boîer de commande, HS.
VEUILLEZ NOTER : Le panneau de commande peut être placé à droite ou à gauche, selon la préférence de l’ulisateur. Si
le support du panneau de commande ne se trouve pas du côté désiré, dévissez-le, alignez-le aux trous pré-percés de l’autre
côté et vissez-le avant de xer le panneau de commande.
Vous pouvez uliser les aaches adhésives incluses pour xer le cordon d’alimentaon du panneau de commande au-
dessous du bureau pour le garder à l’écart.
3