5
Vasa SwimErg User’s Manual
August 2022
STEP 3: PADDED BENCH ASSEMBLY ONTO MONORAIL
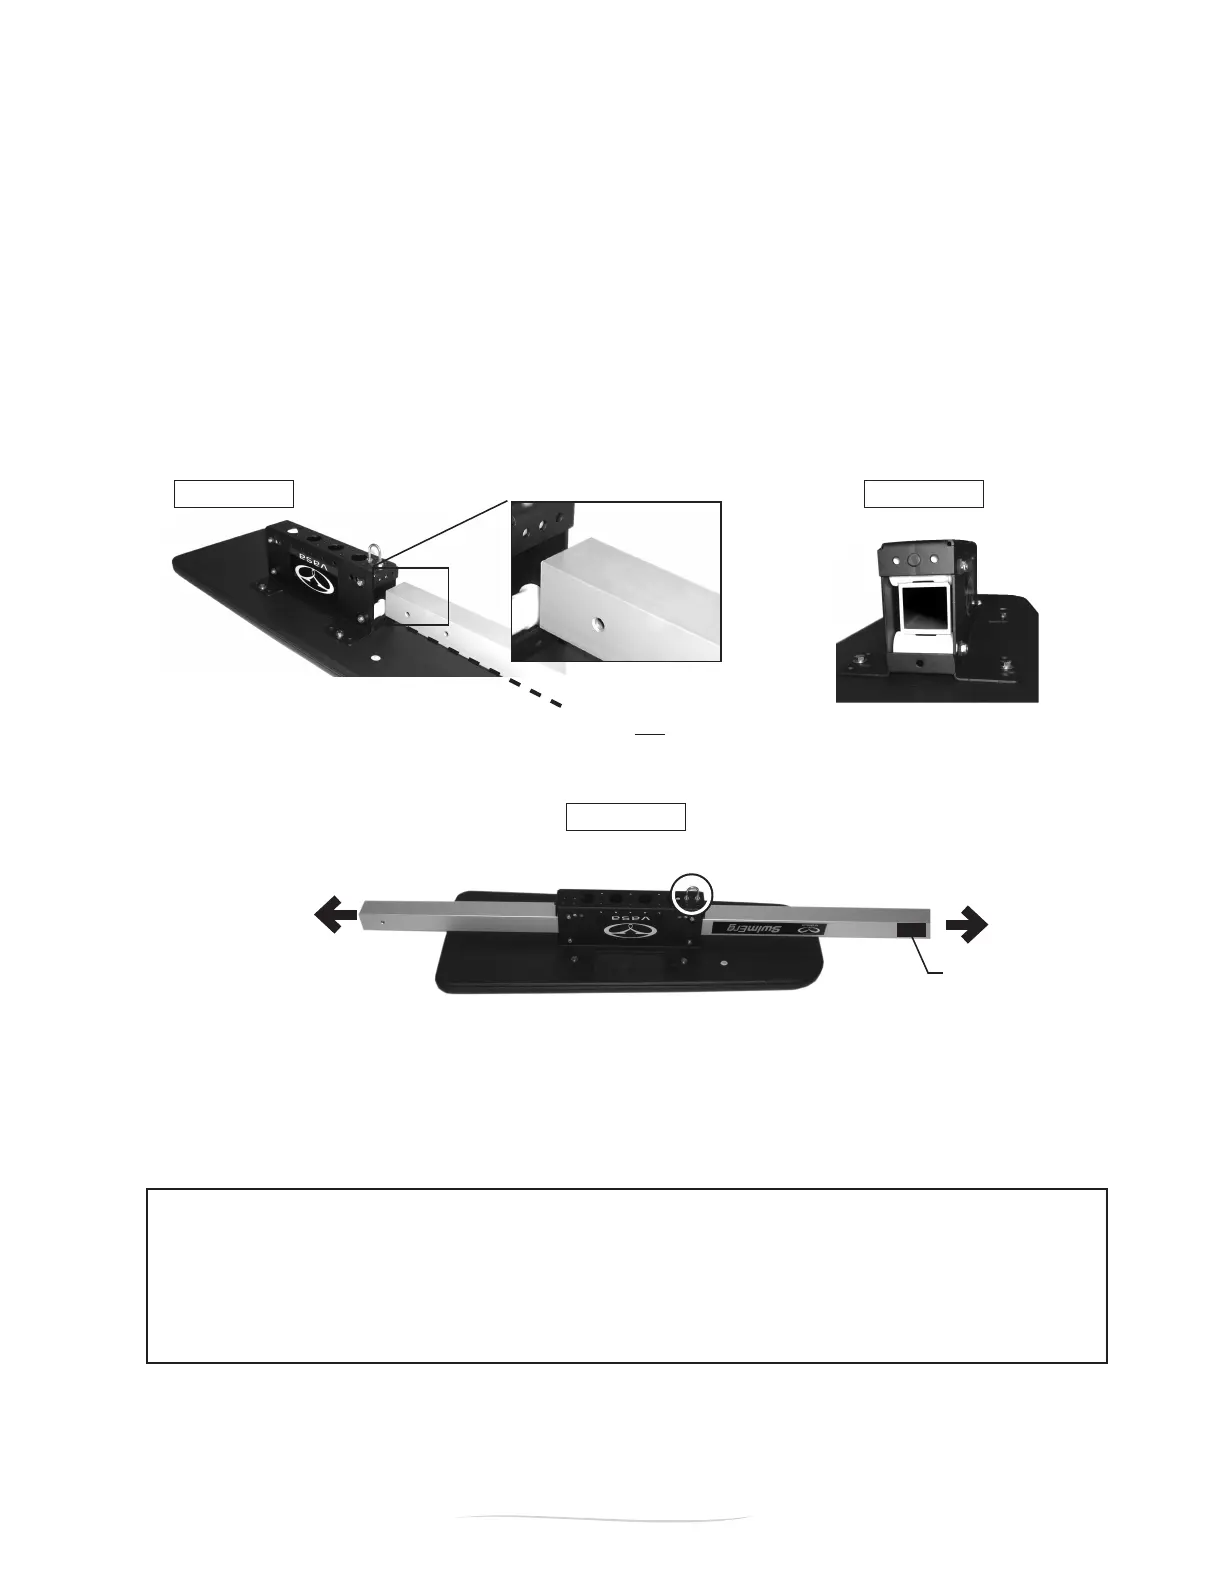
3.1. Laythebenchassembly(withtheseatcarriageup)ontheoornexttothemonorail.
3.2. Keep the monorail level with the decals upside down.(See Figure C) Slowly and carefully feed the monorail
betweentherstsetofrollers(FigureA).
3.3. Carefully guide the monorail through to the second set of rollers (Figure B), continuing to keep it level.
DO NOT FORCE through to prevent damage to the rollers.
3.4. After installing the rail through the seat carriage, it should look like Figure C.
NOTE:
Youmayndthattheseatcarriageseems“tight”onthemonorailandrollswithsomeresistance.
This is normal, since the rollers need to conform to the monorail. You’ll need to do about 25 - 100 repetitions
on your Vasa SwimErg before the rollers wear and conform to the monorail and roll smoothly. As the
rollers wear, they’ll leave some residue on the monorail which needs to be wiped off regularly. Any dust
or residue accumulation on the monorail will inhibit optimal functioning of the rollers. See maintenance
section of this manual for instructions on how to clean your monorail.
KEEP MONORAIL LEVEL
& DO NOT FORCE
carefully & slowly feed the monorail
through 2nd set of rollers
Figure A
Figure C
Figure B
INFO
DECAL
keep at
front
REAR
FRONT
PART 1 - Assembly