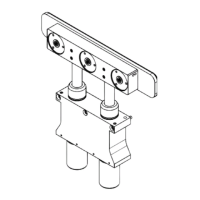
Series 075 MAINTENANCE
61 Washer
65 Piston
70 O-Ring
75 Screw
Figure 6-3
12. Before mounting the pressure plate back onto the shafts, make sure that the 2 O-rings
(70) are in the correct position.
13. Tighten the 4 set screws (68) with a torque of 4.5 Nm; These 4 screws have to be
tightened step by step, cross-wise to evenly distribute force on the pressure bar. Make
sure that the tips of the set screws fit into the 90° countersunk in the shafts.
During system maintenance it is advised to check if the 3 screws (75) are still
tightened properly according point 11.
14. Connect electrical power supply of position indicator.
15. Connect compressed air supply.
16. Perform one cycle, see chapter «4.5 Initial operation».
Door is ready for use.
 Loading...