Securing Your Safe
Installing Mounting Bracket
Aftermarket Conguration
Your mounting plate features additional pre-drilled holes for the addition of aftermarket brackets or
modications (see Figure 1.4 on page 20) using VESA standard tment. This is great if the environment
requires the safe to be congured in a certain manner beyond the standard mounting options available.
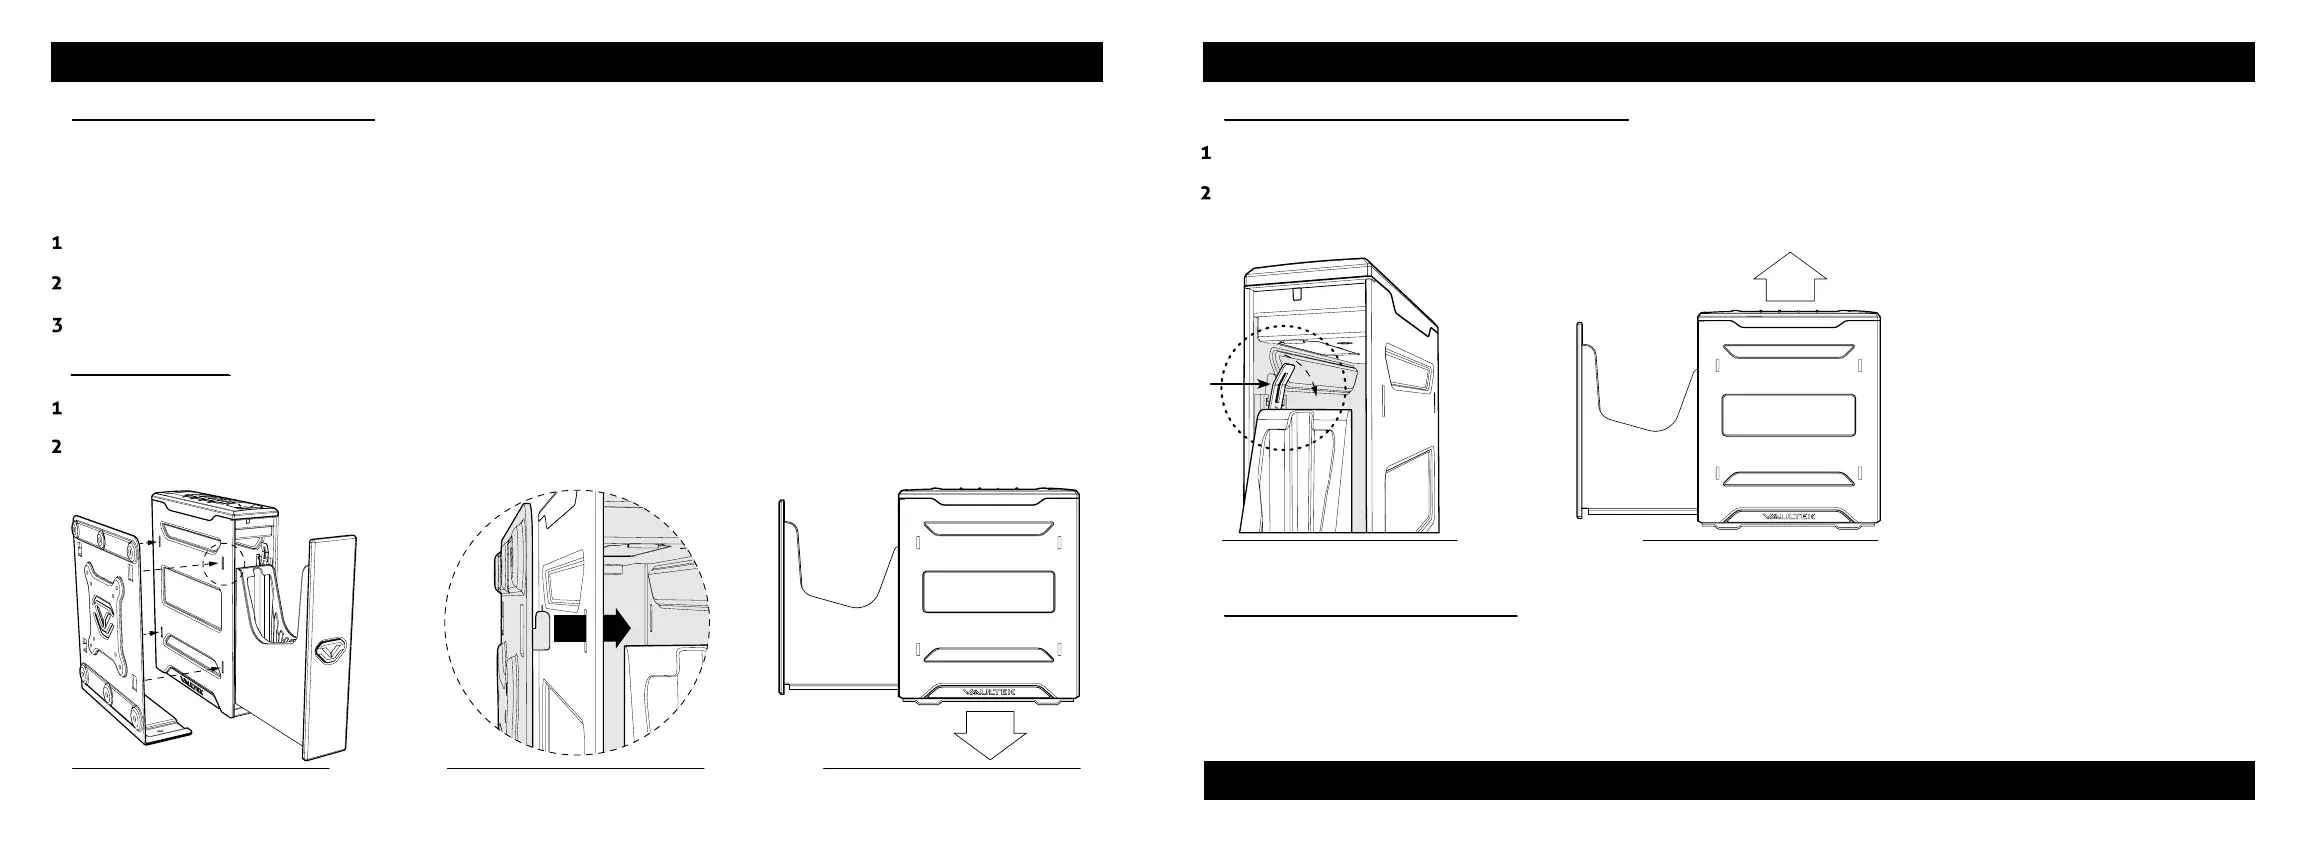
Mounting Safe
Locate the 4 receiving slots located on the safe sides, and the 4 tabs located on the mounting plate.
Fully insert the tabs on the mounting plate into the receiving slots on the safe (Figure N/O), and press the safe
downwards to lock in place (Figure P).
FIGURE PFIGURE OFIGURE N
TIP: Your safe can install on the mounting plate from the left or right side. When installing the plate, be sure the
bottom is parallel to the oor (Fig P) so the safe opens horizontally. Angling the plate or aiming the safe downwards
can aect the rail mechanics and prevent safe from opening correctly.
Locate mounting surface, making sure the safe will have enough clearance to open properly prior to installing.
Hold mounting plate in place and use a pencil to mark desired hole locations. Drill 7/32" inch pilot holes.
Using hardware provided fasten mounting plate in place and tighten rmly.
To Remove Safe from Mounting Plate
Open the safe. Locate the release clip on the same side as the attached mounting plate.
Use your thumb or nger to pull the release clip back, and lift the safe o the mount at the same time (see
FIGURE Q/R). The safe will not remove without pulling the release clip back.
FIGURE Q FIGURE R
22 Vaultek
®
21 Vaultek
®
For tutorials, setup help, and FAQs visit www.vaulteksafe.com/setup/ and select your safe.