09 Vaultek
®
10 Vaultek
®
Biometric Programming (SL20i Only)
Biometrics are methods of authenticating the identity of a person based on physical or behavioral characteristics.
Biometric ngerprint authentication refers to technology that measures and analyzes human physical
characteristics for identication and authentication purposes. The smart align biometric system guides your
nger placement for consistent and accurate results.
Everyone has their own unique ngerprints, and what makes them unique is the pattern of ridges, valleys, and
minutiae points that comprise an individual print. Vaultek
®
and their leading engineering group has developed
proprietary technology to read and match ngerprints with unmatched speed and accuracy. That means that only
authorized users have access to your valuables. The safe is capable of storing ngerprint data for up to 20 unique
authorized users. A user consists of 5 scans of the same nger during registration. Once a user's ngerprint data
is stored in the safe and encrypted, it cannot be copied or stolen.
Programming Admin Fingerprints (First Two Users)
The 1st and 2nd ngerprints will be recognized as administrative ngerprints and
will be used to authorize additional users. To program additional users please refer
to the next page.
Open the safe. Program 1st ngerprint by quickly pressing "PROGRAM" (Figure I).
The ngerprint LED (Figure J) will turn solid RED and the '1' key on the
keypad will start blinking RED.
TIP: If all keys are blinking RED and the ngerprint LED turns solid RED then refer to
programming ngerprints 3-20 on next page.
Using the helpful programming tips provided on page 11 place your nger on the
ngerprint scanner for the 1st of ve scans. When the safe beeps and the '1' key
lights up GREEN remove your nger.
Place nger again over the scanner until the safe beeps and the '2' key lights up
GREEN and lift. You will repeat this process until all keys (1-5) are solid GREEN.
Close door and test to see if the safe will open using your ngerprint. If you
experience issues refer to the helpful programming tips listed on page 11 or
view our tutorials online at vaulteksafe.com under Support/Tutorials.
Repeat steps 1 through 4 to add the 2nd administrative ngerprint.
Continue on next page to program ngerprints 3-20 and how to delete prints.
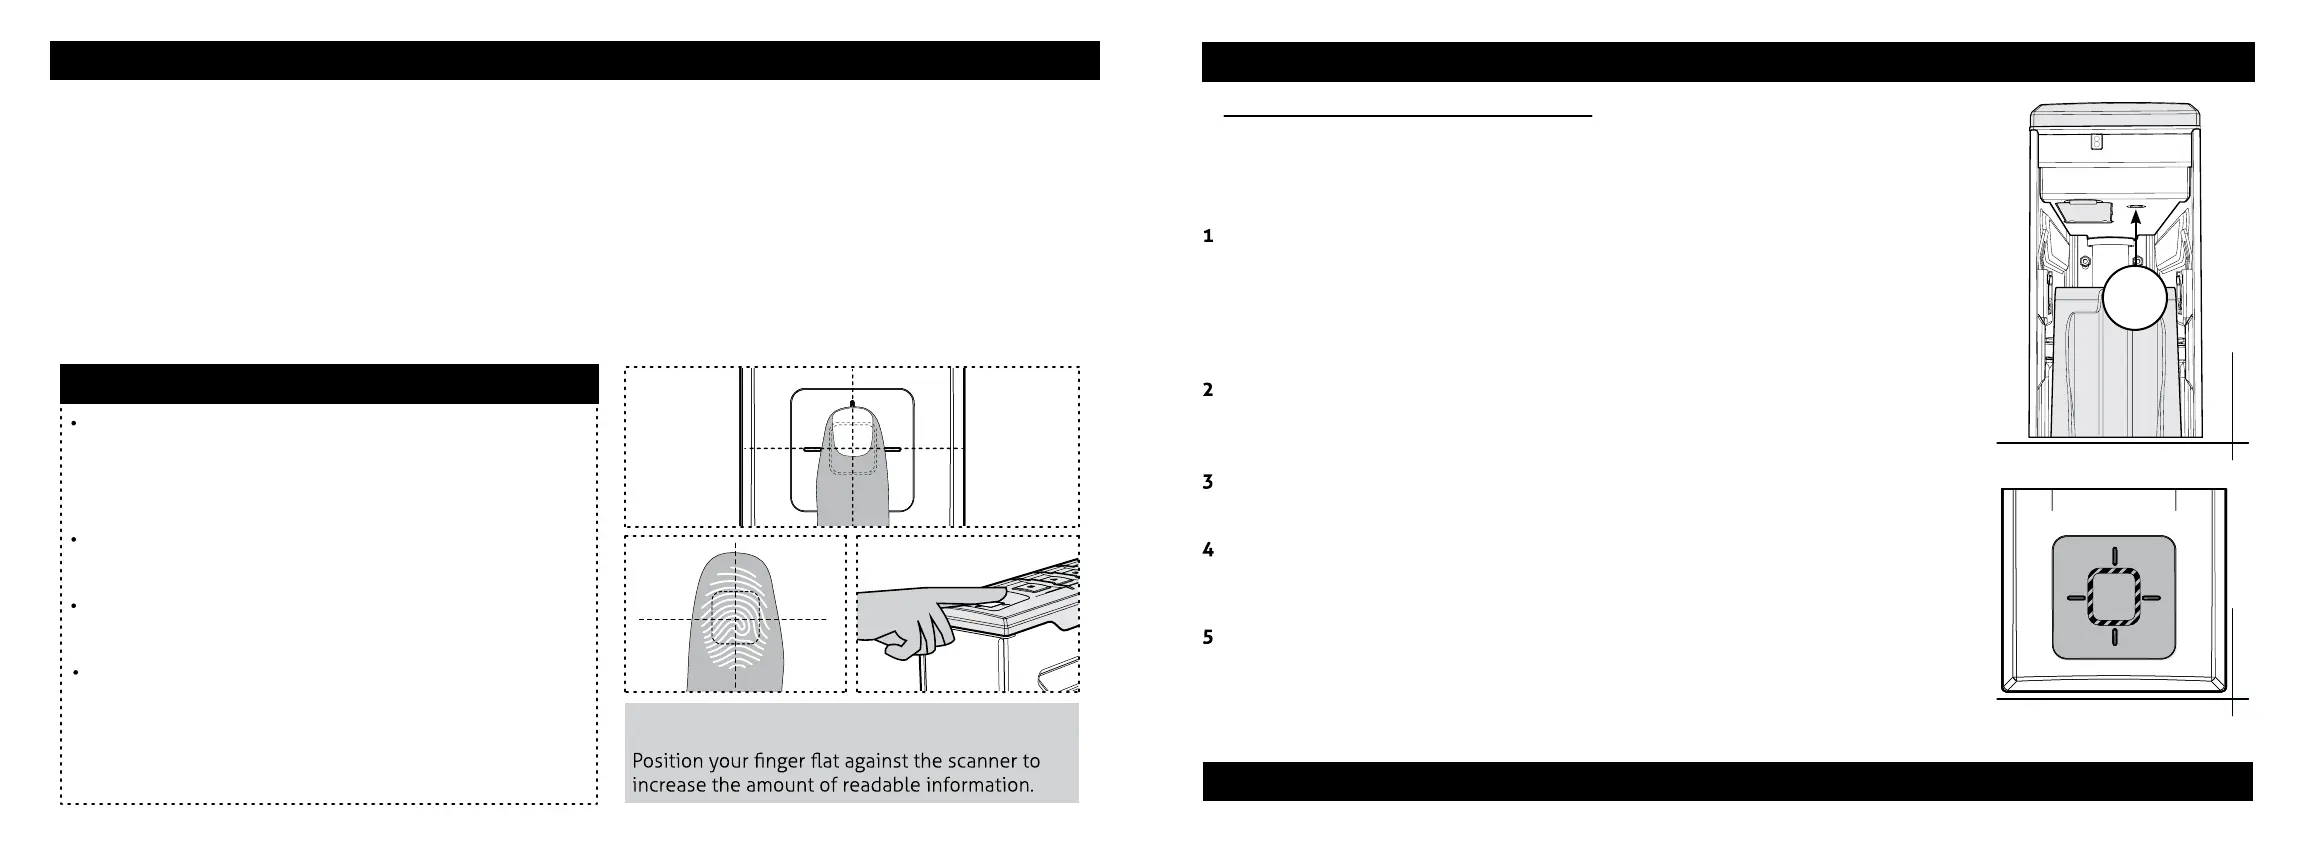
Helpful Programming TIPS
Place the core of the ngerprint at (Figure F+G) over
the center of the scanner (this allows the scanner to
read where most of the ngerprint
detail is located) see (Figure F).
Adjust your nger slightly between scans for increased
accuracy.
Excessive moisture, lotions, or dirt will aect your
ngerprint and may cause inaccurate sensor reading.
If you are having diculty with your print, program the
same ngerprint 4 or 5 times. You have 20 slots
available for programming and you can also try your
thumb as it has more surface area to read.
FIGURE I
FIGURE J
I
FIGURE F
FIGURE G
FIGURE H
ATTENTION! (Figure H)
For tutorials, setup help, and FAQs visit www.vaulteksafe.com/setup/ and select your safe.
Continue on next page for more information about the ngerprint scanner.