EasyManua.ls Logo

Vax V027

Vax V027
18 pages
To Next Page IconTo Next Page
Loading...
3
e
a
c
1
2
3
Putting your cleaner together
Remove your Rapide XL from the
carton with caution. The handle is
connected to the body by a cord.
Note: Do not tug or pull on the
cord.
Line up the handle to the upper
body of the machine and slide into
place.
Secure from the back with the
two smaller screws.
Phillips screwdriver required
a Handle
b Solution trigger
c Soap on/off
d Power on/off
e
Clean water tank release
f Clean water tank carry handle
g
Clean water tank
h Cleaning solution soap tank
i Drain cap
j
H
ose w
ater supply por
t
k
Dual brushbars
l Front suction nozzle
m
Dirty water tank
n Floor/tools selector
o Hose attachment cover
p Dirty water tank handle
q Dirty water tank nozzle tab
r Dirty water tank latch
s Detachable tool storage
t
Extra long Stair Hose
u Water supply connector
v
Upholstery wash tool
w Upholstery tool trigger
x Solution/hose clip
y
Q
uic
k cord release
z
Carrying handle
aa Clean water tank cap
b
b Hose storage clips
cc Power cord
dd Cord wrap
ee Handle release pedal
ff Carpet treatment wand
gg AAA carpet cleaner
hh Multi hard floor solution
i
i
Pre-treatment solution
jj Post-treatment solution
k
k Carpet treatment wand water supply port
ll Flexible hose
mm Power Wash Brush
nn
B
atter
ies f
or power wash brush
o
o
Solution tube and clips ( 3 large, 2 small)
pp Telescopic tube
qq
Hydrodry hard floor wash head
bb
aa
h
d
b
y
bb
x
mm
nn
nn
z
f
g
i
j
k
l
m
n
o
p
q
r
c
d
v
w
cc
dd
ii
ee
s
t
ff
gg
hh
pp
oo
2
multi
pre
treatment
pre-treatment
carpetsolution
solution de prélavage
pour tapis et moquettes
teppichvorwaschspray
tapit reiniger spray
Parts checklist
oo
kk
u
ll
qq
jj
post
treatment
p
re-treatment
c
arpet solution
s
olution de prélavage
p
our tapis etmoquettes
t
eppichvorwaschspray
t
apit reiniger spray
V027(Y) User Guide 5/10/06 11:47 am Page 1
Question and Answer IconNeed help?

Do you have a question about the Vax V027 and is the answer not in the manual?

Vax V027 Specifications

General IconGeneral
BrandVax
ModelV027
CategoryVacuum Cleaner
LanguageEnglish

Summary

Parts Checklist

Putting Your Cleaner Together

Initial Setup and Handle Attachment

Remove cleaner, route cord, attach handle to machine body, and secure with screws.

Clean Water Tank Installation

Prepare and Install Tanks

Place solution tank correctly, then install clean water tank by aligning grooves and pushing.

Tool Storage Installation

Attach Tool Caddy

Line up tool caddy tabs with round tabs on the back of the handle for storage.

Pre-treating Carpets with Wand

Prepare Tanks and Attach Wand

Remove clean water tank, loosen/remove solution tank, then attach carpet treatment wand.

Pre-treating Carpets: Tank Filling

Fill Solution and Water Tanks

Fill solution tank with pre-treatment solution and clean water tank with warm tap water.

Secure Wand Attachment

Ensure the carpet treatment wand is securely attached to the water supply port.

Pre-treating Carpets: Operation

Apply Solution and Manage Flow

Turn on switches, apply solution with wand, release trigger to stop flow, and avoid over-wetting.

Operating Your Cleaner: Setup

Prepare Tanks for Cleaning

Remove clean water tank and loosen solution tank to prepare for filling with cleaner.

Operating Your Cleaner: Filling Tanks

Fill Solution and Water Tanks

Fill solution tank with cleaner and clean water tank with warm tap water.

Operating Your Cleaner: Cleaning

Connect, Power On, and Use

Plug in, turn on power/soap, and use trigger to spray and clean carpets.

Utilize Burst Clean Feature

Activate burst clean for stubborn stains to enhance brushbar speed and pump flow.

Carrying Your Cleaner

Use Carrying Handle for Transport

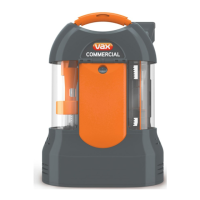
Grab the carrying handle on the back of the cleaner to move it between rooms.

Hose Attachments: Setup

Prepare Cleaner and Attach Hose

Put cleaner upright, turn off switches, remove hose, and attach it to the tool opening.

Hose Attachments: Operation

Connect Supply, Set Selector, and Clean

Connect water supply, set selector to tools, apply solution, and rinse upholstery.

Disconnect and Store Attachments

Remove hose fitting and water supply connector, then set selector and store tools.

Hard Floor Cleaning: Setup

Prepare for Hard Floor Cleaning

Fill solution tank with specific hard floor solution; do not use carpet cleaner.

Connect Solution Tube and Set Controls

Wrap tube, connect to supply/head, set floor/tools selector to tools, and turn on cleaner.

Hard Floor Cleaning: Operation

Operate Hydrodry Head and Disconnect

Operate Hydrodry head with rocker switch, then disconnect all attachments for drying.

Power Wash Brush Installation

Install Batteries and Attach Brush

Insert batteries into the Power Wash Brush and attach it to the hose attachment.

Emptying the Dirty Water Tank

Remove, Empty, and Rinse Tank

Release latch, remove tank, empty water, twist off cap, rinse with hot water.

Emptying the Dirty Water Tank: Final Steps

Return Tank and Clean Filter

Return the dirty water tank to the base, then lift and clean the filter under hot water.

Post-treating Carpets: Setup

Prime Wand and Prepare Tanks

Prime wand by depressing trigger, remove clean water tank, loosen solution tank.

Post-treating Carpets: Tank Filling

Fill Solution and Water Tanks

Fill solution tank with post-treatment solution and clean water tank with warm tap water.

Confirm Wand Attachment

Ensure the carpet treatment wand remains securely attached to the water supply port.

Post-treating Carpets: Operation

Apply Solution and Post-Cleaning

Turn on switches, apply solution with wand, release trigger, and follow post-cleaning steps.

Belt Removal and Replacement

Access and Remove Belt Components

Remove tanks/nozzle, unscrew and remove belt cover to access the belt.

Belt Replacement and Brush Handling

Install Belt and Replace Cover

Loop the new belt correctly, then replace the nozzle cover and screws.

Remove and Install Brushbar

Remove brushbar screw, slide out worn brushbar, then feed and secure new brushbar.

Troubleshooting Guide

Safety Precautions

Related product manuals