8
3 Mounting
VEGAPULS 68 • Two-wire 4 … 20 mA/HART
47165-EN-210621
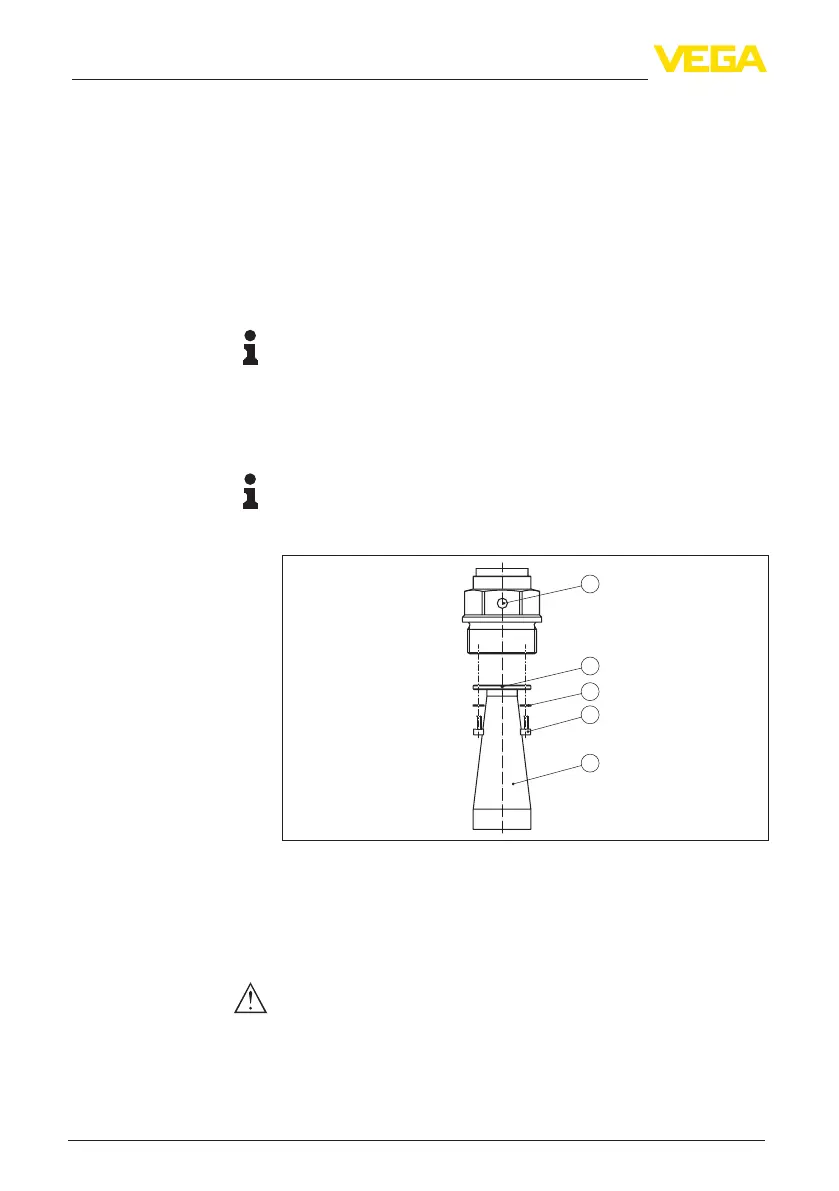
3.2 Mounting preparations
The instrument is also available in versions with an antenna whose
diameterislargerthantheprocesstting(thread,ange).Insuch
casestheantennamustbedisconnectedfromtheprocesstting
before mounting.
Proceed as follows:
1. Loosenthehexagonsocketscrews(3)ontheantennasocket
withanAllenwrench(size3)
2. Remove the antenna (4)
Note:
The plastic cone may not be pulled out of the antenna socket.
3. Insert the antenna from below into the vessel socket and secure it
againstfallingo
4. Retightentheantennawithhexagonscrewstotheantenna
socket;max.torqueseechapter"Technical data"
Note:
Theradarsensorwithrinsingairconnectionorwithantennaexten-
sionhasanotchontheantennasocketforpolarization.Thisnotch
mustbealignedwiththemarkingontheprocesstting.
4
3
5
1
2
Fig. 3: Dismounting of the horn antenna
1 Markingontheprocesstting
2 Marking at the antenna socket
3 Screw locking device
4 Hexagon socket screws
5 Antenna
Caution:
A secure hold of the antenna is only ensured with the untwist guard.
The untwist guards inserted on site must hence be used again.
Depending on temperature range and antenna material, these are
spring rings according to DIN 217 or wedge lock washers according
to DIN 25 201.
Horn antenna

 Loading...