18
4 Mounting
VEGAPULS 68 • Foundation Fieldbus
36538-EN-170405
4.3 Mounting preparations - Parabolic antenna
The instrument is also available in versions where the antenna has
adiameterlargerthantheprocesstting(thread,ange).Withsuch
versionstheantennamustbedisconnectedfromtheprocesstting
before mounting. Proceed as follows:
1. ClampVEGAPULS68withtheange,e.g.inabenchvice
2. Holdtheconnectionpiece(1)withawrenchontheatsurfaces
(widthacrossats22mm)
3. Loosen counter nut (3) completely with a wrench (width across
ats36mm)inthedirectionoftheantenna
4. Loosen compression nut (2) completely with a wrench (width
acrossats41mm)inthedirectionoftheantenna
5. Remove the parabolic antenna (4) axially
6. Mountsensorangeontheadapterangeandfastenittightly
7. Check if the O-ring seal is present on the connection piece and
make sure it is not damaged.
Note:
A damaged O-ring seal must be replaced: FKM (SHS FPM 70C3
GLT),FFKM(Kalrez6375)
8. Remount the parabolic antenna (4)
9. Fastencompressionnut(2)withawrench(widthacrossats41),
max. torque see chapter "Technical data"
10. Fastencounternut(3)withawrench(widthacrossats36),max.
torque see chapter "Technical data"
Note:
On the version with rinsing air connection, make sure that the holes
intheantennaandintheprocessttingcoincide.Thisensuresasuf-
cientairow(theairisledthroughtheholestothefeedsystem.A
rinsing of the whole parabolic antenna is not intended).
1
2
3
4
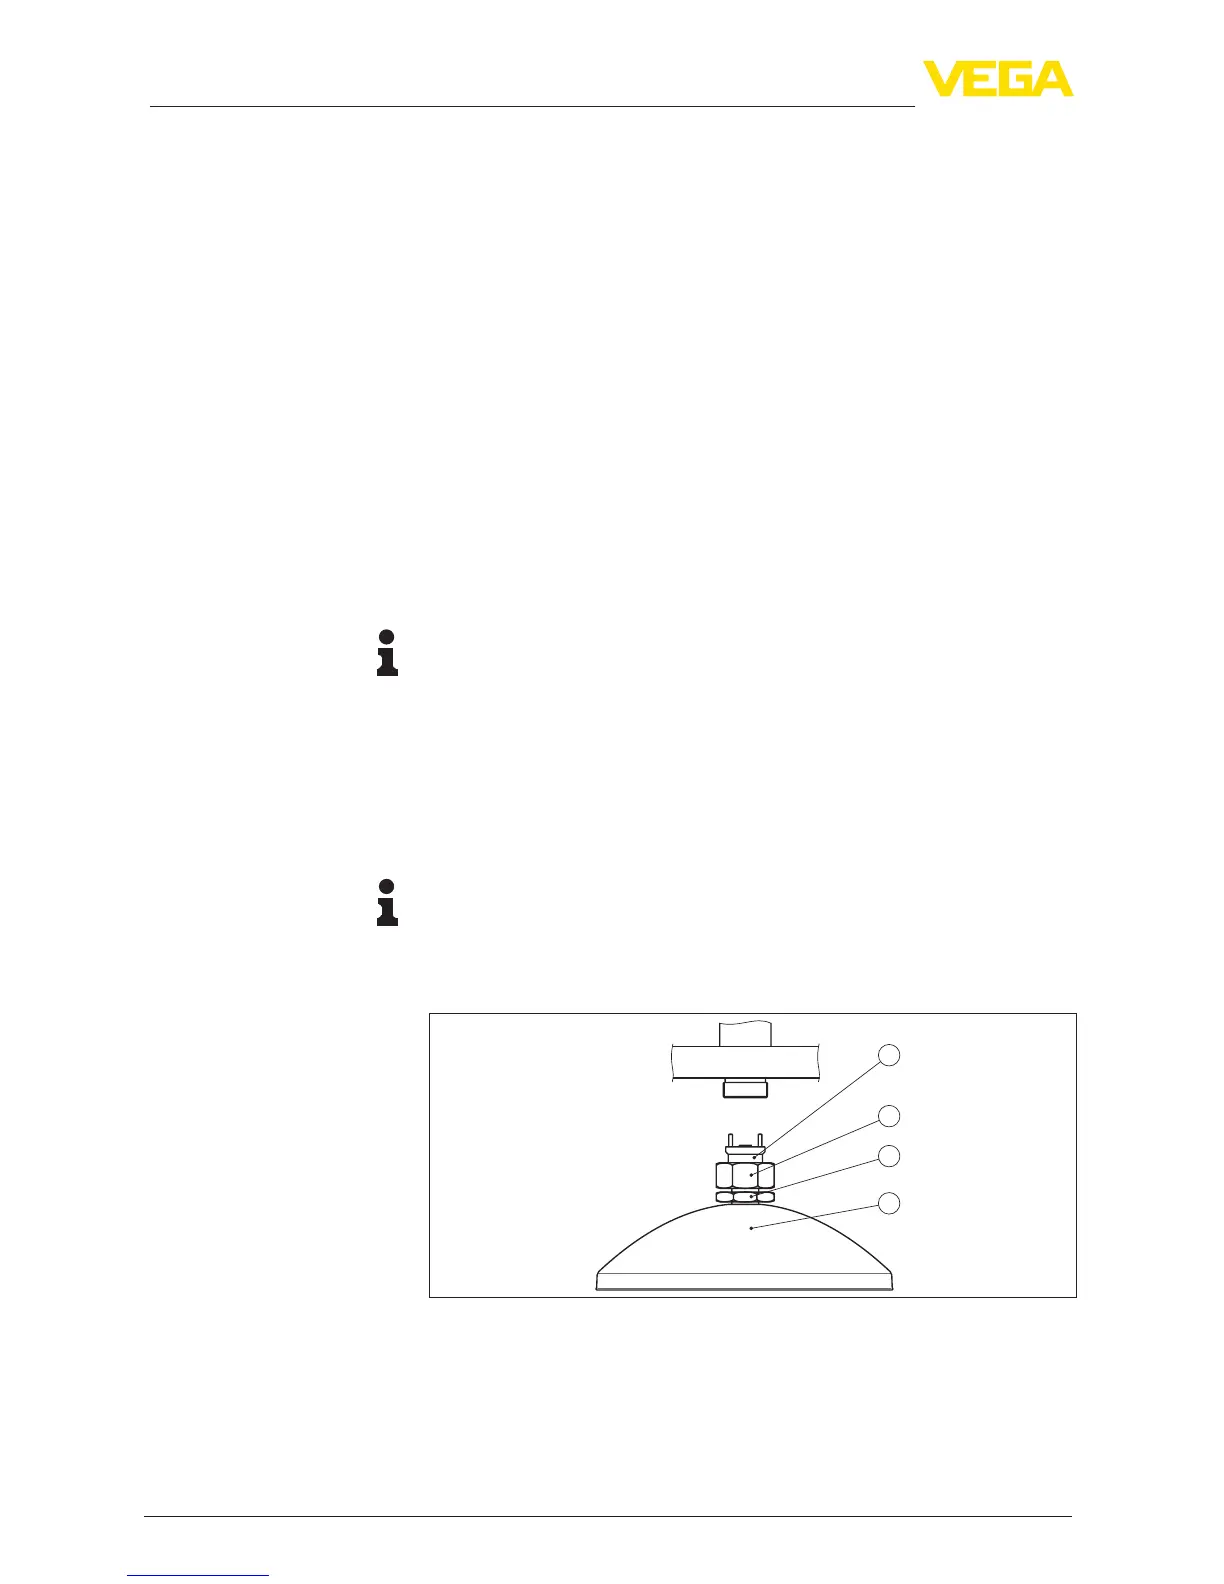
Fig. 4: Dismounting, parabolic antenna
1 Connection piece
2 Compression nut
3 Counter nut
4 Parabolic antenna

 Loading...