DVR4H4
V. 01 – 10/02/2014 8 ©Velleman nv
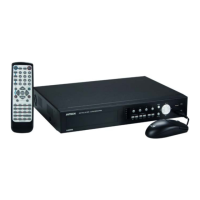
7. Hardware Overview
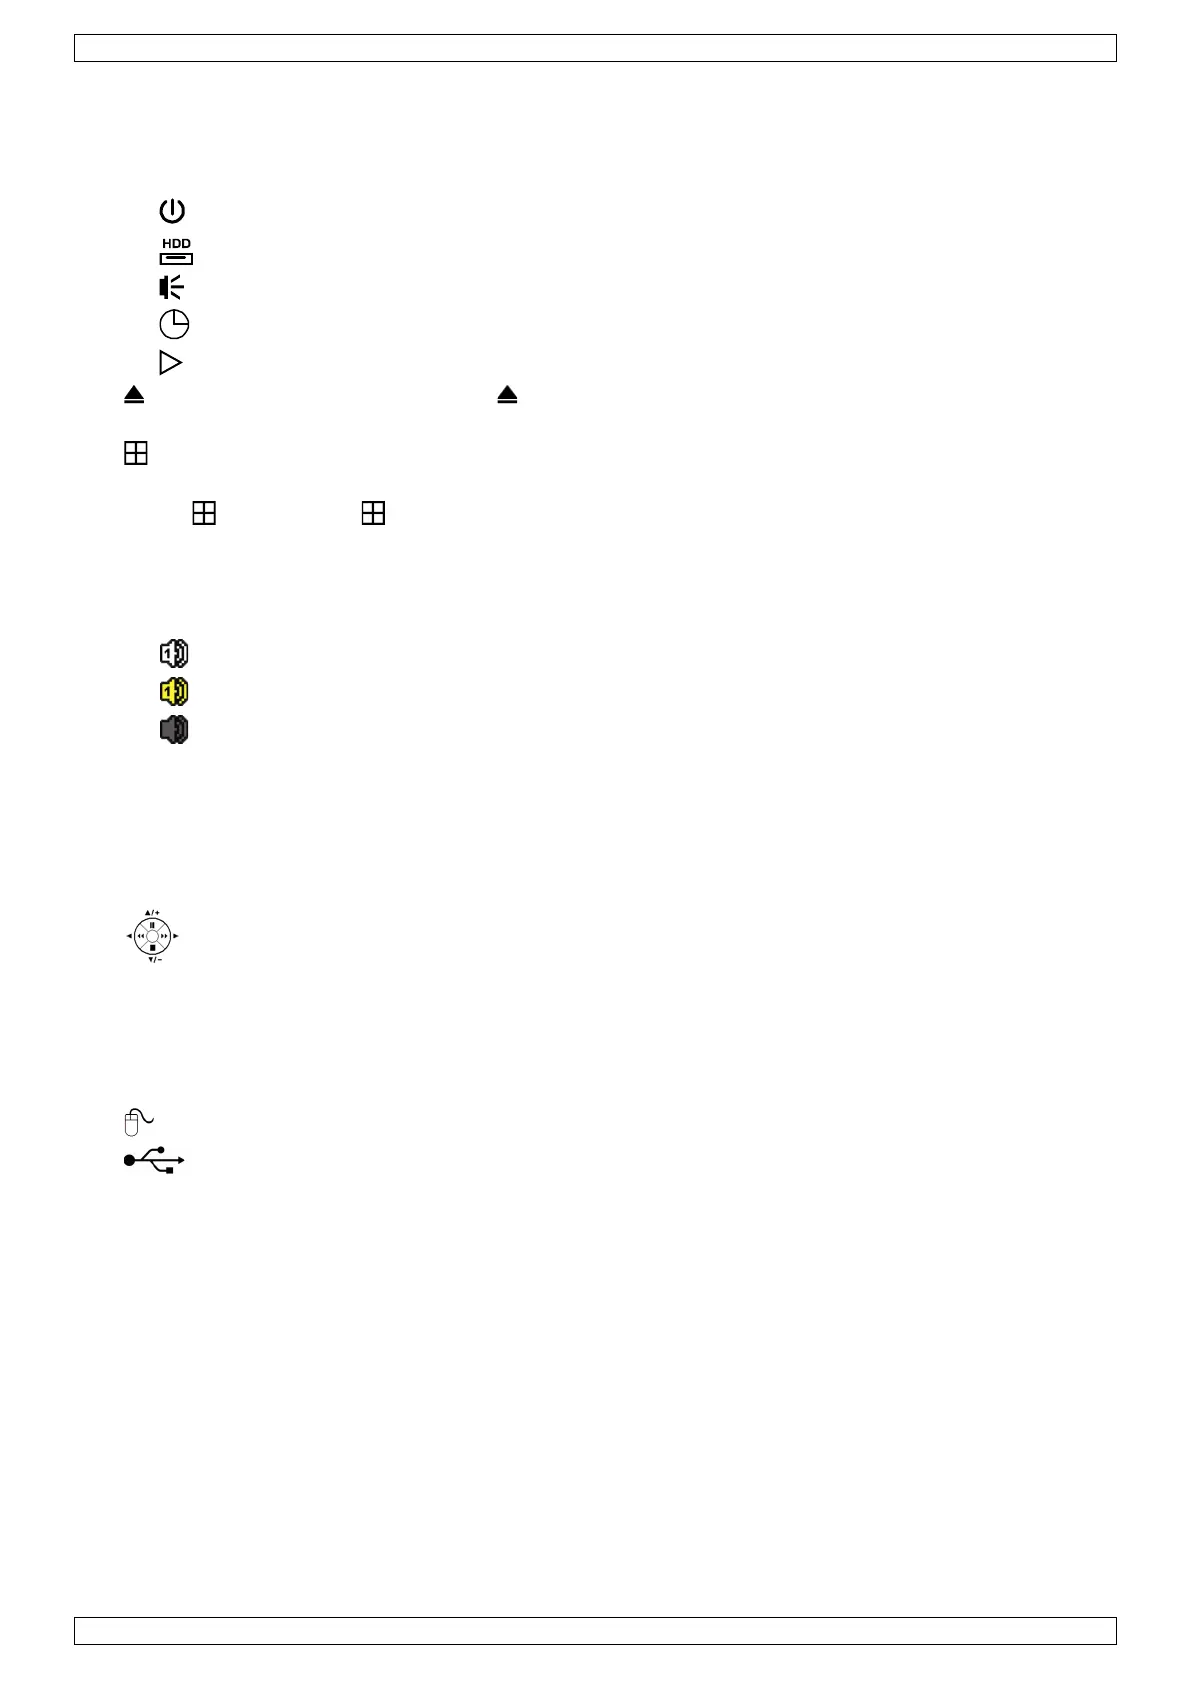
7.1 Front Panel
• LED indicators
o : DVR is powered on.
o : HDD is reading or recording.
o : An alarm is triggered.
o : Timer recording is on.
o : DVR is in playback mode.
• : For models with a DVD writer, press to open or close it.
• 1–4: Press the channel number buttons to select the channel to display.
• : Press to show the 4-channel display mode.
• SEQ: Press to show all screens sequentially in full screen mode. Press again to quit.
• P.T.Z. ( + SEQ): Press + SEQ at the same time to enter or exit the PTZ control mode.
• SLOW: In playback mode, press to play the recorded file slowly.
• ZOOM: Press to enlarge the image of the selected channel (in FRAME or FIELD recording mode).
• AUDIO (SLOW + ZOOM): Press SLOW + ZOOM at the same time to select live or playback audio from audio
channel 1-4.
o : live audio from audio channel 1-4 (indicated in white)
o : playback audio from audio channel 1-4 (indicated in yellow)
o : audio channel unselected.
• PLAY: Press to playback the latest recorded data.
• LIST (Event List Search): Press to quickly search the recorded files by event lists: RECORD / MOTION /
ALARM / TIME / HUMAN DETECTION / IVS / STATISTIC, or select FULL to show all the event logs.
To quickly search the time you want, select QUICK SEARCH. For more details, refer to the full user manual.
• MENU: Press MENU to enter the main menu.
• ENTER: Press ENTER to confirm the setting.
• : Press ▲ / ▼ / ◄ / ► to move up / down / left / right.
In playback mode:
o Press to pause playback.
o Press to stop playback.
o Press to fast forward.
o Press to fast rewind.
• : USB port to connect a USB mouse for mouse control
• : USB port to connect a USB flash drive for video backup.
Note: Do not connect two USB mice or two USB flash drives simultaneously.
Note: For a list of compatible USB flash drives, please refer to the appendices in the full user manual.
7.2 Rear Panel
• INPUT (1–4): Connect to the video connector of a camera.
Note: The DVR will automatically detect the video system of the camera; make sure that the cameras are
properly connected to the DVR and powered on before the DVR is turned on.
• 75Ω / HI-IMPEDANCE (1–4): If you are using the loop function, set the switch to HI-IMPEDANCE;
otherwise, set to 75Ω.
• CALL: Connect to a monitor specific for sequence display.
• AUDIO IN (1-4): Connect to the audio connector of a camera if the camera supports audio recording.
Note: To make a video backup with audio, make sure the camera which supports the audio function is
connected to the video-in channel and audio-in channel. For example, the audio data from audio channel 1
will be recorded with the video data from video channel 1.
• AUDIO OUT (1): Mono audio output to connect to a speaker.
• LAN: Connect to internet by LAN cable.