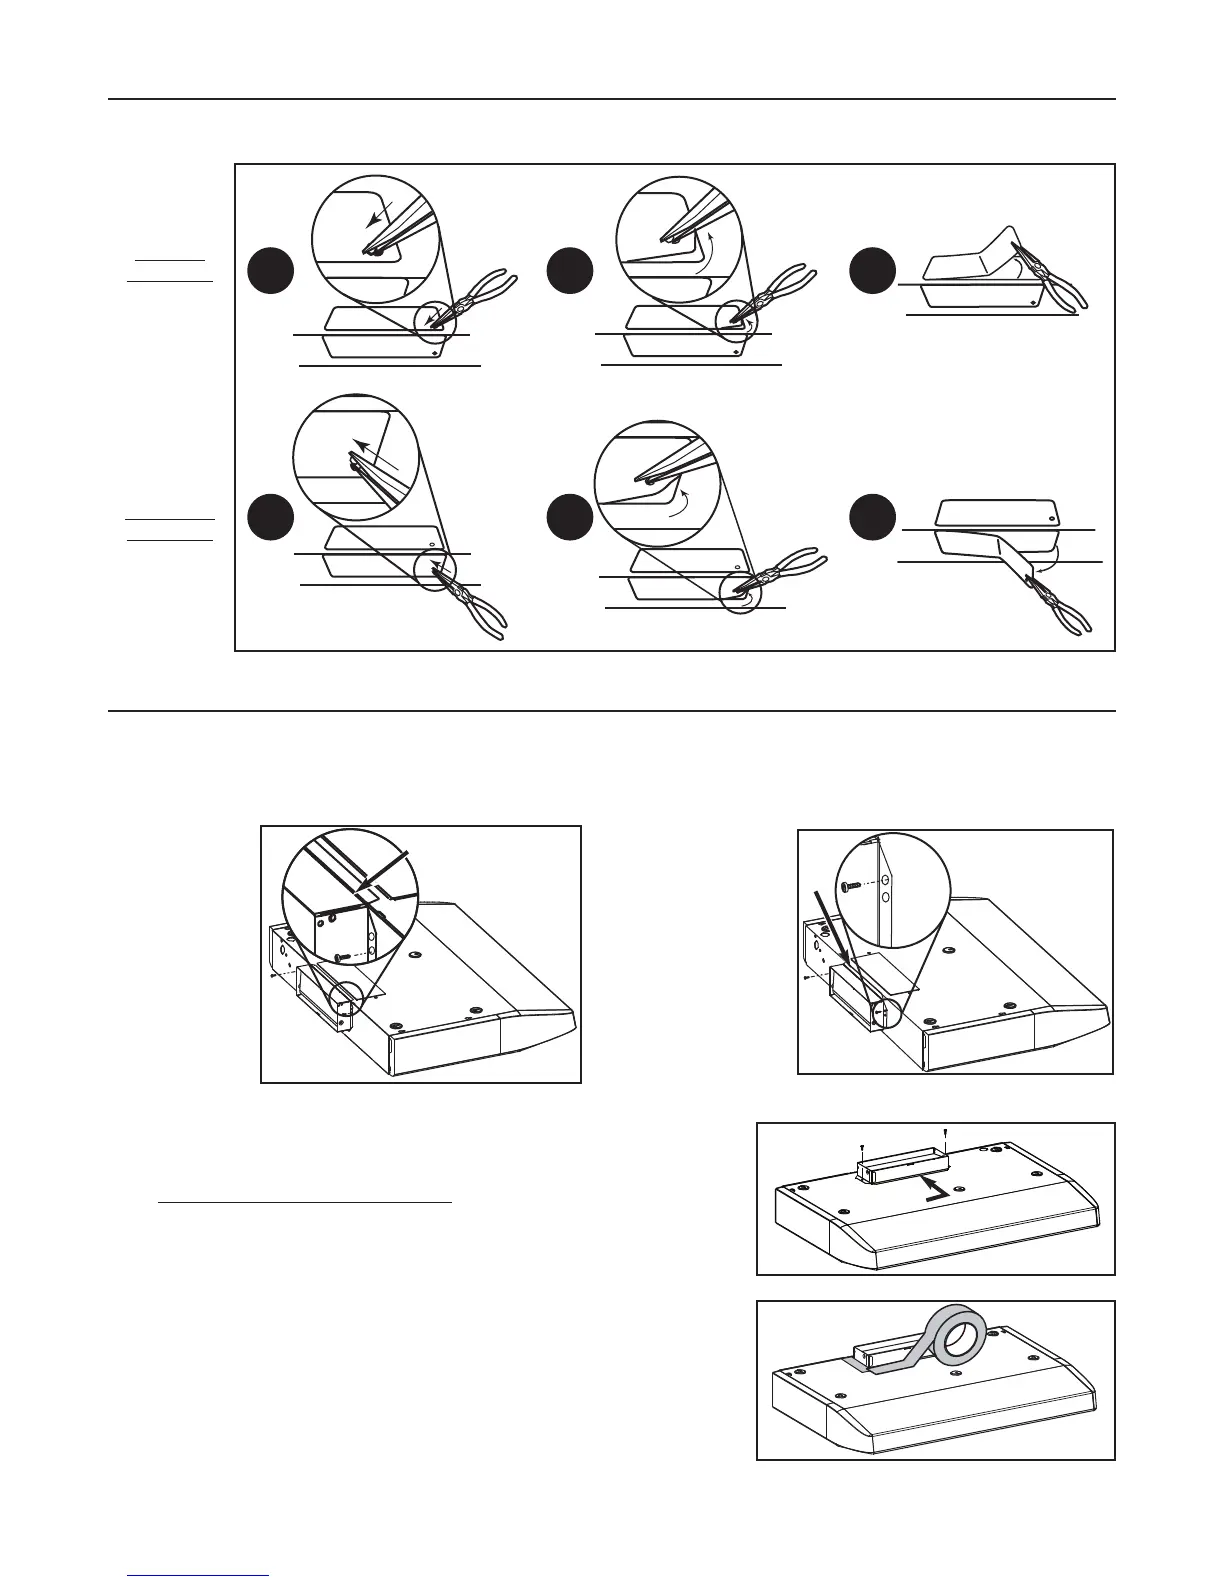
4. PREPARE THE HOOD (CONT’D)
Using a long nose pliers, remove the knock-outs for the chosen opening (vertical on top or horizontal at the back of the hood).
See figures below.
V
ERTICAL
DISCHARGE:
HORIZONTAL
DISCHARGE:
NOTE: For the best ventilation performance, if a round duct must be used, the
duct diameter must be 6” or more. Use a 3¼” x 10” to 6” round transition.
The wall duct must be well prepared to receive the adapter. Before performing
the installation, make sure the adapter fits easily in the duct.
NOTE: If this hood replaces another one, please note that the location of the air exhaust can vary from one manufacturer to
another.
1 2 3
HR0018
1 2 3
5. INSTALL THE ADAPTER/DAMPER
For a vertical discharge installation only, leave the foldable flange (C) of the
adapter/damper as is. This flange must be located towards the front of the hood.
See beside.
Fold down the
foldable flange
(C) of the
adapter/damper.
This flange must
be at 90° from the
remaining flanges.
Use the lower
screw holes on
each side of the
adapter/damper
to assemble it to
the back of hood.
See beside.
HO0057
HJ0006
- 6 -
C
It may be necessary to adjust the adapter/damper location
to the existing
wall discharge
opening. Leave
the foldable
flange (C) of the
adapter/damper
as is. Use the
upper screw
holes on each
side of the
adapter/damper
to assemble it to
the back of hood. See beside.
HJ0007
C
C
ALL INSTALLATIONS
Using (2) 1/2” screws, secure the adapter/damper to the top or back of the hood.
Tape the adapter/damper to the hood using duct tape to seal it.
HO0058
HORIZONTAL DISCHARGE, NEW INSTALLATION
VERTICAL DISCHARGE
HORIZONTAL DISCHARGE, HOOD REPLACEMENT
 Loading...