9
2. STARTING TO SEW
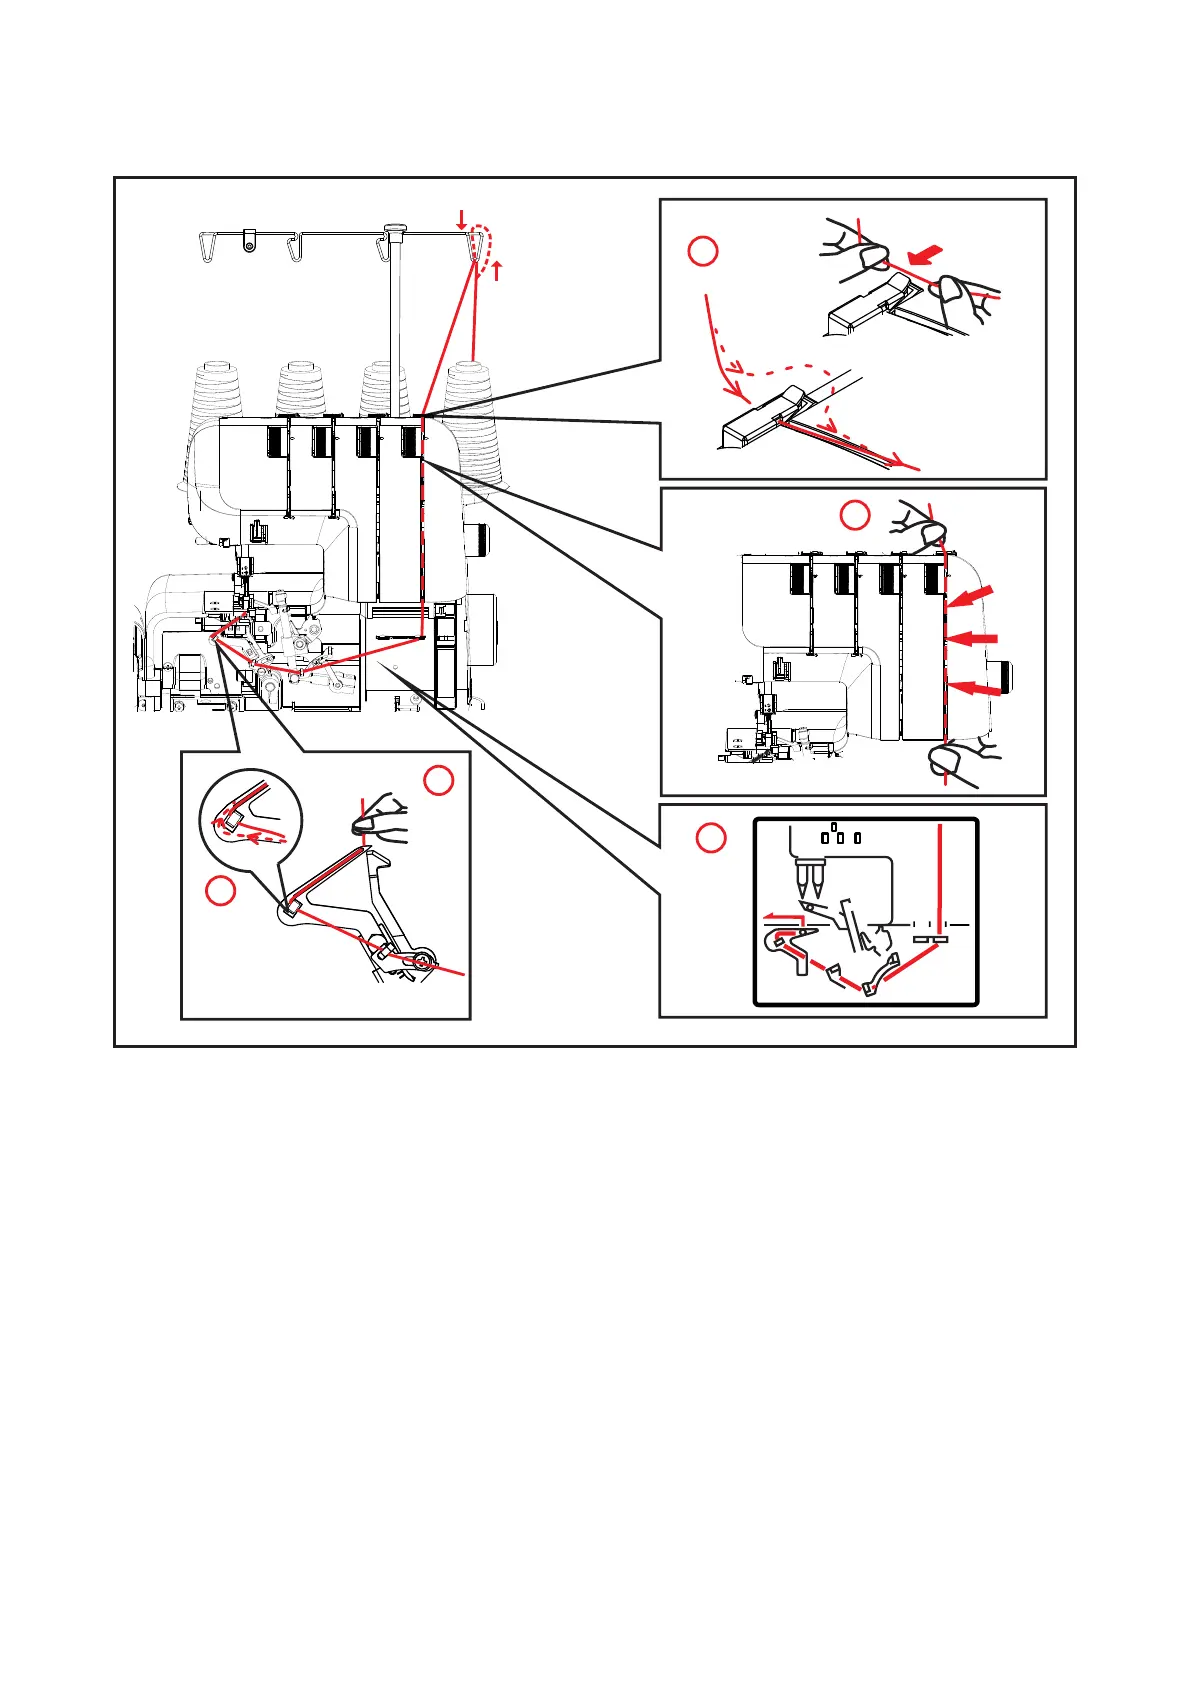
THREADING YOUR MACHINE
Wrong threading may cause skipped stitches,
breaking threads, or other problems.
Try to master the correct threading before moving on
to test sewing.
Threading must be carried out in the sequence of
Lower Looper – Upper Looper – Needle.
Open the front cover and the working table
Raise needle to its highest point by turning hand
wheel towards you, and raise the presser foot.
Before re-threading lower looper, remove thread from
needle eye first, then re-thread the lower looper. This
will prevent tangling.
STEP 1
THREADING LOWER LOOPER
1. Feed the thread through the thread guide as
illustrated.
2. Pull the lower thread through tension slot.
Holding the thread with your left hand, pull
down with right hand firmly.
3. Draw the thread through thread guide as
illustrated.
4. Pass the thread through lower looper eye,
and hook it around part A as indicated by the
arrow. Leave about 4” (10cm) extra thread.
3
4
A
2
1

 Loading...