Vertiv™ NetSure™ Control Unit (NCU) Controller 2nd Ethernet Port Add-On Kit Installation Manual
Proprietary and Confidential © 2022 Vertiv Group Corp.
1.2 Kit Contents
Table 1.1 lists the items furnished with this kit. Before starting the procedure, check the items furnished against those listed to ensure
that there are no shortages.
Table 1.1 Kit Contents
Qty. Description P/N
1 IB4 Board Assembly 558076
1 IB4 Board Cover 559238
1 IB4 Board USB Cable 559324
7 6-32 x 1/4” Screws 233394000
NOTE!
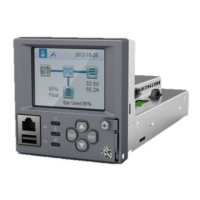
The system must be equipped with the NCU controller (model 1M830DNA) for the second Ethernet port to operate.
If the system is equipped with the ACU+ controller (model 1M820DNA) it must be replaced by the NCU controller, which is
not provided with this kit and must be ordered separately.
1.3 Tools and Material Required
Table 1.2 lists the items required to install this kit.
Table 1.2 Tools and Material Required
Description
Cross-Blade Screwdriver
1.4 Installation Procedure
THESE INSTRUCTIONS SHOULD BE READ THROUGH COMPLETELY BEFORE INSTALLING THE KIT.
The following is a step-by-step procedure to install the kit. The procedure has been written for ease of use and to minimize the
possibility of contact with potentially hazardous energy. This procedure should be performed in the sequence given, and each step
should be completely read and fully understood before performing that step. Observe all “Important Safety Instructions” presented at
the beginning of this document as this procedure is being performed. As each step of the procedure is completed, the box adjacent
to the respective step should be checked. This will minimize the possibility of inadvertently skipping any steps. If the step is not
required to be performed for your site, also check the box to indicate that it was read.
NOTE!
When performing any step in this procedure which requires removal of existing hardware, retain all hardware for use
in subsequent steps, unless otherwise stated.
1.4.1 Procedure
DANGER! Observe the Important Safety Instructions located at the beginning of this document.
NOTE!
Refer to Figure 1.1 and Figure 1.2 as this procedure is performed.
[ ] 1. Locate the standoffs at the top inside of the distribution cabinet used to mount the IB4 board. See Figure 1.2.