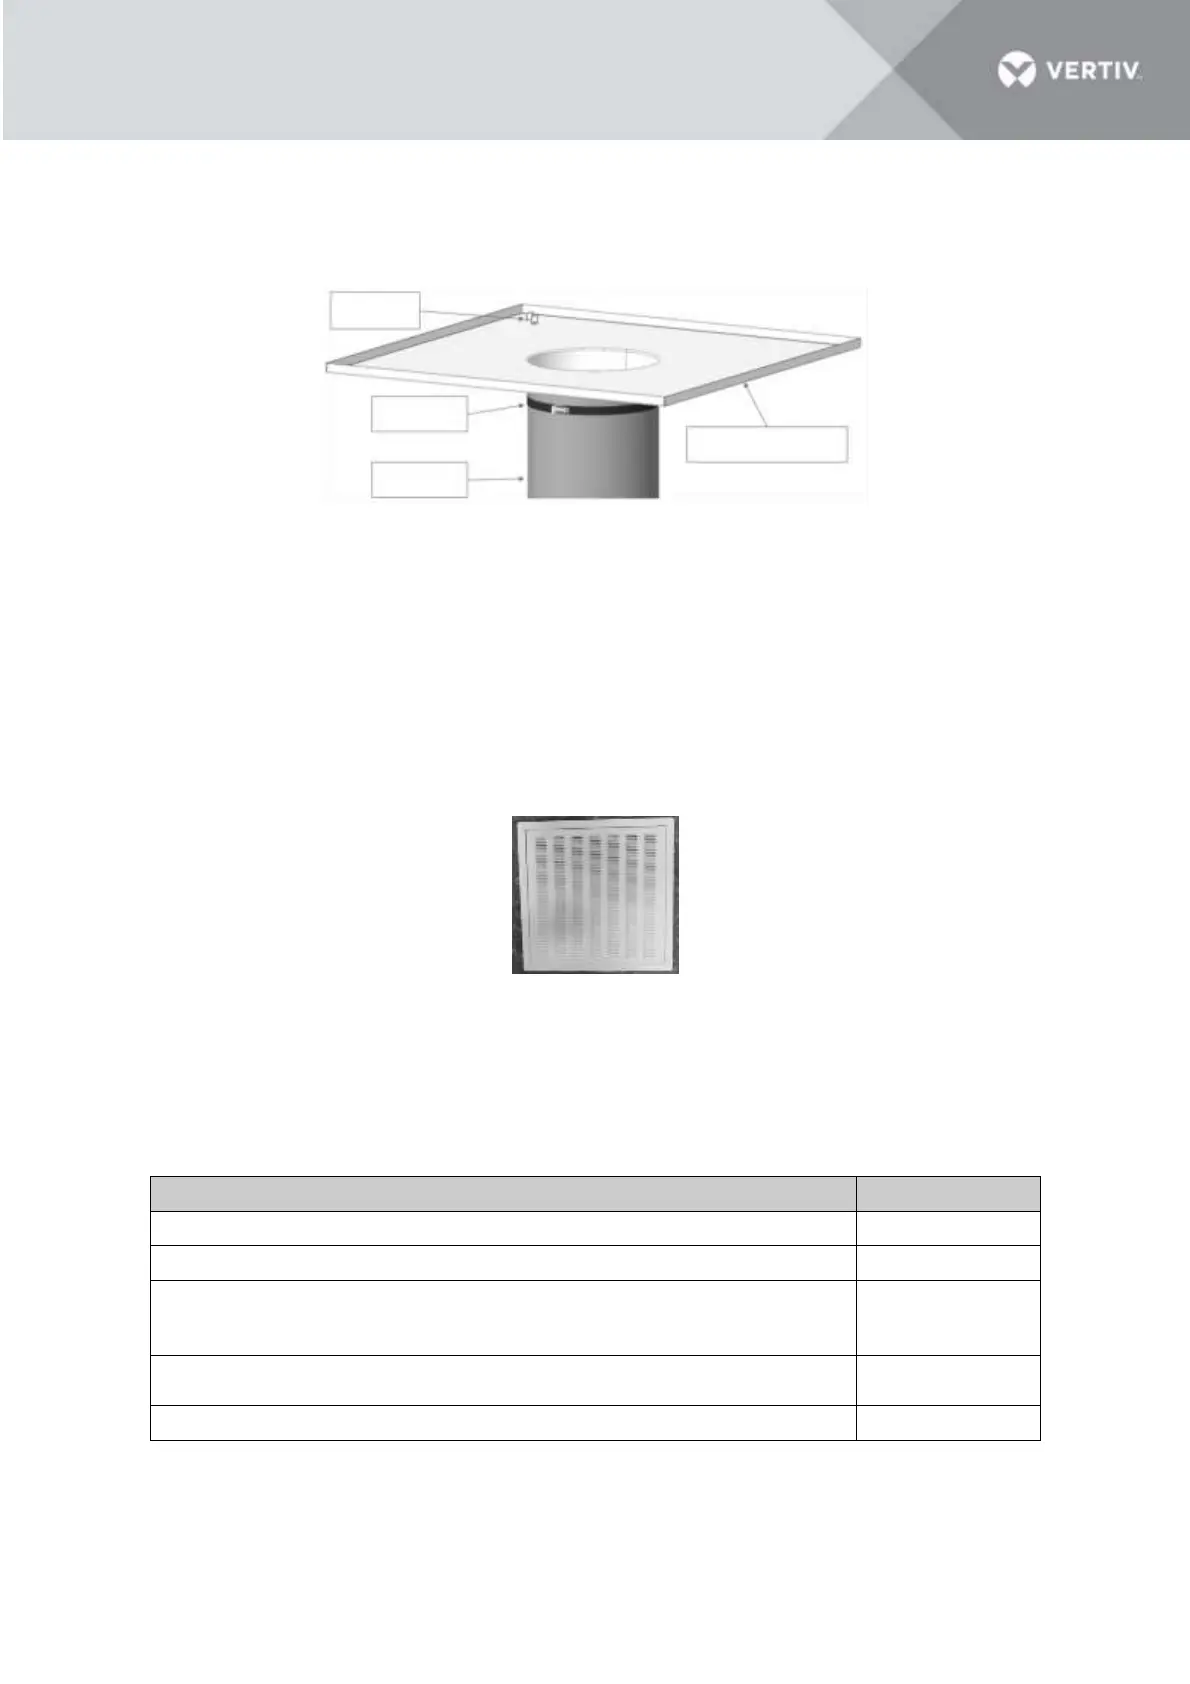
3.4.7 Connect the duct to the ceiling tile for air outtake
Connect the duct to the ceiling tile for air outtake which will be mounted on the ceiling and secure it with a
clamp. Also, the minimal overlapping of duct and transition part should not be less than 90 mm (3.54’’),
and make sure the clamping force is sufficient to ensure the connection reliability.
Figure 3-23 Connect the duct and ceiling tile for air outtake
NOTES:
• There is a hook on the ceiling tile for air outtake for safety reason when connecting the ceiling tile
to the ceiling construction.
3.4.8 Install the ceiling tile for filter pad
The ceiling tile for filter pad is installed in a 2’x2’ ceiling tile at the air inlet. The fresh air enters the
condenser for heat exchange through the ceiling tile filter. The ceiling tile for filter pad is used to clean the
fresh air.
Figure 3-24 The ceiling tile for filter pad
3.4.9 Installation/Pre- commissioning Check List
After the unit is installed with all of the necessary mechanical connections, check the installation per Table
3-2.
Table 3-2 Mechanical installation checklist
Make sure that the unit is placed correctly. Verify that the supply air is sent to the
cold aisle at the front of the unit and that the hot air is drawn to the return air inlet
in the back of the unit.
Foreign materials in and around the equipment are removed (such as shipping
materials, removed structural materials, tools, and so on)