VESDA-EVEP-A00-P Product Guide
26 www.xtralis.com
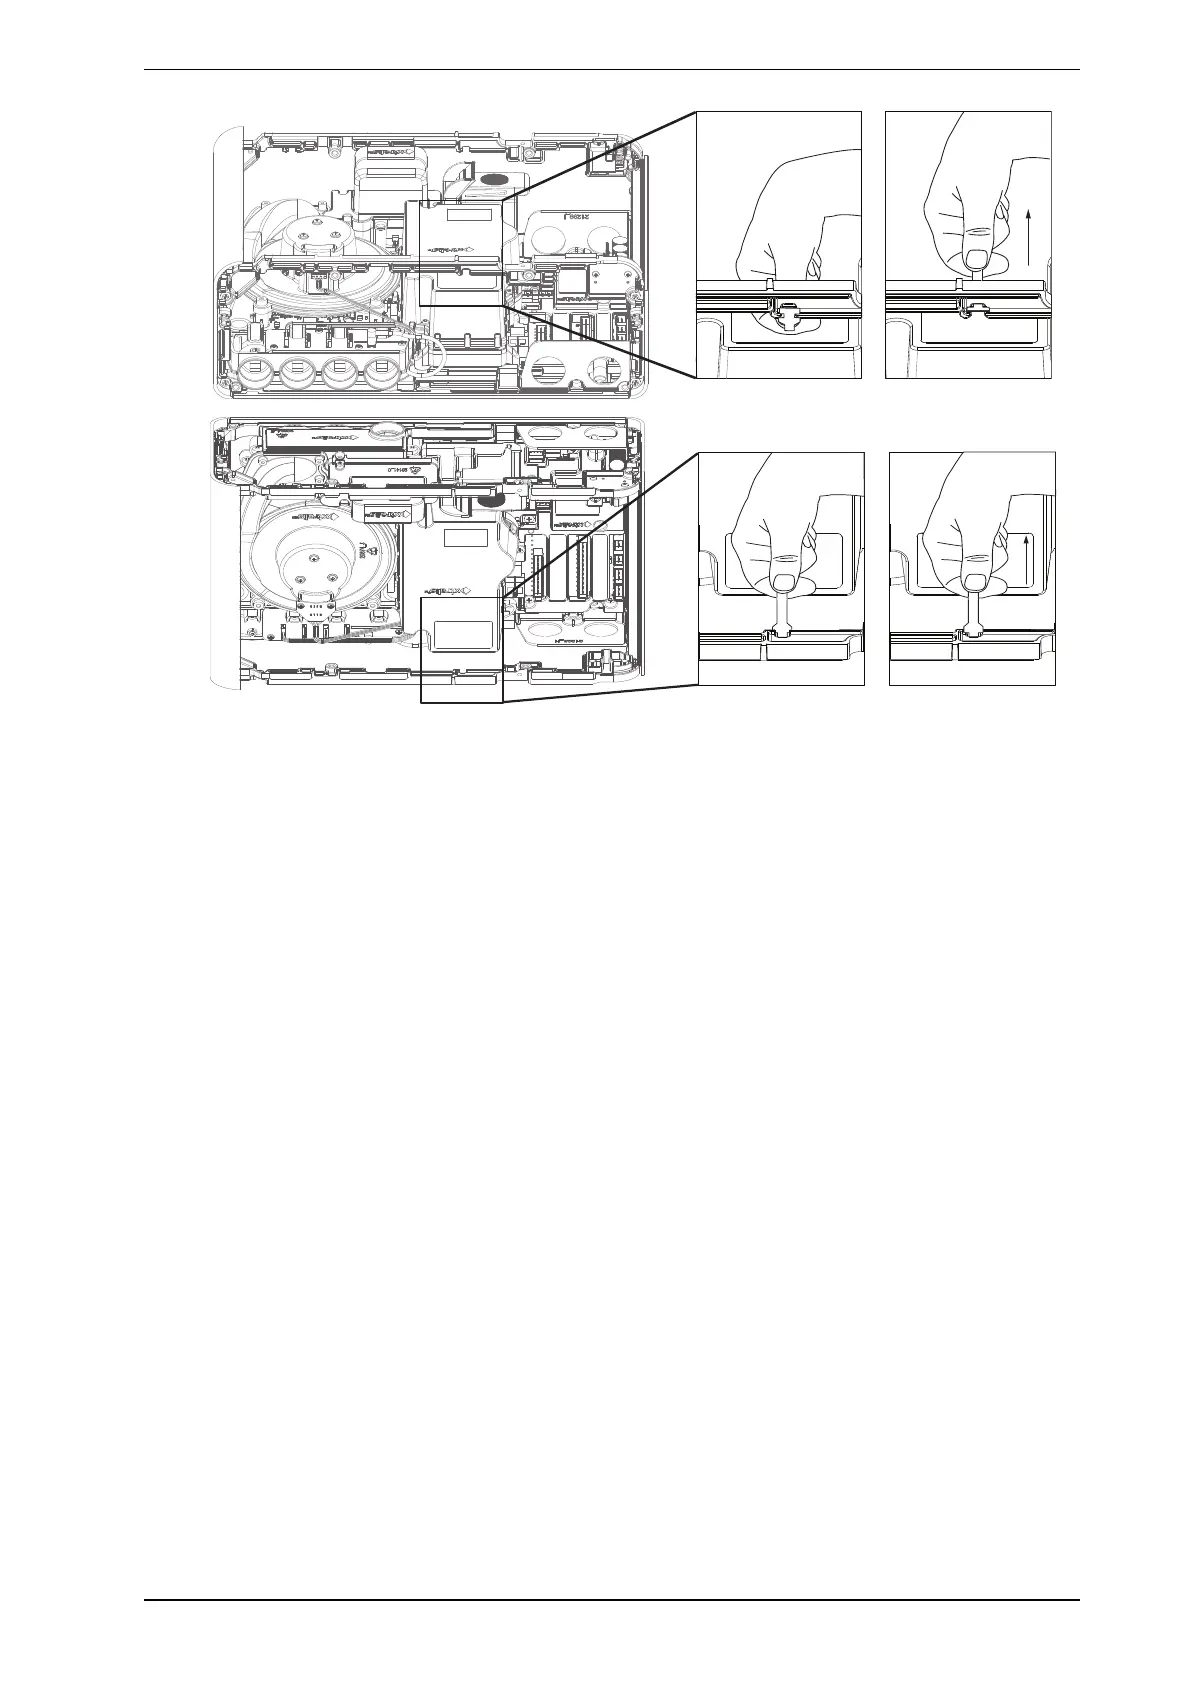
Figure4-16: Position the tethers and pull up to attach
9. Re attach the top and bottom covers.
10. Re-attach the fascia. Re-attach to the front of the detector by tightening the two retaining screws as
shown in Figure7-8.
11. The detector is now inverted. The display should be upright while the exhaust vent is at the top and
sampling pipe inlets at the bottom. The electrical connections and filter should be accessible by opening
the door.