Vicon Valkyrie Quick Start Guide
15 Dec 2022, Revision 1
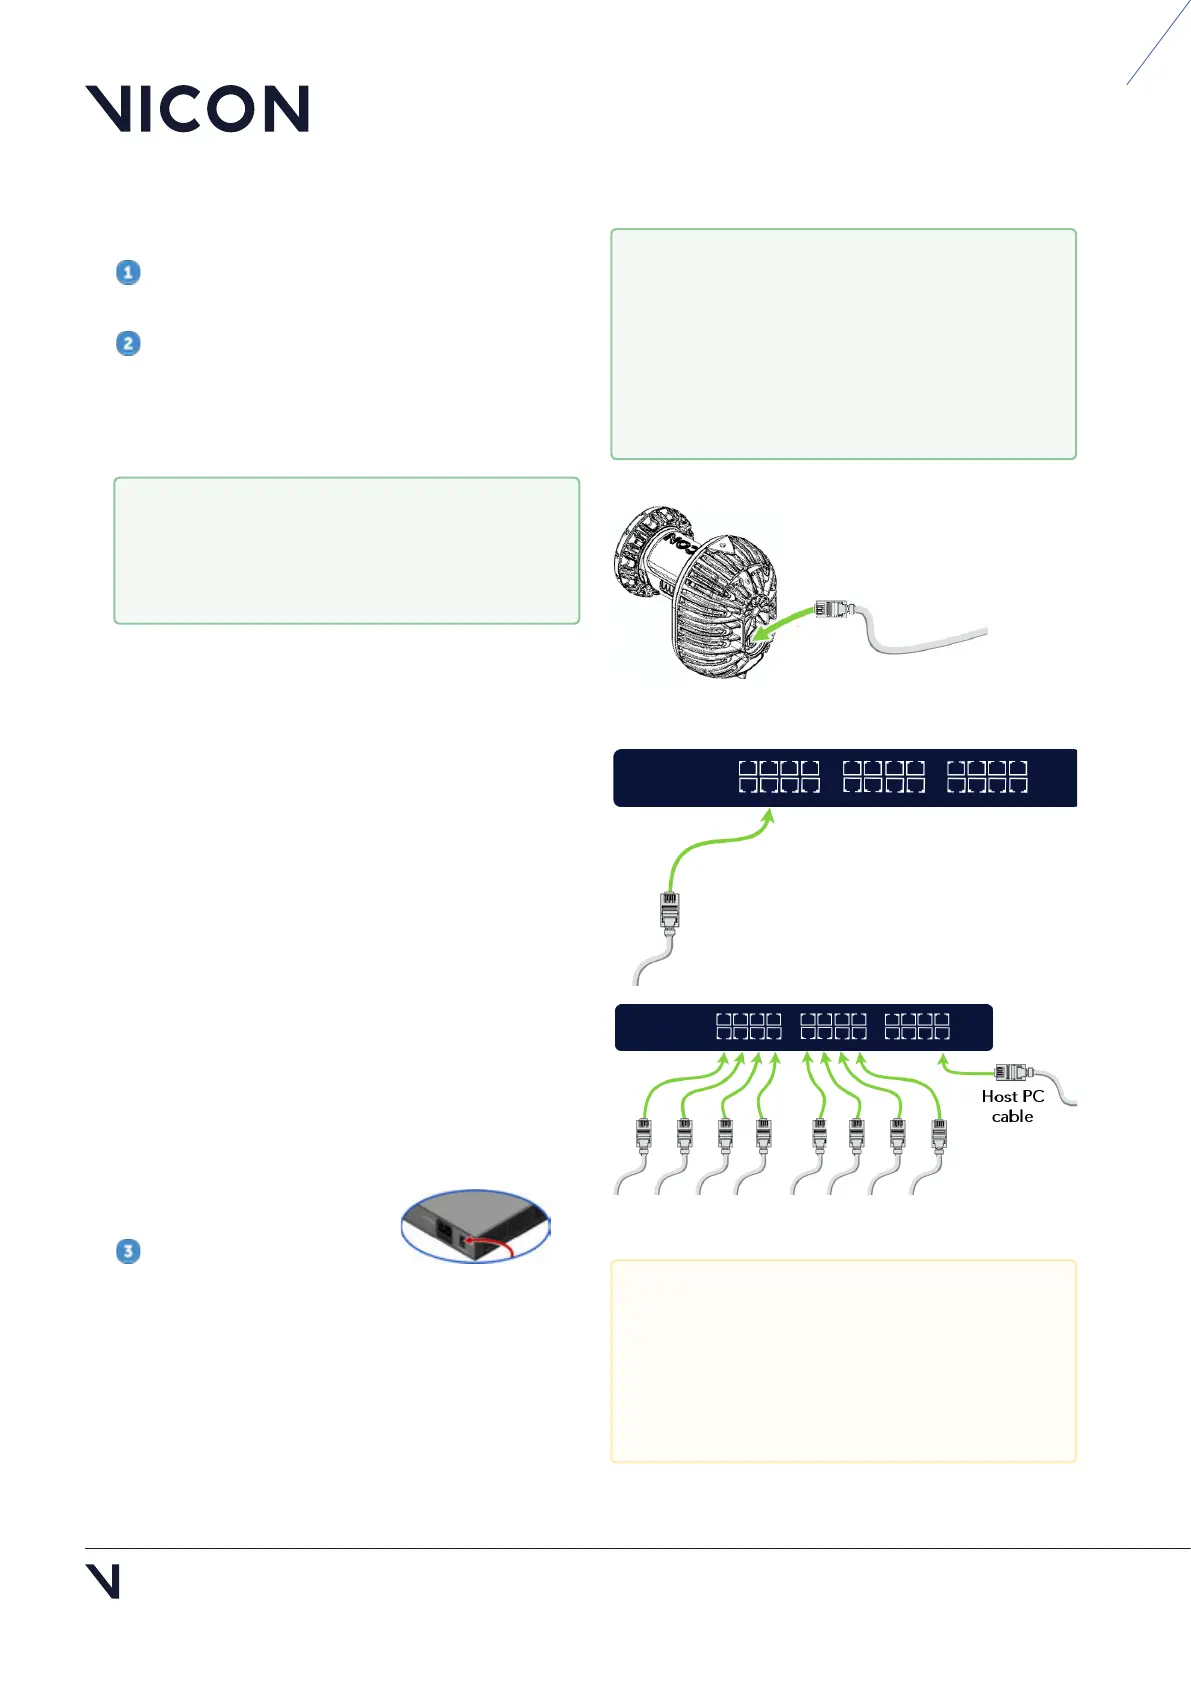
Connect the cameras
Ensure the Ethernet switch is connected to an
appropriate power source.
For each camera:
Insert one end of the supplied network cable
(RJ45) into the Ethernet port on the camera.
Connect the other end to the Ethernet switch.
From the total number of sockets, remember:
One socket is needed to connect to the host PC.
To benefit fully from the power and range of
Valkyrie cameras, connect each camera to a UPoE
port on a UPoE switch.
The UPoE switch can support up to eight Valkyrie
cameras. Any spare
ports can be connected to
other components in your system,
such as a Vicon
Lock unit, etc. The uplink ports or any spare PoE
ports can be connected to the PC
.
To add more cameras, you can connect further
Ethernet switches to the system (see
the Valkyrie
Topology
video in the release installation folder).
Turn on the Ethernet switch.
If you need to remove the IP65 cable cap
that protects the camera's Ethernet port,
follow the instructions in Remove and
replace IP65 cable cap, page 4.
To adjust the focus, aperture, or zoom, you
must remove the IP65 lens cover. You may
prefer to remove the cover before you
mount the camera and replace it when
you've finished adjusting the settings. For
further tips, see Valkyrie handling
recommendations, page 3).
Although your Valkyrie cameras are IP65-
rated, the other components of your
Valkyrie system (switches, Locks, other
cameras, etc) may not be, so ensure that
these components are not exposed to
unsuitable environmental conditions.