Vicon Valkyrie Quick Start Guide
15 Dec 2022, Revision
Remove and replace IP65 cable cap
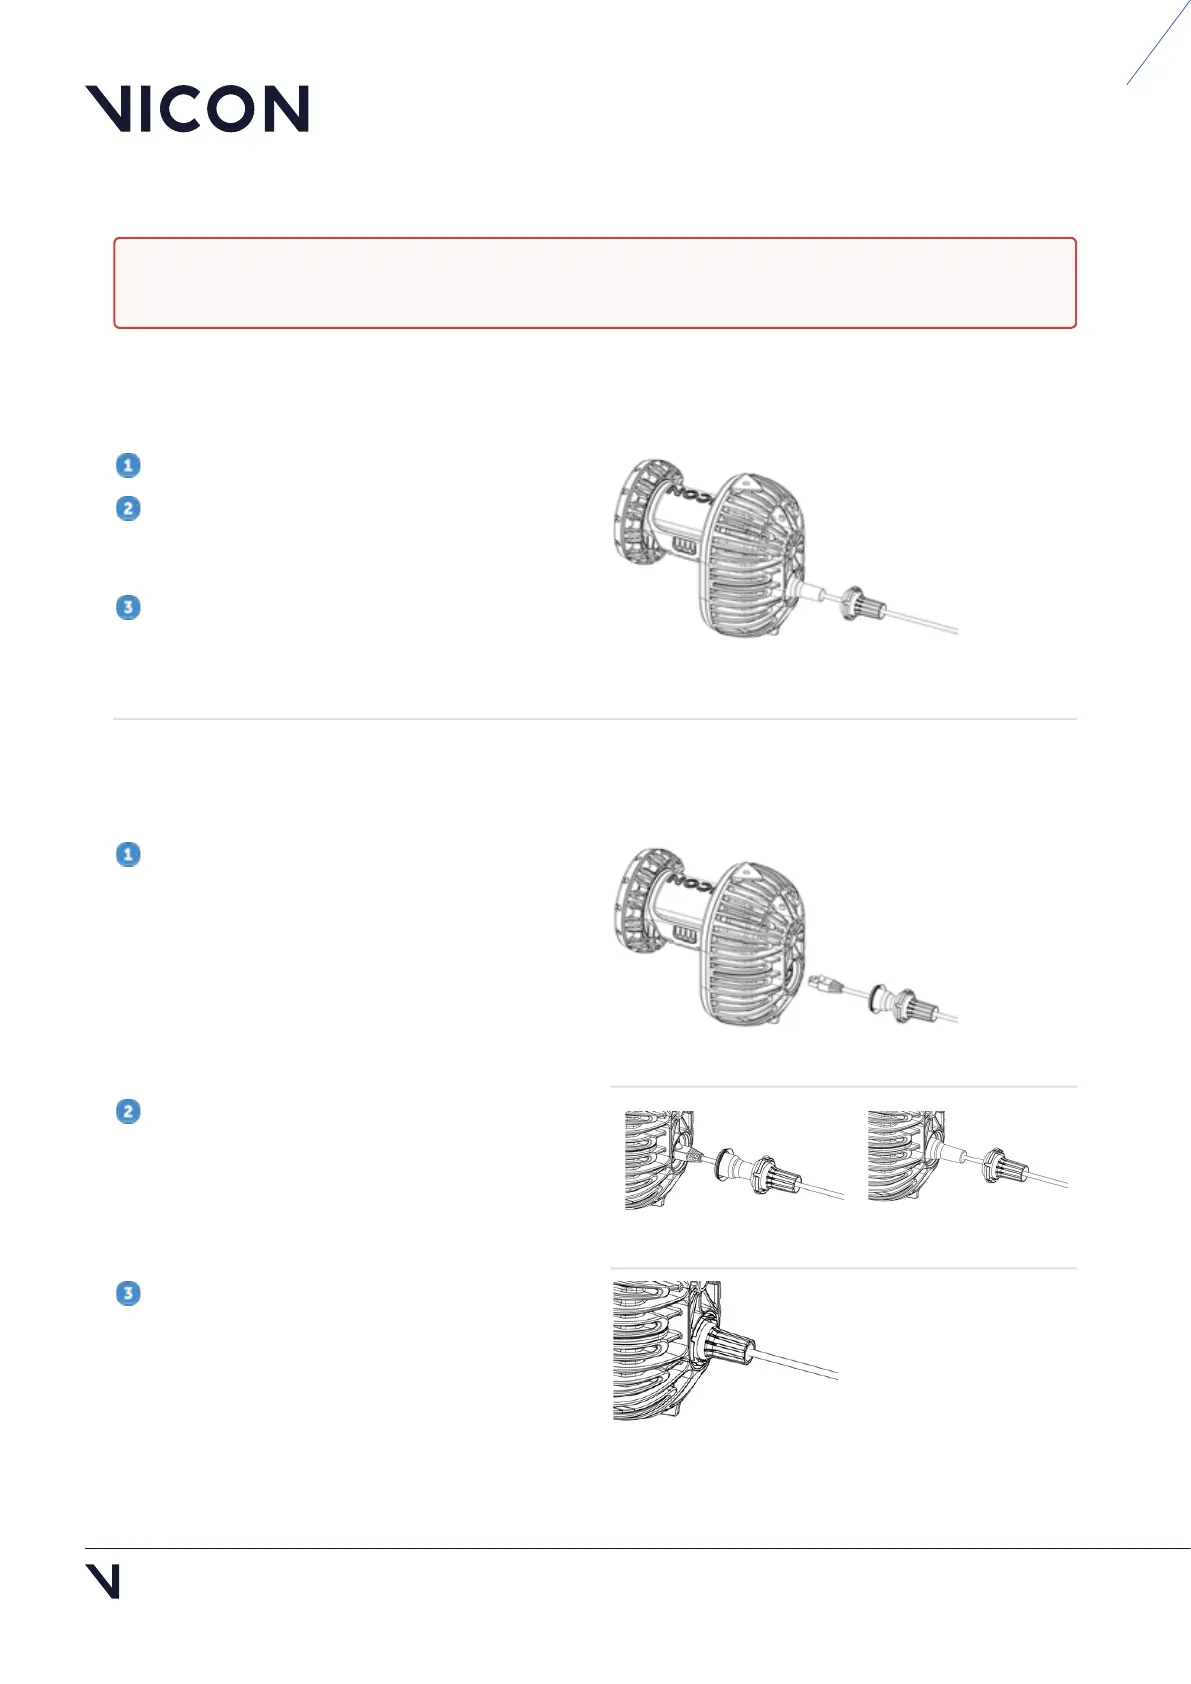
Remove an IP65 cable cap
To remove the Ethernet cable from a Valkyrie camera, you must first remove the cable cap and seal.
Hold the camera by its body, NOT by the lens.
Push inward on each of the segments around
the edge
of the outer cap until it loosens, then pull
the cap gently backward along the cable.
Pull the seal backward along the cable.
You can now detach the RJ45 connector of the
Ethernet cable from the back of the camera.
Replace an IP65 cable cap
If you remove an IP65 cable cap from a Valkyrie camera, to maintain the camera's IP65 rating, you must
replace the cap correctly, as described in these steps.
Insert the RJ45 connector on the Ethernet cable
into the port at the back of the Valkyrie camera.
Push the seal into place and ensure it sits flat
within the circular recess
around the connection.
Push the cap into place over the seal until the
rounded clips on the edge of the cap clip into the
groove in the metalwork.
Note that if the seal is not correctly fitted, you will
not be able to clip the cap into position.
Caution: To maintain IP65 protection for your Vicon Valkyrie cameras, ensure that if you remove IP65
cable caps (and/or lens covers), you replace them correctly, as described below.