a.
b.
c.
In the System panel, select all the cameras
(Shift+click). In the
Properties section at the bottom
of the window, change
Grayscale Mode to All.
In the System panel, select a camera. For each
marker:
In the view pane, zoom in to the center of the
marker.
Valkyrie cameras are supplied pre-focused for
typical motion capture use, so in most situations,
no focusing is necessary. The following step (b) is
applicable only if you need to re-focus the
camera, otherwise, go straight to step c.
If required, turn the camera focus ring (see above
illustration) until the 2D image of the marker in
the view pane is clear and sharp. As you rotate
the focus ring, note that the marker images get
smaller and then begin to get larger again.
Good focus is when the marker is at its smallest.
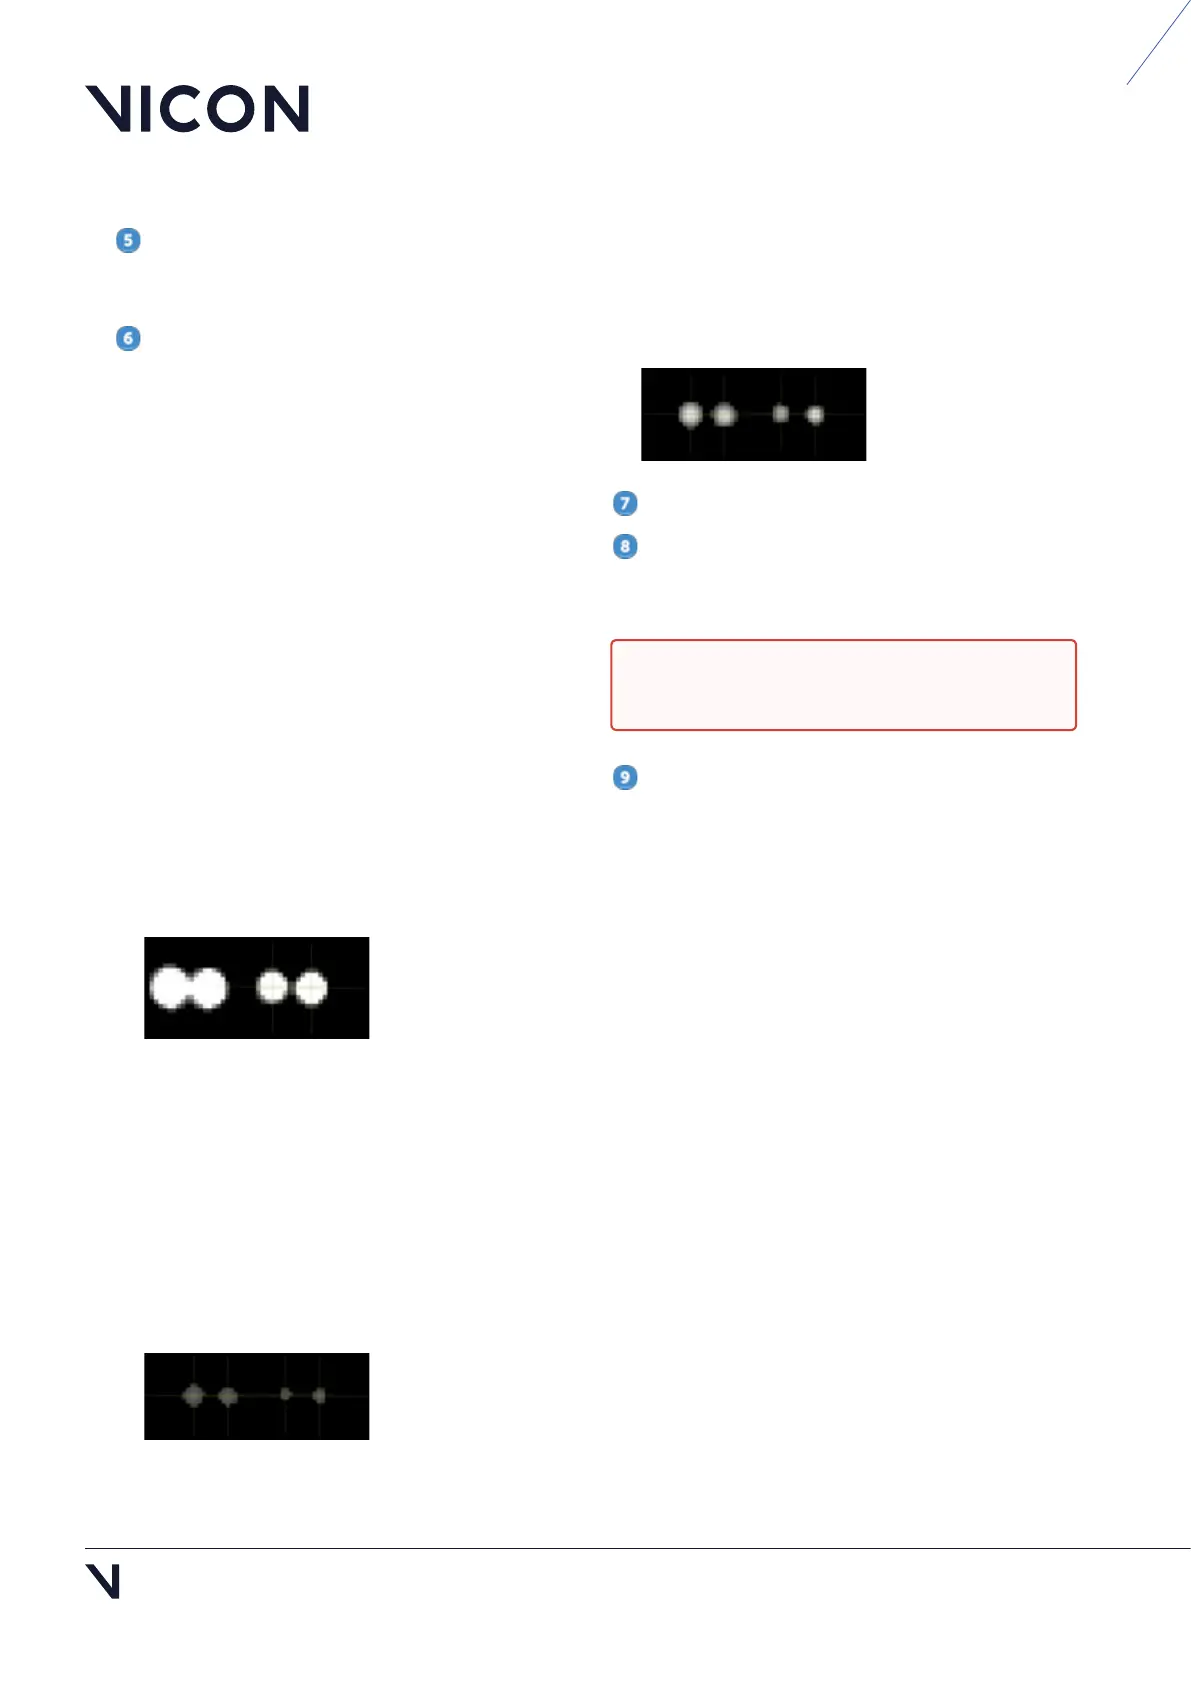
Note that, with the aperture fully open, the
markers appear fully saturated, with very little
grayscale gradation and some merging, as in the
following image.
Adjust the aperture ring to change the amount of
light that hits the image sensor. Turn the
aperture ring to close the aperture and obtain
good, clear images of markers even when they
are close together.
If you turn the aperture ring too far, until the
aperture is almost closed, the markers appear
very small, lack any bright grayscale pixels and
the circle-fitting is poor, as shown below.
Adjust the aperture ring so that the markers are
not too small, and the center is just off-white (not
fully saturated) when viewed from the middle of
the volume.
For each camera, repeat Step 6.
When you are happy with the focus and
aperture, to prevent the rings from moving, tighten
the locking screws and then replace the lens cover.
In your Vicon application software, select all of
the cameras and change the
Grayscale Mode
property back to Auto.
For information on the next steps, such as masking
and calibrating the cameras, see the documentation
for your Vicon application software.
Caution: To avoid damaging the rings, do
not over-tighten the locking screws.