66800012
165 cm
Piano stradale
Ground oor
Fig. 4
Fig. 6
Fig. 5
Fig. 7
N
D EN M
P
M
I
K
L
R
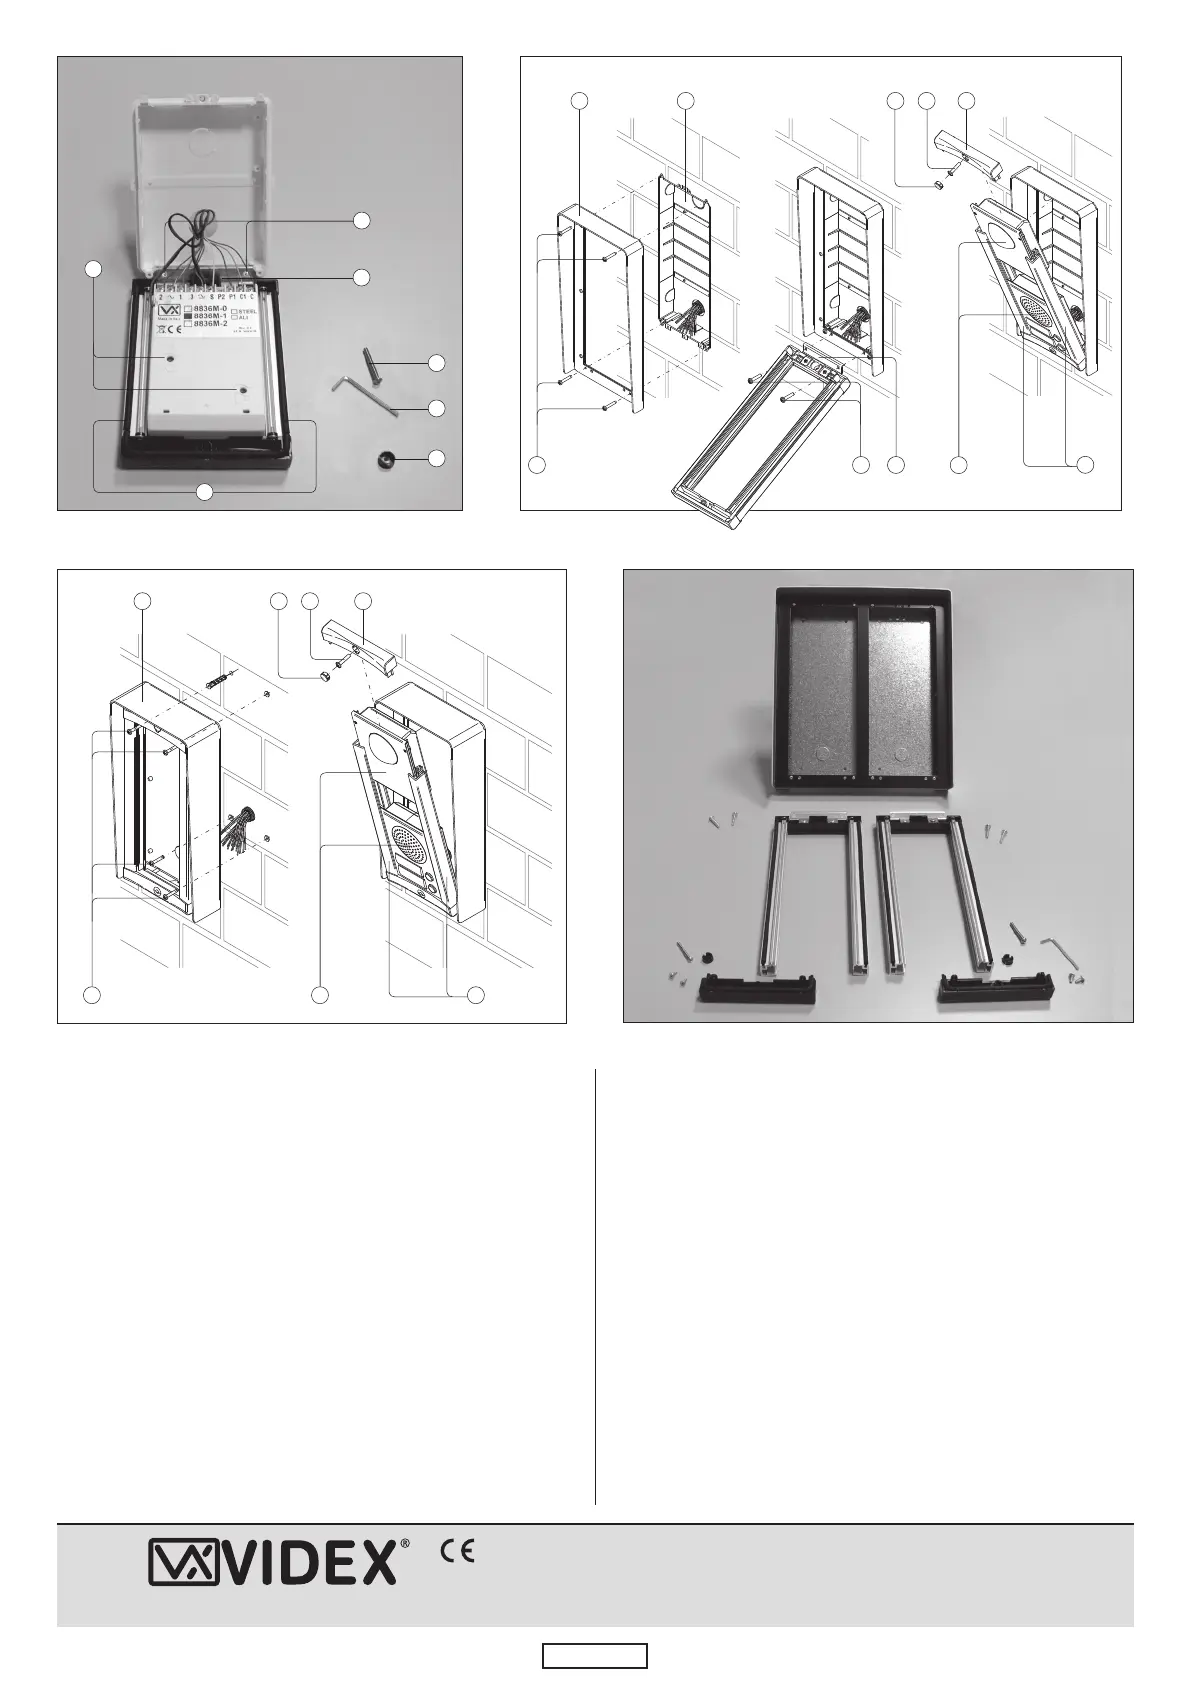
Inserire la cerniera (I - Fig.4 e 5) e fissarla tramite le 2 viti
(K - Fig.4 e 5) in dotazione.
Eseguire i collegamenti seguendo scrupolosamente lo sche-
ma di installazione. Testare l’impianto e regolare i volumi (Rif.L
- Fig. 4) se necessario.
Ruotare il supporto (Rif.R - Fig.4 e 5) verso l’alto e fissarlo alla
scatola da incasso tramite la vite (Rif.M - Fig.4 e 5) usando una
chiave a brucola (Rif.P - Fig. 4).
Coprire la vite di chiusura tramite il tappo in plastica
(Rif.N - Fig. 4 e 5) in dotazione.
SCATOLE DI PROTEZIONE - Fig. 6 e 7
Fissare la scatola a parete mantenendo una distanza di 165cm
tra il piano stradale e la parte superiore della scatola (Fig.1).
Procedere analogamente a quanto sopra descritto per comple-
tare il montaggio.
SURFACE MOUNTING UNIT - Fig. 6 and 7
Fix the surface box on the wall keeping a distance of 165 cm between
the top of the box and the ground (Fig.1).
To complete the installation follow the same steps described above.
Insert the hinge (I - Fig.4 and 5) and fix it with the two screws
(K - Fig.4 and 5) provided.
Make all connections following accurately the wiring diagram
provided. Check the installation and if necessary adjust speech
levels using volume controls (Ref.L - Fig. 4).
Rotate the support upwards and fix it to the back box with the
screw (Ref.M - Fig.4 and 5) by using an alan key (Ref.P - Fig.4).
Hide the screw by using the plastic cover (Ref.N - Fig. 4 and 5) pro-
vided.
VIDEX ELECTRONICS S.p.A.
Via del Lavoro, 63846 MONTEGIBERTO (FM) - ITALY
Tel. (+39) 0734.631669 - Fax. (+39) 0734.632475
www.videx.it
G F R
165 cm
Piano stradale
Ground oor
165 cm
Piano stradale
Ground oor
K I
165 cm
Piano stradale
Ground oor
G
SD EN M
F
R

 Loading...