24
Use the and buttons to choose between in.stream,
in.stream 2, in.tune and no/other audio. is should only be done
during installation or when replacing a part.
About
is screen displays technical information about the control
system (X500) software on your X Series spa and applicable
revisions of the different components of your system.
Audio System Controls (Optional)
Press the to access “in.stream 2” player controls.
If you are using a device with Bluetooth technology, it must be
connected for functions to work.*
*Use code 5555 to pair.
Note: Play/Pause functions apply only to Bluetooth source.
Change Track or station functions works with all sources except
AUX.
Turning power On/Off: Press to access Settings and then
press “Audio”. Press “Power” to turn the in.stream 2 on or off.
Selecting the source: Press to access Settings and then press
“Audio”. Press “Source” to toggle between available sources.
Play/Pause audio: Press the Play/Pause button to start or pause
the audio.
Adjusting the volume: Press the Volume Up or the Volume
Down key to increase or decrease the volume.
Changing tracks: Use the Last Track and Next Track keys to
change tracks. Note that in FM mode these functions can be used
to change stations.
Disconnect: is option can be found under the Audio section
in the Settings menu.
Fader, Balance and Subwoofer: Fader, Balance and Subwoofer
settings can be edited under the Audio section in the Settings
menu if your in.stream 2 supports it.
e first time you use your Bluetooth device with an X Series
Audio system you must first “pair” your device to the spa audio
system according to the standard pairing functionality of your
specific device. Each device must be paired separately. Use code
5555 to pair.
For proper function, place your Bluetooth device within 20 feet
(6 meters) of your spa. e device should have “line of sight” to
the spa control panel / equipment door area.
NOTE: Certain house construction materials and other
obstructions can impair Bluetooth connectivity. You may need to
experiment with where to place your device for best results.
Interchanging JetPaks-
Premium, Comfort, and
Design Line Spas
Step 1: Put the spa in “Standby”, this will prevent the pump(s)
from activating for a period of 30 minutes (see Control Systems).
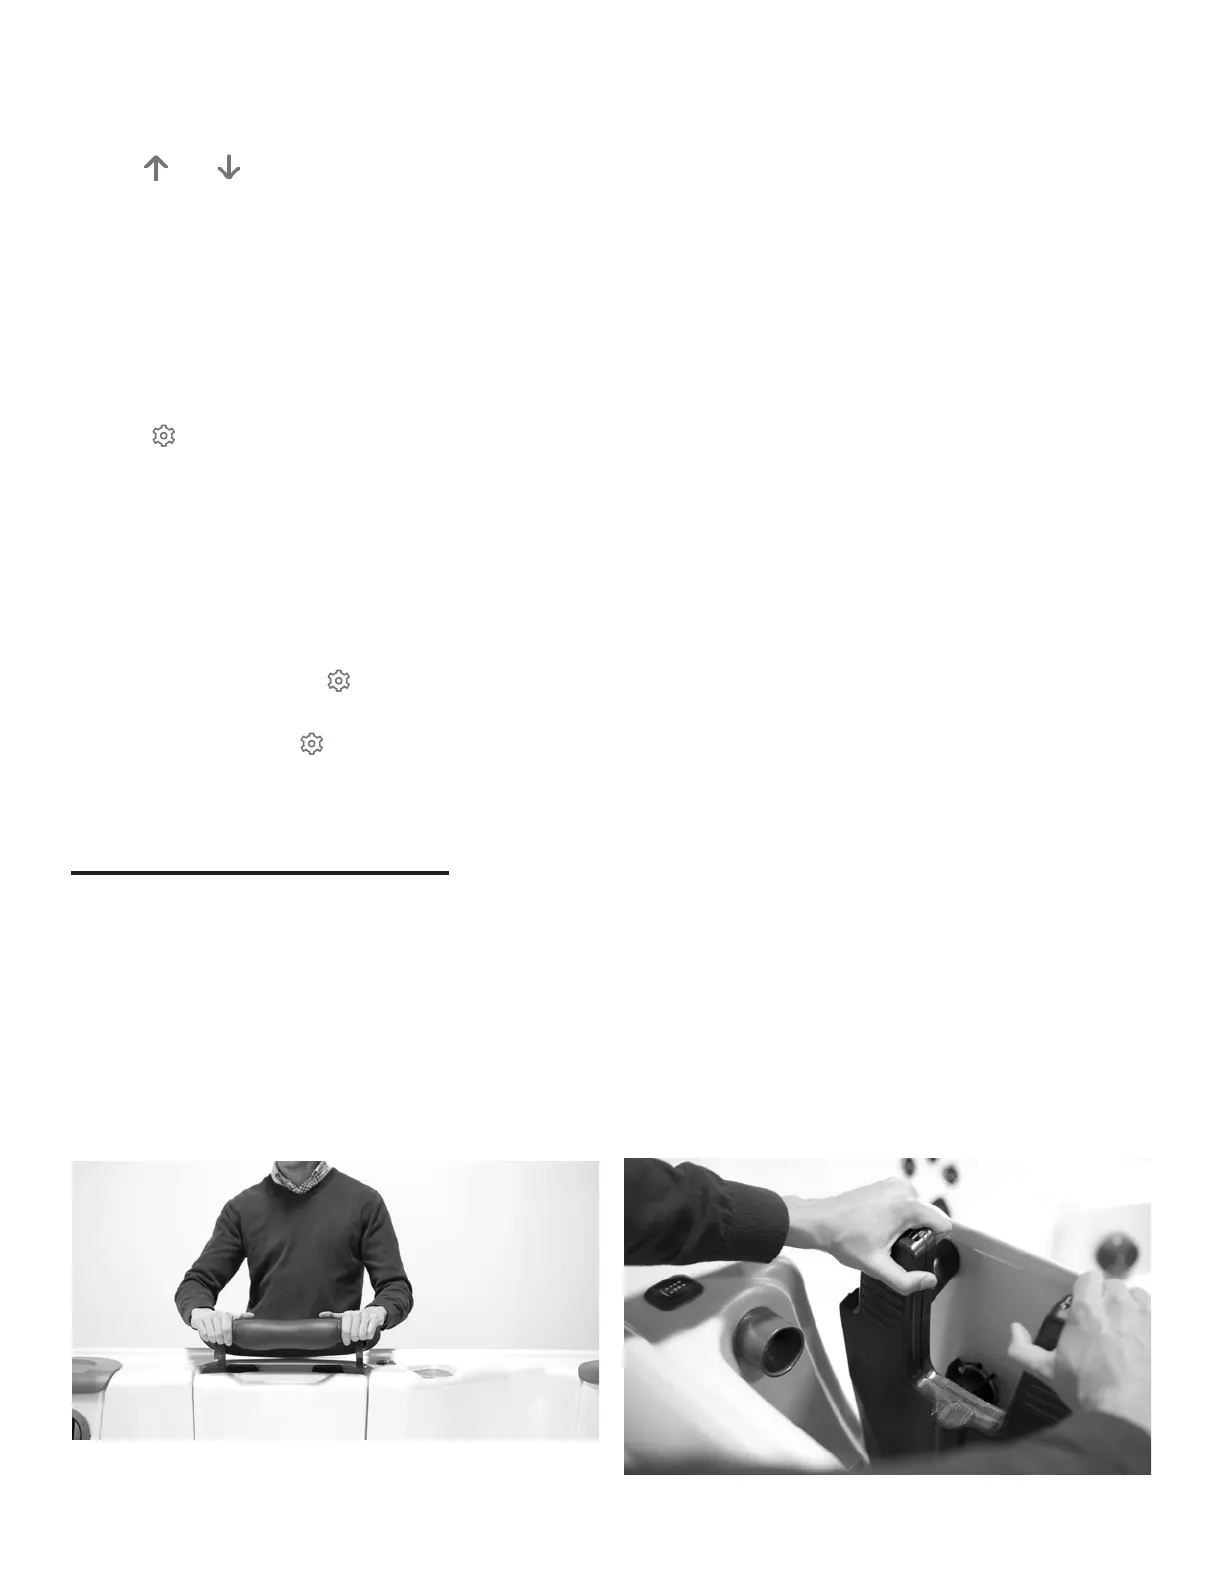
Step 2: Remove the head rest and Snap-Cap by lifting upwards.
CAUTION! WHILE PERFORMING STEPS 3&4 YOU
MUST USE THE BLACK MANIFOLD AREA AS THE
POINT OF CONTACT AS SHOWN IN THE PICTURE.
PRESSURE APPLIED TO THE FRONT FACE (ACRYLIC
PLATE) MAY CAUSE DAMAGE TO THE JETPAK
Step 3: While applying pressure downward on the manifold
push the manifold toward the inside of the spa to release the
manifold from the wall clip assembly, then lift the jet plate
straight up to remove.
Step 4: Exchange JetPak
JETPAKS & JETS
 Loading...