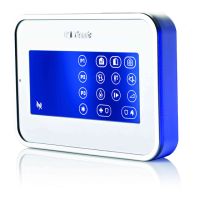
6 D-303169 KP-160 PG2 Installation Instructions
2.4 Enrolling the KP-160 PG2
Refer to the PowerMaster panel's Installer Guide and follow the procedure under the
"02:ZONES/DEVICES" option of the Installer Menu. A flowchart of the procedure is provided
below.
Step Action LCD Display
1
Enter the Installer menu and select
“02:ZONES/DEVICES”
2
Select "ADD NEW DEVICE" Option
See Note
3
Enroll the device or enter the 7-digit
code that appears on the device's
sticker.
4
Select the desired keyprox Number
5
Configure the settings of the device
6
Configure the Keyprox See section 2.5
means scroll and select
Note: If the KP-160 PG2 is already enrolled, you can configure the KP-160 PG2 parameters
via the “Modify Devices” option – see Step 2.
2.5 Configuring the KP-160 PG2 Parameters
Enter the menu and follow the configuration instructions for the
KP-160 PG2 keyprox.
Option Configuration Instructions
Define the active tamper.
Option settings: Disabled (default); All Tampers and Battery
Cover.
Define whether or not the control panel will monitor supervision
messages sent by the keyprox (see Note).
Option settings: ON (default) or OFF.
SUPERVISION
TAMPERS
K07.DEV SETTINGS
K07.DEV SETTINGS
ID No. 374-XXXX
K07: LCD Keypad
ENTR ID:XXX-XXXX
ENROLL NOW or
MODIFY DEVICES
ADD NEW DEVICES
02.ZONES/DEVICE