D-302893 NEXT CAM PG2, NEXT CAM K9-85 PG2 Installation Instructions 5
Configuration Instructions
Here you set the pixel quality of the image. Select 160 x 120 for lower quality or 320 x 240 for higher quality..
Optional settings: 320 x 240 (default) and 160 x 120.
Here you set the brightness of the image.
Optional settings: Normal (default), -3, -2, -1, +1, +2 and +3.
Here you set the contrast of the image.
Optional settings: Normal (default), -3, -2, -1, +1, +2 and +3.
Here you determine whether or not to activate the microphone.
Optional settings: Disable (default) and Enable.
3. VIDEO VERIFICATION
After enrolling the Next CAM PG2 / Next CAM K9-85 PG2 in the PowerMaster control panel (see section 2.3 "Enrollment") and after
performing the required camera configurations through the control panel menus (see PowerMaster Installer Guide, "Configuring Motion
Cameras for Video Alarm Verification") the Next CAM PG2 / Next CAM K9-85 PG2 will capture burglary image clips to be sent to the
Monitoring Station for Burglary verification once the system is armed and upon occurrence of a burglary alarm.
The camera can also capture images upon occurrence of non-burglary alarms (i.e. Fire, Duress, Emergency and Panic) - see
PowerMaster Installer Guide, "Configuring Motion Cameras for Video Alarm Verification".
4. LOCAL DIAGNOSTICS TEST
NOTE: Run a diagnostic test at least once a year to ensure that the detector is working correctly.
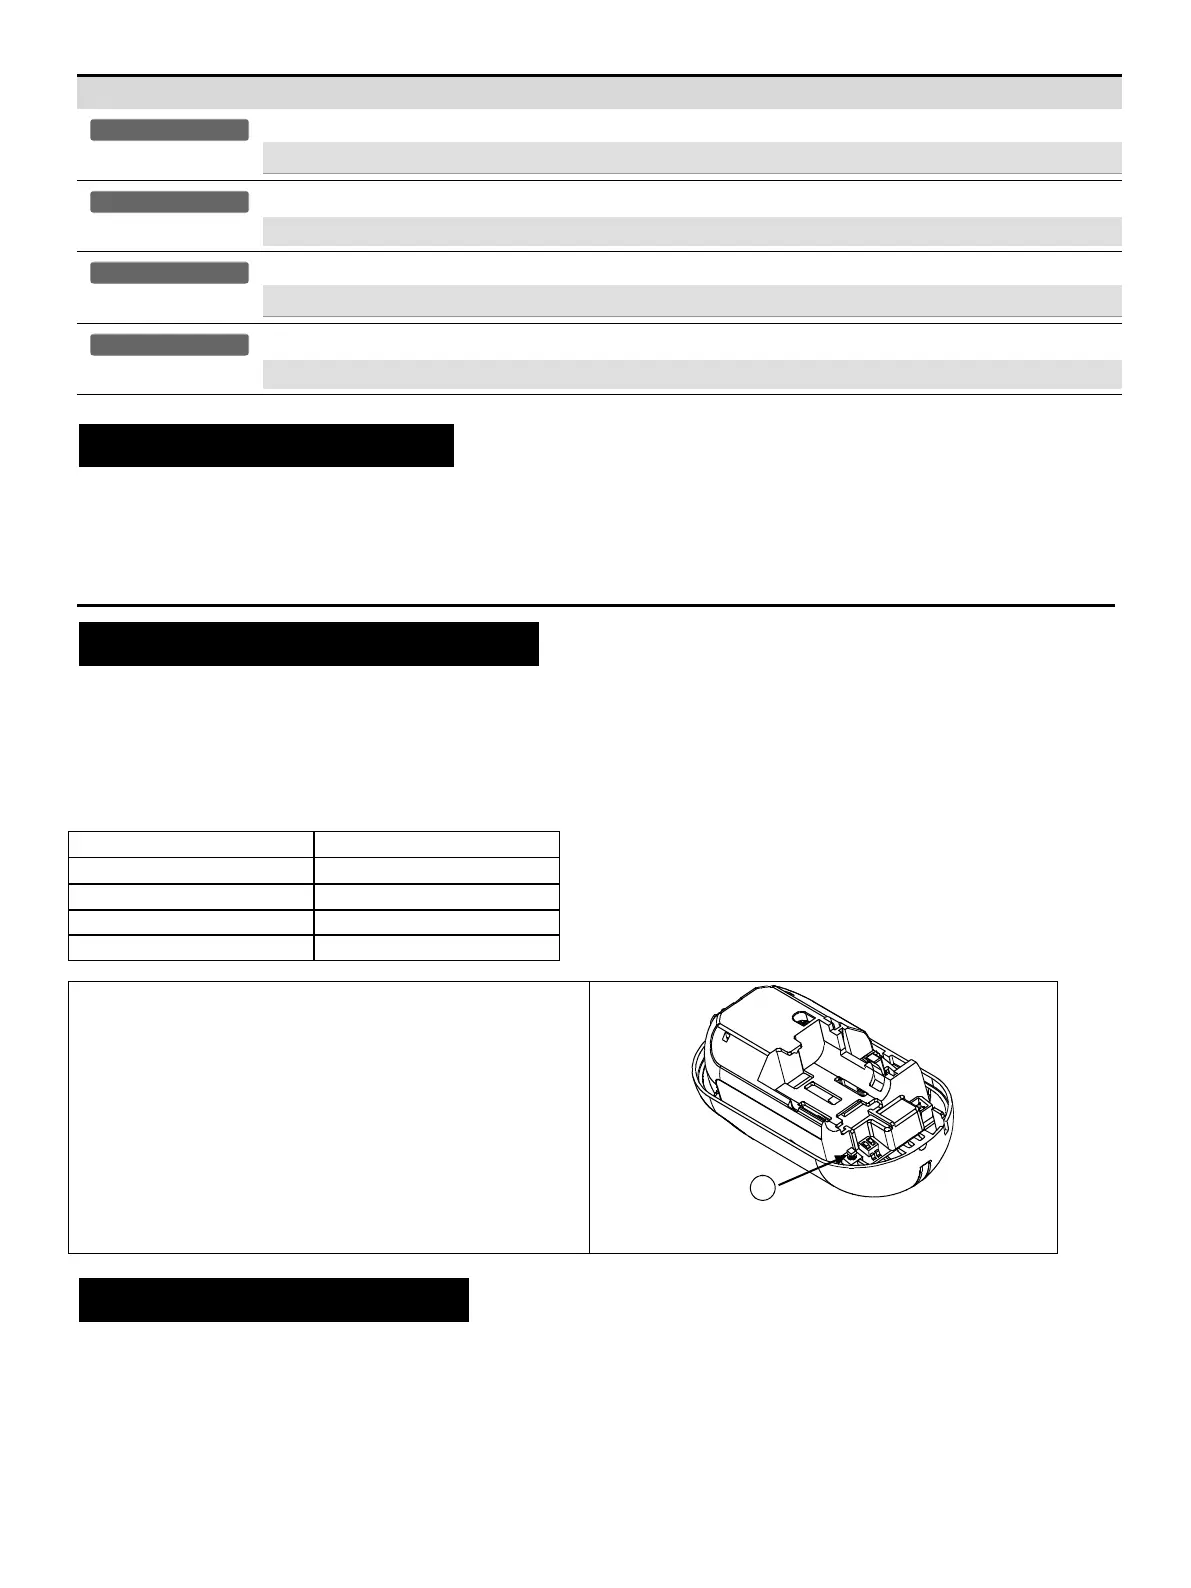
A. Separate the base from the cover (see Fig. 4).
B. Put back the cover to return the tamper switch to its normal (undisturbed) position, and then secure the front cover to the base with the
case closure screw.
C. The NEXT CAM will enter a 2 min. stability period. During this time the red LED blinks.
D. Walk-test the coverage area - see Fig. 5. Walk across the far end of coverage pattern in both directions, The red LED lights each time
your motion is detected followed by 3 LED blinks.
The following table indicates received signal strength indication.
IMPORTANT! Reliable reception must be assured. Therefore,
"poor" signal strength is not acceptable. If you receive a "poor"
signal from the detector, re-locate it and re-test until a "good" or
"strong" signal strength is received (in regions requiring UL-
compliant installation, only “strong” signal strength is permitted).
1. For detailed Diagnostics Test instructions refer to the control
panel Installer Guide.
2. For UL/CUL installations, the test result must be “Strong”.
A. Enroll button
Figure 4. Device enroll button
5. SPECIAL COMMENTS
Even the most sophisticated detectors can sometimes be defeated or may fail to warn due to: DC power failure / improper connection,
malicious masking of the lens, tampering with the optical system, decreased sensitivity in ambient temperatures close to that of the
human body and unexpected failure of a component part.
The above list includes the most common reasons for failure to detect intrusion, but is by no means comprehensive. It is therefore
recommended that the detector and the entire alarm system be checked weekly, to ensure proper performance.
An alarm system should not be regarded as a substitute for insurance. Home and property owners or renters should be prudent enough
to continue insuring their lives and property, even though they are protected by an alarm system.
 Loading...