VIVOTEK
10 - User's Manual
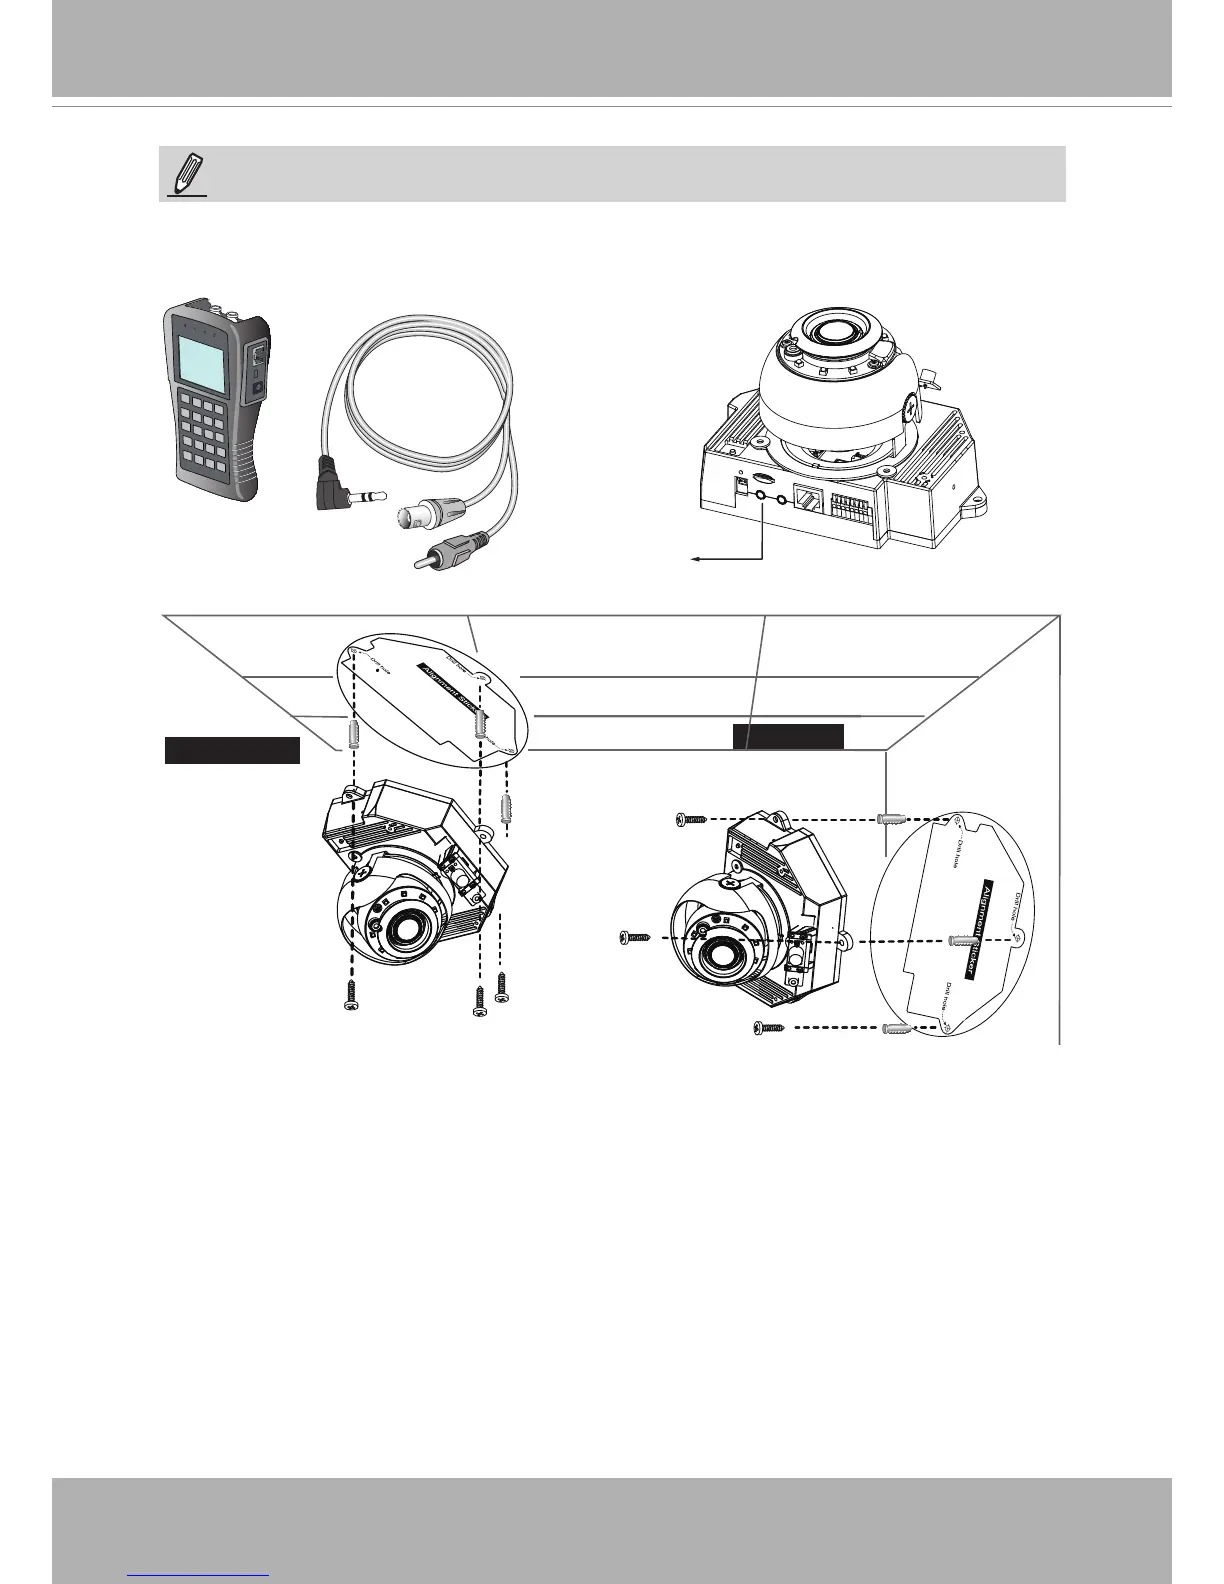
1. Attach the alignment sticker to the ceilling/wall.
2. Through the two circles on the sticker, drill two pilot holes into the ceilling/wall.
3. The Network Camera can be mounted with the cable routed through the ceiling/wall or
from the side. If you want to feed the cable through the ceiling/wall, drill a cable hole A
as shown in the above picture.
4. Hammer the supplied plastic anchors into the holes.
5. Align the two holes on each side of the camera base with the two plastic anchors on the
ceilling/wall, insert the supplied screws to corresponding holes and secure them with a
screwdriver.
Wall Mount
Ceiling Mount
LCD Monitor/
Camera tester
AV Out
NOTE:
You may use the included AV cable to connect a camera tester for initial conguration at
the installation site.