■ Refresh: Click this button to refresh all current connections.
■ Add to deny list: You can select entries from the Connection Status list and add them to the Deny List
to deny access� Please note that those checked connections will only be disconnected temporarily
and will automatically try to re-link again (IE Explore or Quick Time Player). If you want to enable the
denied list, please check Enable access list ltering and click Save in the rst column.
■ Disconnect: If you want to break off the current connections, please select them and click this
button� Please note that those checked connections will only be disconnected temporarily and will
automatically try to re-link again (IE Explore or Quick Time Player).
Enable access list ltering: Check this item and click Save if you want to enable the access list ltering
function�
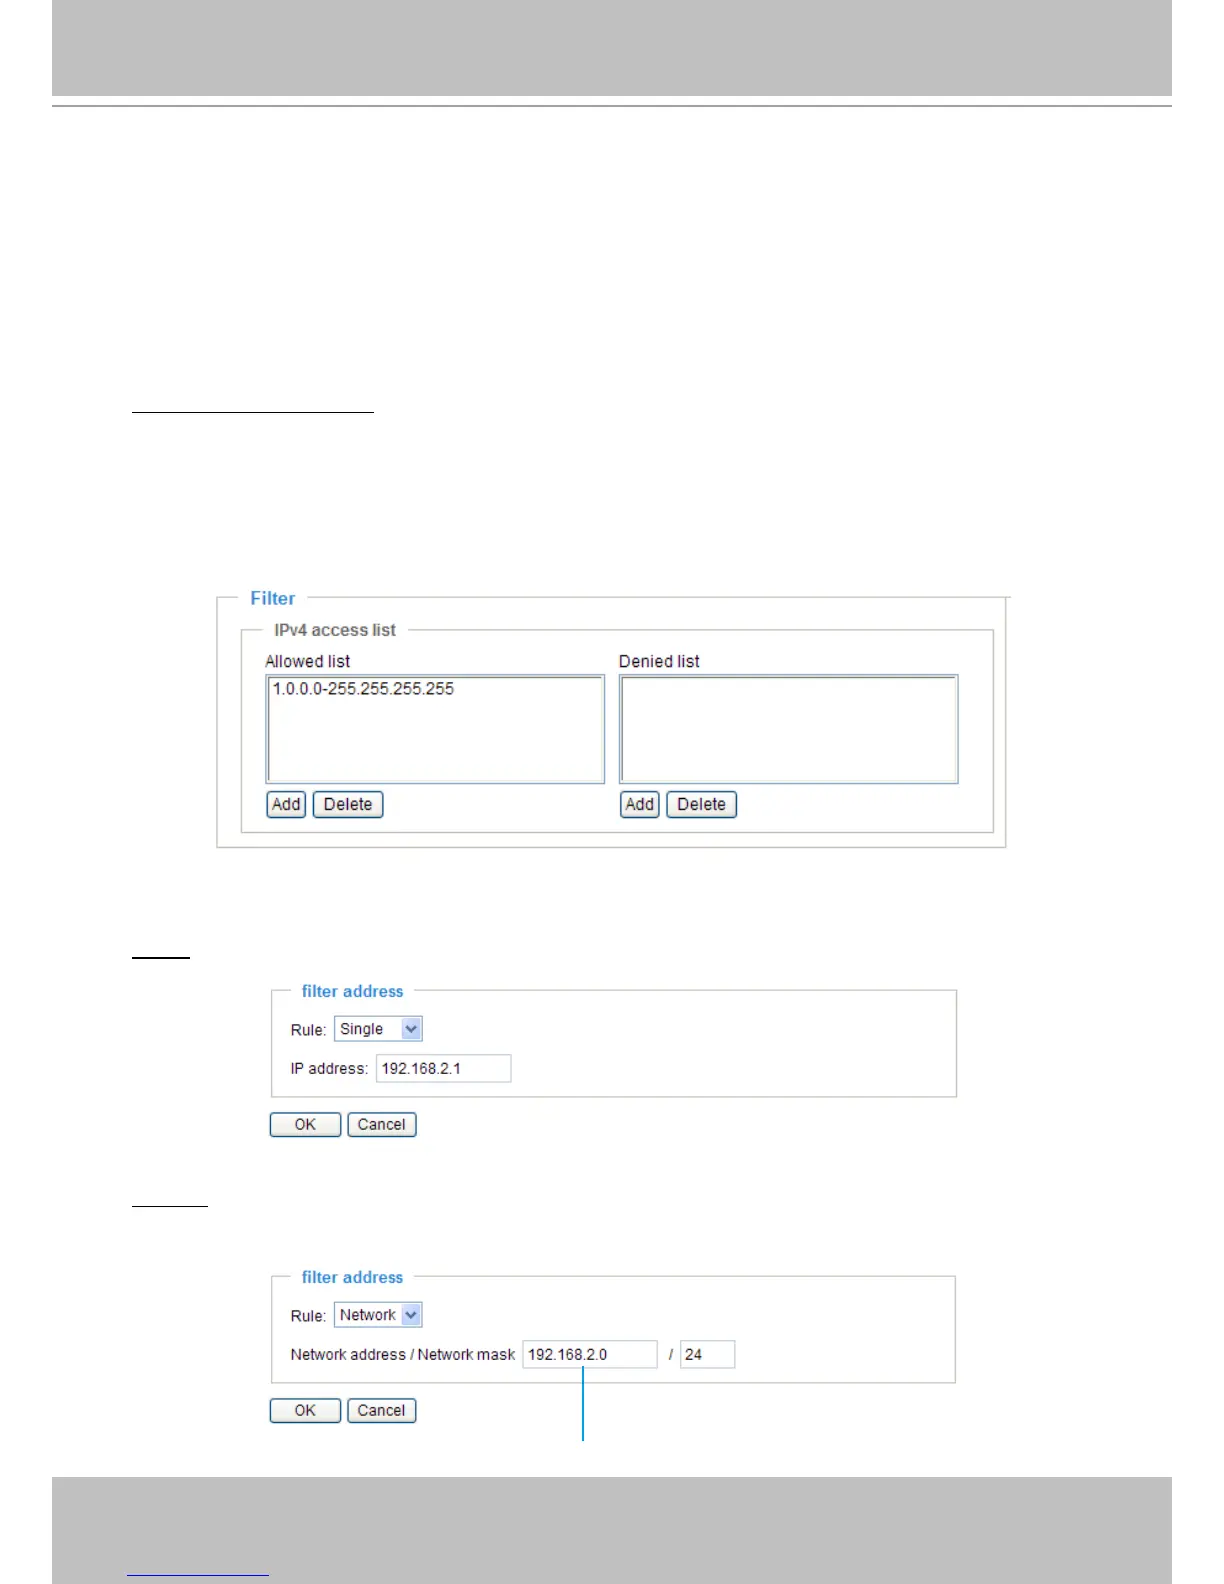
Filter
There are two lists for permission control: Allowed list and Denied list� Only those clients whose IP
addresses are on the Allowed list and not on the Denied list can access the Network Camera�
■ Add a rule to Allowed/Denied list: Click Add to add a rule to Allowed/Denied list�
There are three types of rules for user to set up:
Single: This rule allows the user to add an IP address to the Allowed/Denied list�
For example:
Network: This rule allows the user to assign a network address and corresponding subnet mask to the
Allow/Deny List�
For example:
IP address 192.168.2.x will be bolcked.