WWW.VORONDESIGN.COM
CAD version: ERCF V2
14
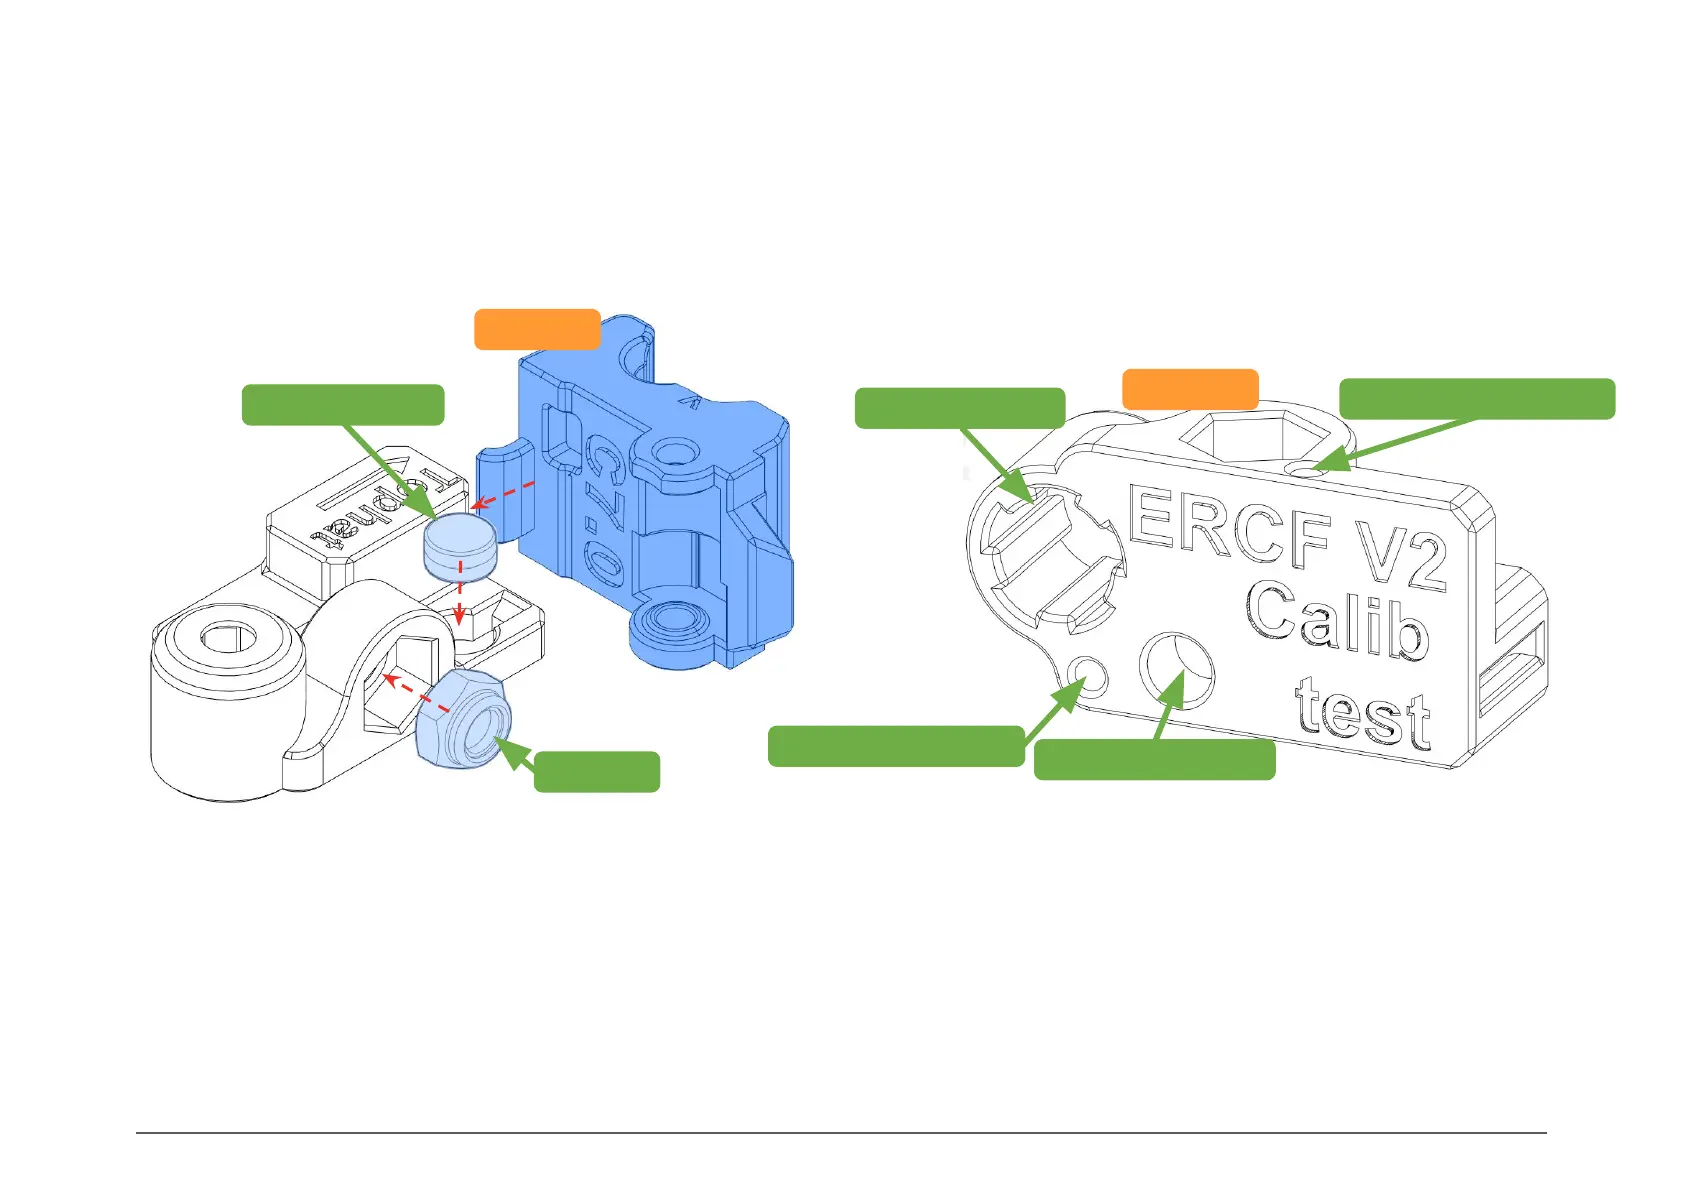
Use this test to ensure your printer and slicing profile are properly tuned, in order to have a pleasant ERCF assembly experience.
TESTS
Insert the different pieces of hardware in their dedicated slots: 6x3mm magnet, M5 nut, and 8mm rod. They should grip the
hardware so that they don’t fall out easily, but they should not be very difficult to insert or remove. Test the heat set insert
hole using a soldering iron and insert.
Use the Filament Path to check that 1.75mm filament slides through without friction. The Filament Axis should have some
light friction.
To check the Top_Hat, insert the arm of a Tophat into the slot. It should insert without much force. Once inserted, the Tophat
should be able to move up and down easily. To remove the Tophat, pull it up while rotating it.
14
INTRODUCTION
8mm Rod Insert
1.75mm Filament Path
1.75mm Filament Axis
M3 Heat Set Insert
Tophat
M5 Nut
6x3mm Magnet
CALIBRATION TOOL
Calib_Test