Do you have a question about the VORON 2.4 and is the answer not in the manual?
Provides essential safety warnings and advice before commencing the assembly process.
Details the critical use of heat set inserts and references for proper installation.
Guidance on installing set screws, emphasizing thread locker for reliability and preventing issues.
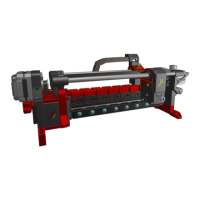
Instructions for assembling pulleys and shafts, including thread locker application and work verification.
Installation of the GT2 belt loop and verification of shaft position in the Z drive assembly.
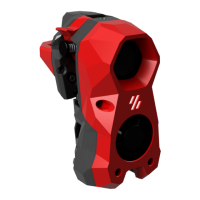
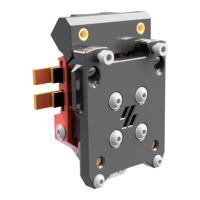
Details on using M3x40 SHCS, M5 nuts, M3x8 SHCS, and the NEMA17 stepper motor with GT2 pulley.
Correctly orienting the motor and securing it with M3x8 SHCS for the Z drive.
Visual guide for printer orientation and Z drive placement, including upside-down assembly techniques.
Instructions for installing M5x10 BHCS, leaving them loose, and then tightening after belt tensioning.
Ensuring the Z drive and belt tensioner did not shift after final tightening.
Instructions for building additional Z drives, including opposing corners and mirrored configurations.
Assembly of the Z idler using specific hardware like M3 nuts, M3x16 SHCS, and M5x30 BHCS.
Correctly orienting the Z idler and ensuring it is firmly seated in the corner before tightening.
Instructions for building additional Z idlers, including opposing corners and mirrored versions.
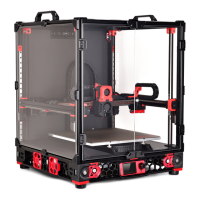
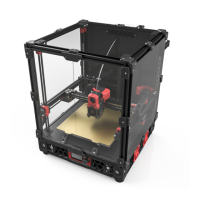
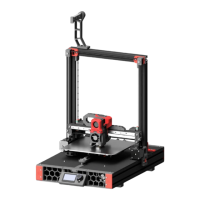
| Build Volume | 350 x 350 x 350 mm |
|---|---|
| Extruder Type | Direct Drive |
| Heated Bed | Yes |
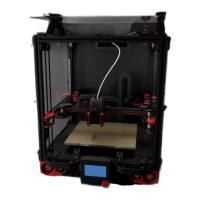
| Frame Material | Aluminum |
| Filament Diameter | 1.75 mm |
| Motion System | CoreXY |
| Firmware | Klipper |
| Print Technology | FDM |
| Max Nozzle Temperature | 300°C |
| Max Bed Temperature | 120°C |
| Power Supply | 24V |
| Enclosure | Optional |
| Weight | Approx. 20 kg |
| Layer Resolution | 0.05mm - 0.3mm (depending on nozzle and settings) |
| Connectivity | USB |
| Nozzle Diameter | 0.4 mm |
| Bed Leveling | Automatic |
| Controller Board | SKR 1.3 or 1.4 |
| Z-axis | Triple Z-axis motors with leadscrews |