WWW.VORONDESIGN.COM
CAD version: ERCF V2
2222
WIRING (LEDS)
WIRING THE LEDS
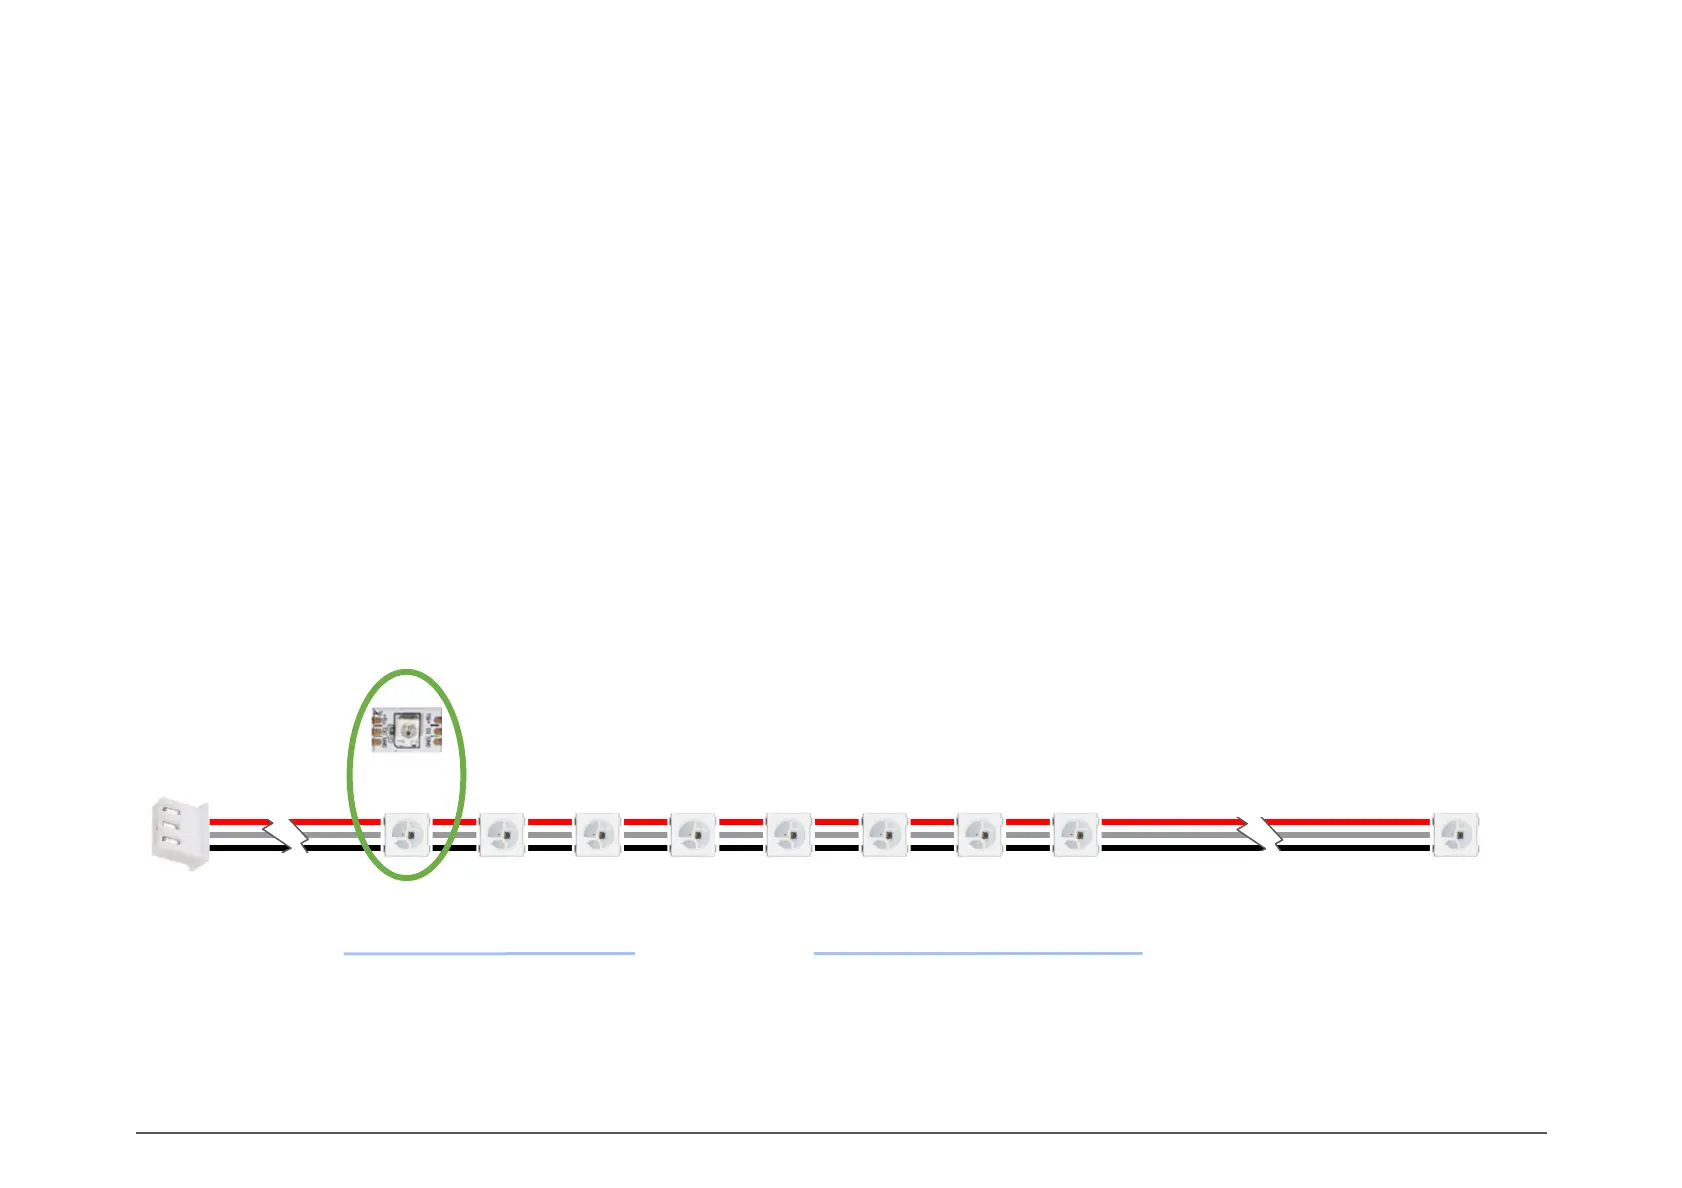
The default option is to use a premade flexible LED strip. Unfortunately, you will need to cut up
the strip and re-solder it in order to get to the necessary 23mm spacing. The suggested method is
to stick the segments of LED strip to the inside of each of the Cover_Body_xN, attach all of the
Cover_Body_xN to the 2020 extrusion, and solder short pieces of wire between the strips.
If you are using NeoPixels or individual LED PCBs, we provide a wiring jig:
ERCF_v2 / Stls / Apron_Leds / Options / LED_Soldering_Tool_24mm.stl
For the wires between each LED, cut 20mm sections of wire and strip them back about 1.5mm on
each end. Then use the jig to solder the LEDs in place.
If using a local MCU, the connection between the first LED and the MCU should be about 250mm.
If using a remote MCU, the connection between the first LED and Molex plug is 175mm.
There is an LED circuit board that is in development for later release, if you would rather wait and
skip the soldering.
WIRING THE LEDS
Encoder
Neopixel
(Optional)
Gate #0
Gate #N
Apron LEDs
Route through
cable chain to
selector
or