10
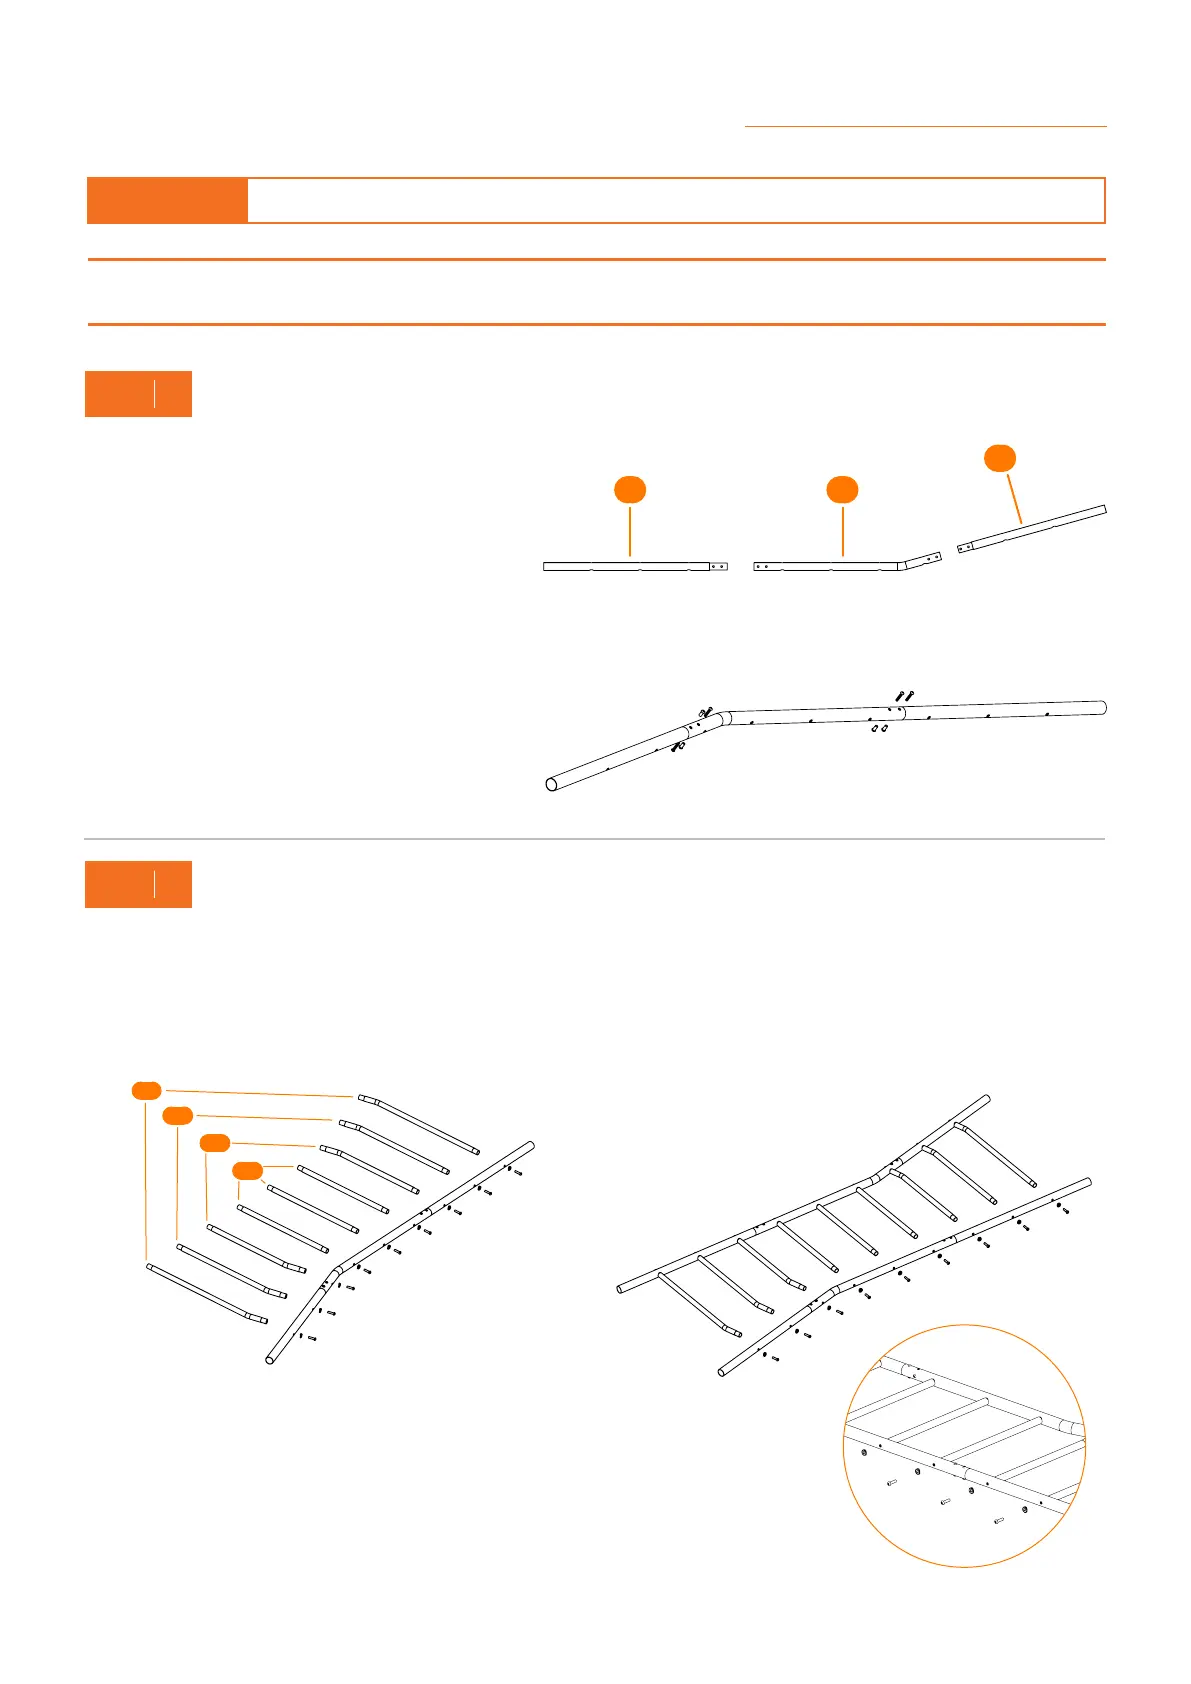
A. B.Insert each of the Climbing Bars into the
completed Climbing Rail, as shown below.
Secure with Locking Bolts & Washers.
Note: Ensure that the bolts are not overly tight. You
may need to rotate some Monkey Bars to fit into the
remaining Climbing Rail.
Remember: When you secure the Climbing Bars with
bolts, make sure to position the washers first.
Connect the remaining Climbing Rail to the other ends of
the Climbing Bars.
Make sure that the straight Climbing Bars are in the middle,
and the curved ends of the other Climbing Bars are in the
shorter ends of the Climbing Rails.
2
STEP
A4.1
A4.2
A4.3
A4.4
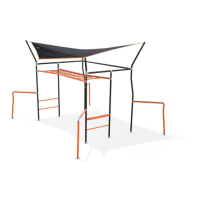
4.0. Assembly instructions – Vuly Quest
1
STEP
A.
B.
Insert a 3-hole Climbing Rail (A1) into the
kinked end of a Curved Climbing Rail (A2),
and a 2-hole Climbing Rail (A3) into the
straight end of the Curved Climbing Rail.
Make sure that there are three large holes
on one side of the bend, and six on the other,
and all nine holes are facing the same way.
Fix rails at juncture using frame bolts & nuts.
A
B
ENSURE THAT AS YOU ASSEMBLE THE PRODUCT, YOU FIRMLY TIGHTEN ALL NUTS AND BOLTS, UNLESS DIRECTED.
PRE-ASSEMBLY
You will require the following: • Ladder • Rubber mallet • Tape measure or ruler
A1
A2
A3
C. Repeat for the remaining three different
Climbing Rails.