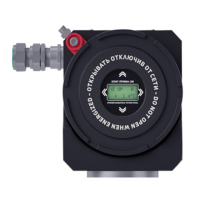
4.3 Connecting the Cong Prima 2M
!
The Cong Prima 2M is ready to begin taking dew point measurements at atmospheric
pressure immediately upon being connected to the power supply.
You will find detailed information about the installation of the Cong Prima 2M in Appendix B.
Affix the gas delivery element of the CP 2M perpendicular to a horizontal surface using four
M8 bolts (see Appendix B, perspective A).
Attach the CP 2M to the gas delivery element using eight M8 bolts (included in delivery).
Gradually open the shutoff valve of the sample extraction device. The sample gas will now
flow into the sample extraction device through the (IN) inlet and then flow out again through
the (Out).
Set the gas flow volume rate to 0.2 – 0.3 Nl/min.
Check the seals of the connection elements. To do this, fill the measuring chamber of the
analyzer at operating pressure (including the gas delivery lines). Next, coat all of the
connecting elements with a soapy emulsion. If small bubbles form, it indicates a leak or a
bad seal. This connection must be resealed.
Complete the electrical installation of the CP 2M in accordance with Appendix A.
Ground the analyzer. To do this, connect the grounding terminal of the analyzer with the
ground bus at the installation site. This requires an insulated copper conductor with a cross-
section of at least 1.5mm
2
(or 4mm
2
for a copper conductor that is not insulated).
To uninstall the Cong Prima 2M complete the preceding steps in the reverse order.
4.4 Connecting the Cong Prima 2M equipped
with a retractable sampling device
!
The installation of the CP 2M with a retractable sampling device is a two-step process. First,
attach the gas feed unit to the sampling site. Next, mount the analyzer to the gas feed unit.
(refer to Appendix D)
To attach the gas supply line follow these steps:
Weld the mounting bushing onto the gas pipeline at the sampling site. The bushing must be
oriented within 10° of perpendicular and have threading of M33x2;
Carefully screw the gas feed unit into the mounting bushing (14) until it is fully seated;
Adjust the position of the gas feed unit so that the direction of the arrows on the unit
correspond to the gas flow. To make this adjustment, turn the gas feed element counter
clockwise no more than one full turn;
Finally, tighten the lock nut (13);
Ensure that the handle of the sampling device is in the closed position;
Open the gas feed and check the seal integrity of the connecting elements. Spread a soapy
emulsion between the lock nut (13) and the mounting bushing (14). If small bubbles form, it is
an indication that the seal is not airtight and must be reseated.