26
Control Pro 250 R / 350 R
GB
Maintenance and repairs
Dan
er
Before carrying out any work on the device, relieve the pressure and unplug the power plug from the socket.
a) Cleaning the inlet valve
i
If any problems occur when the paint is sucked up, the intake valve needs to be cleaned or replaced. Problems can
be avoided by cleaning and servicing the device properly.
1. Detach the suction hose from the basic unit.
2. Remove the inlet valve (Fig. 25, 1) from the base unit using a wrench (20 or Allen wrench 10mm).
3. Remove the valve seat (Fig. 25, 2), ball (3) and O-ring (4) from the inlet valve.
4. Clean the inlet valve mount and all components thoroughly with a suitable cleaning solution or replace them if necessary.
5. Lubricate the O-ring (Fig. 25, 5) on the inlet valve.
6. Place the valve seat, ball and O-ring back in the inlet valve.
7. Replace inlet valve assembly by screwing it into the sprayer.
b) Cleaning the outlet valve
i
If the spray pattern is poor, the outlet valve may need to be cleaned or replaced.
Problems can be avoided by cleaning and servicing the device properly.
1. Remove the high-pressure hose from the base unit using a wrench (17).
2. Loosen the screw (Allen wrench 2.5 mm) on the outlet valve (Fig. 26), but do not remove it.
3. Remove the outlet valve (Fig. 27, 1) from the base unit using a wrench (16).
4.
Clean the outlet valve mount and the outlet valve thoroughly with a suitable cleaning solution or replace the outlet valve if
necessary.
5. Put the new or cleaned outlet valve back in.
6. Re-tighten the screw (Fig. 26).
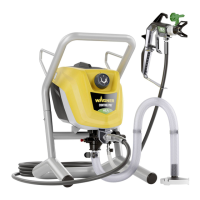
Spare Parts List (Fig. 28)
Pos. Description Order No.
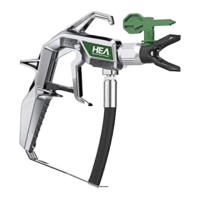
1 Spray gun assembly (incl. nozzle holder) 0517100
2 Nozzle 517 (for thick materials, e.g. interior wall paints)*
Nozzle 311 (for thin materials, e.g.
lacquers)*
0517517
0517311
3 Nozzle holder 0517200
4 Sealing set 0517900
5 HEA Filter Set (incl. lter red and lter white) 0517 202
6 Filter, red (nozzle 311, 2 pack)*
Filter, white (nozzle 517/619, 2 pack)*
0418 711
0418 713
7 High-pressure hose, 9 m
High-pressure hose, 15 m
0580050
0517802
8 Carry handle 0580389
9 Door (1 pc.) 0580041Y
10 Suction hose and Return line 0580159A
11 Clip (suction hose) 9890222
12 Clip (return line) 0327226
13 Return line 0580487A
14 Clip (1 pc.) 0512390
15 Filter housing 0580154
16 Filter 0580155
17 Outlet valve 0580072A
18 Repair kit for inlet valve 0580391
19 Inlet valve housing 0580071A
* Wearing part: Not covered by warranty
 Loading...
