25
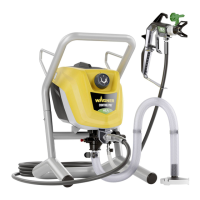
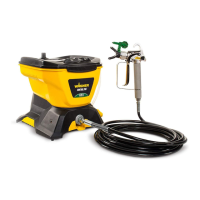
Control Pro 250 R / 350 R
GB
Interruption of Work
Danger
Be sure to follow the Pressure Relief Procedure when shutting the unit o for any purpose.
This procedure relieves the pressure from the spray hose and the gun.
•
Switch the device o (pressure regulator in position 0) and remove the power plug.
•
Put the spray gun in a plastic bag and seal so that it is air-tight.
•
Wet paint surface in paint container with a little water to prevent a skin from forming.
Taking Out of Operation and Cleaning
Proper cleaning is the prerequisite for problem-free operation of the paint application device. No warranty claims are accepted
in case of improper or no cleaning.
Danger
Do not use ammable materials / cellulose thinner for cleaning purposes.
i
Always clean the device as soon as you have nished operation.
Dried-on coating substance makes cleaning more dicult.
1.
Perform Pressure Relief Procedure.
2. Secure the spray gun.
3.
Remove the nozzle holder from the spray gun. (Fig. 19)
4. Put the suction hose and return ow pipe into a container full of water or suitable cleaning solution.
5.
Turn the switch to the SPRAY position and set maximum pressure.
6. Hold the spray gun on the edge of the paint container. (Fig. 20)
Danger
Ground gun with a metal container if ushing with solvent.
7. Unlock the spray gun and pull the trigger to pump the excess paint out of the system into the paint container. Release the
trigger again as soon as the cleaning agent comes out.
8.
Turn the switch into the PRIME position (vertical).
9. Hold the spray gun on the edge of the cleaning container.
10. Pull the trigger and hold it until only clear liquid comes out.
11. Switch the device o and remove the power plug.
12.
Turn the switch into the PRIME position (vertical).
13. Pull the trigger to relieve the pressure.
14.
Secure the spray gun.
15. Separate the spray gun from the paint hose using wrenches (13).
i
If the HEA lter set is being used, remove it and clean it in accordance with the information in the chapter entitled
"HEA Filter Set".
16. Remove the nozzle (1), plain washer (2) and the mounting (3) from the nozzle holder (4) and clean all parts thoroughly.
(Fig.21)
17. Replace the mounting and the plain washer in the nozzle holder.
Screw the nozzle holder onto the gun.
18. Detach the suction hose from the basic unit.
19. Disconnect the return line.
20. Wipe o the exteriors of both hoses.
21. Carefully remove the lter disc (1) from the suction lter. (Fig. 22)
22. Clean the lter disk thoroughly under running water.
23. Remove the high pressure hose from the basic unit with a wrench (17).
24. Immerse the inlet valve in a container lled with conservation agent (e.g. household oil). (Fig. 23)
25. Insert the power plug.
26. Hold a cloth in front of the hose connection and switch the device on for approx. 5 seconds. (Fig. 24)
This procedure preserves the pump.