13
W 690 Flexio Extra Spray Kit
AUS
the air lter compartment (Fig. 26, A). Replace both air lters (Fig. 26, B). Close the cover
of the air lter compartment.
Ventilating hose / Valve (Wall Extra I-Spray spray attachment)
•
Pull the ventilating hose (Fig. 18, A) at the top from the gun body. Screw o the valve
cover (B). Remove the diaphragm (C). Carefully clean all parts or replace in the event
of damage.
•
Place the diaphragm (Fig. 18, C) with the pin facing upwards on the bottom section of
the valve. Also see the marking on the gun body.
•
Place on the valve cover (Fig. 18, B) and screw it closed.
•
Place the ventilating hose (Fig. 18, A) on the valve cover and on the nipple at the gun body.
Ventilating hose / Valve (Gravity spray attachment)
•
Remove the hose, dismantle it and remove the membrane (Fig. 18, D).
•
Carefully clean all parts or replace if required.
•
During assembly, insert the membrane (g. 18, D) with the pin pointing downwards.
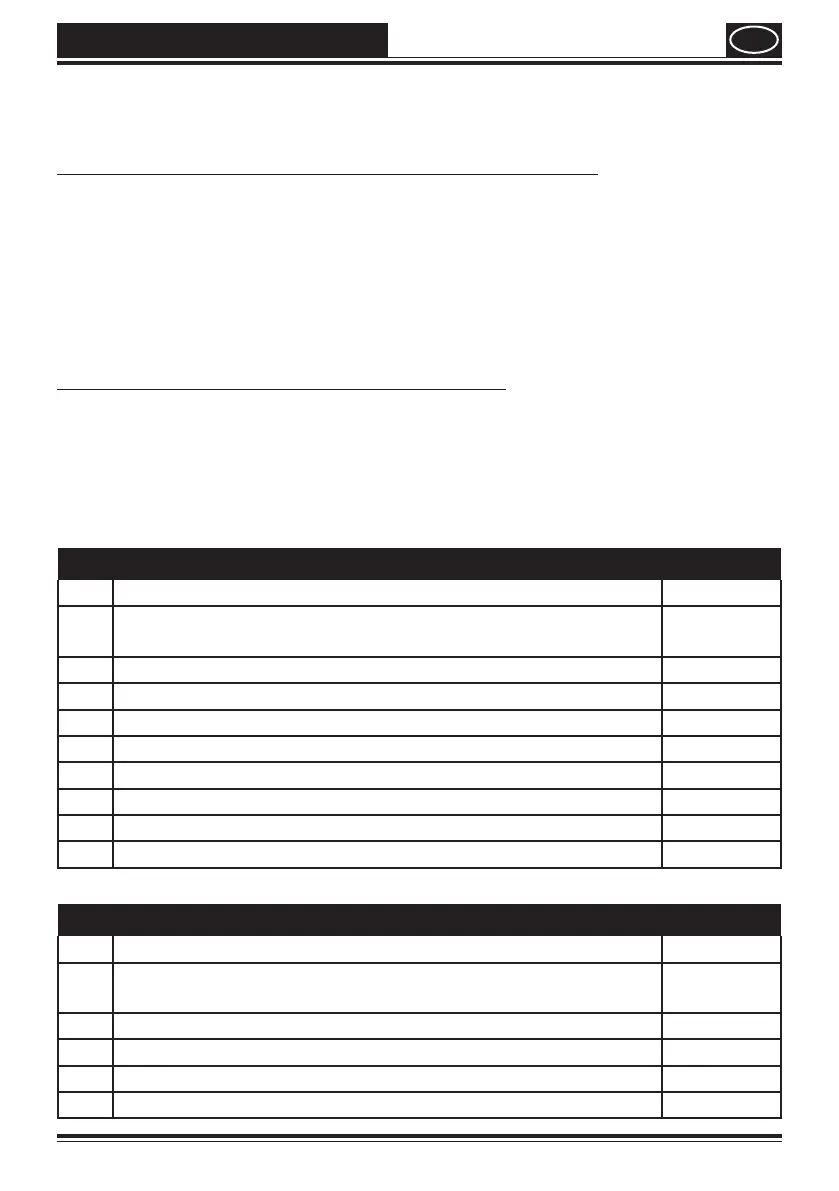
19. Spare Parts
Spare Parts List Gravity spray attachment (Fig. 27)
Pos. Designation Order No.
Gravity spray attachment complete with container (600ml and
150 ml)
2414024
1 Union nut 2410212
2 Air cap 2361747
3 Nozzle 2361238
4 Seal 0417 706
5 O-ring of spray attachment 2362 875
6 Ventilation hose with valve 2410217
7 Container with cover 600 ml 2410208
8 Container with cover 150 ml 2410210
Spare Parts List Wall Extra I-Spray spray attachment (Fig. 28)
Pos. Designation Order No.
Wall Extra I-Spray spray attachment complete with 1800 ml
container
2361 749
1 Air cap 2382 753
2 Union nut and nozzle 2382 751
3 O-ring of spray attachment 2362 875
4 Ventilating hose, valve cover, diaphragm 2382 754
 Loading...