55
Maintenance Instructions CLEANING
Inspect the primary lter element after every 100
hours of service and replace the element and safe
ty lter yearly (or when dirty or damaged). More
frequent replacement may be required when operat
ing in extremely dusty conditions. Service the air
cleaner as follows:
1. Release the top and bottom cover latches and
remove the air cleaner cover. Wash the cover
and dust ejection valve. Check that these com
ponents are in good condition. The dust ejec
tion valve is subject to wear and deterioration
and should be inspected carefully and replaced
yearly or when damaged. The lips of the valve
should close and t together; any cracks, defor
mation, or wear in the valve is cause for re
placement.
2. Remove the primary lter element by pulling it
out of the canister. There will be some initial
resistance as the lter seal breaks loose and
slides o of the outlet tube. Gently move the
end of the lter up and down and side to side or
twist to loosen the seal. Use gentle action to
minimize the amount of dust dislodged as the
lter is removed.
3. Clean the lter element by GENTLY tapping on
a at, hard surface.
NOTE: Use care when cleaning the lter ele
ment. The lter element and/or seal surface
may be damaged by tapping too hard or hitting
on an uneven surface or sharp edge. Washing
the paper element in water or cleaning solution
is not recommended. Do not try to clean the
element with compressed air. Do not oil the
paper element. Remember, replacing a lter is
less expensive than replacing a dusted engine.
4. Use a bright light inside the lter element to in
spect for damage. Check the element very
carefully for pin holes or other damage that
will allow dirt to leak through the paper media.
Replace lter element if dirty or damaged.
5. Check the condition and resilience of the radial
sealing surface (inside of the open end) of the
primary lter element. Replace the lter if any
cracks, tears, or other damage to the sealing
surface are noted.
6. Without removing, visually inspect the condition
of the safety lter for damage or holes. The
safety lter should only be removed for yearly
replacement (or when dirty or damaged).
IMPORTANT: Prior to removing the safety lter,
make sure the inside surface of the air cleaner
canister is clean. This will minimize the risk of
dirt entering the outlet tube which can cause pre
mature engine wear.
7. After removing the safety lter, use a clean,
damp cloth and wipe the interior of the air clean
er canister clean. Use special care to clean
both the inside and outside surfaces of the
outlet tube.
IMPORTANT: Any dust left on the inside of the
outlet tube will go into the engine and cause
wear.
8. Check the outside surface of the outlet tube for
smoothness and cleanness (this is the sealing
surface).
9. Insert and seat the safety lter and primary lter
el ement carefully into the canister, applying
pres sure at the outer rim of the lter; not at the
exible center. Make sure the lter element is
completely in place before installing the cover.
IMPORTANT: DO NOT use the cover latches
to force the lter into the canister–the cover
should t on with no extra force.
NOTE: DO NOT use petroleum based lubri
cants on the sealing surfaces of the lter ele
ments; use tal cum powder or dry silicone lubri
cants if required for lter installation.
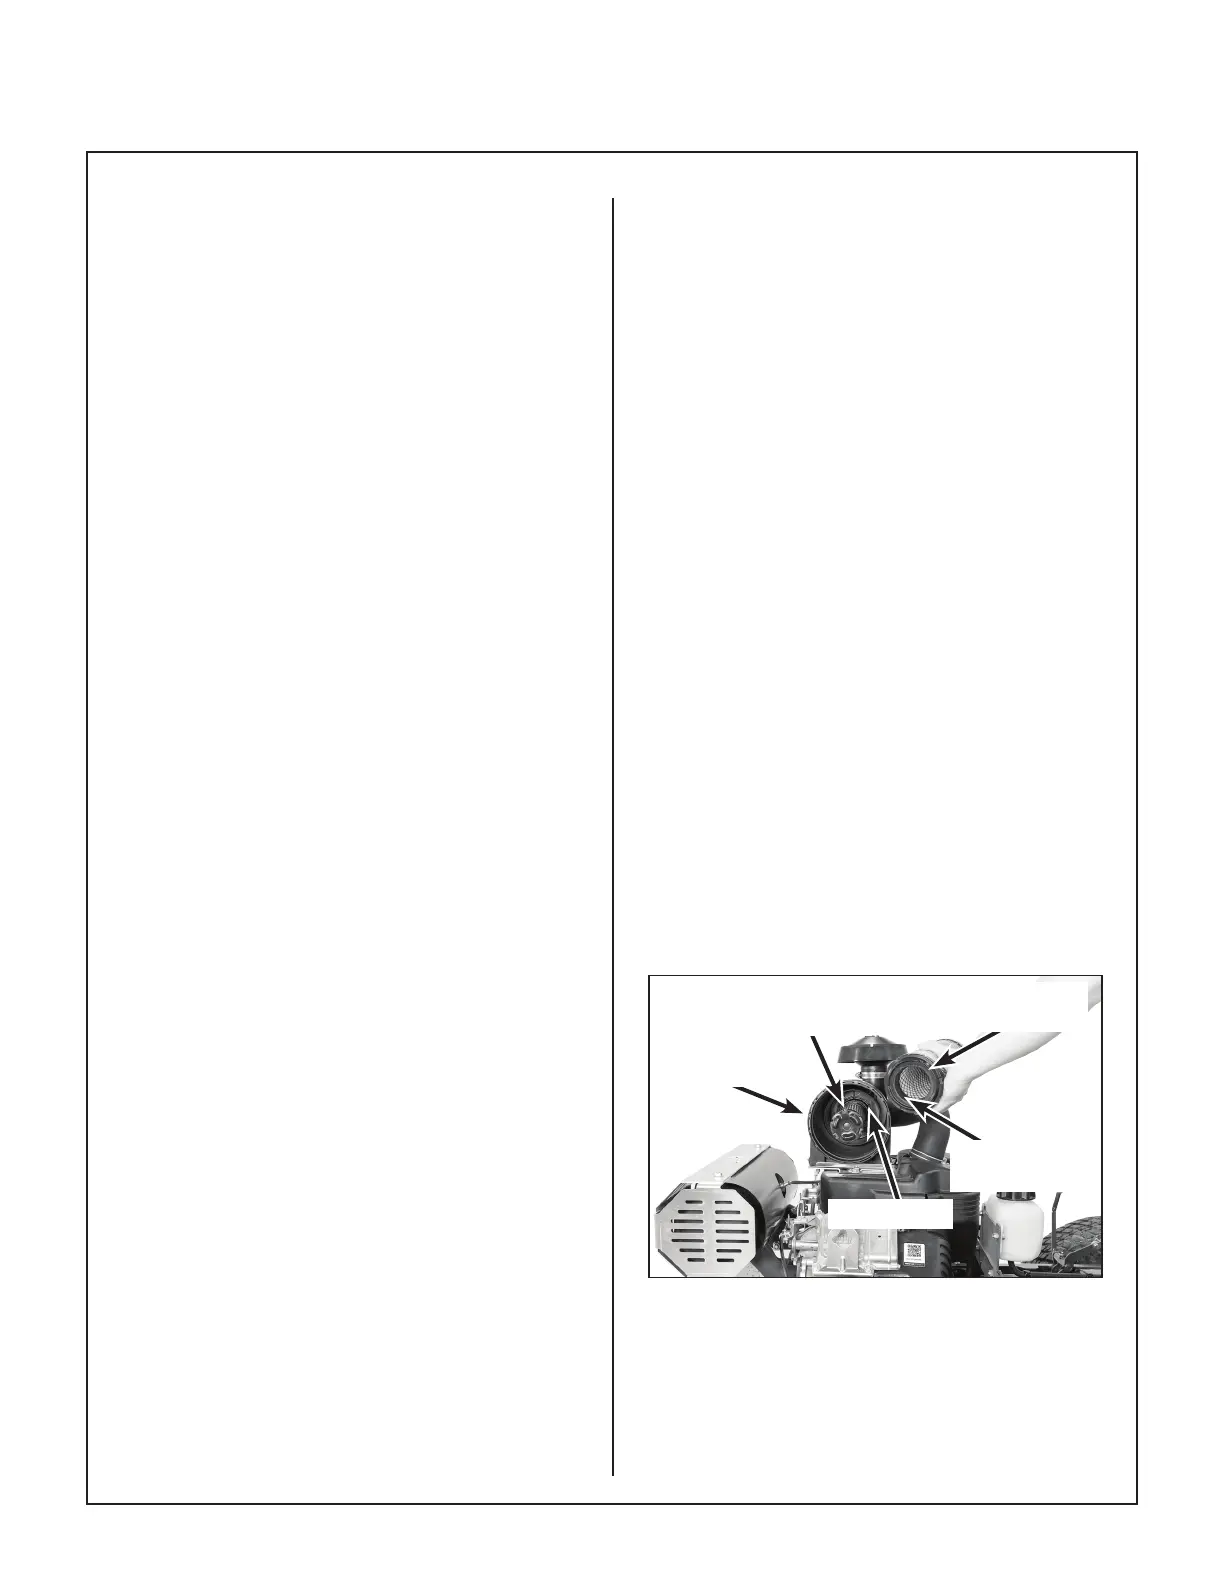
Canister
Primary
Filter Element
Safety Filter
Radial Sealing
Surface
Outlet Tube
Air Filter Element Replacement