79
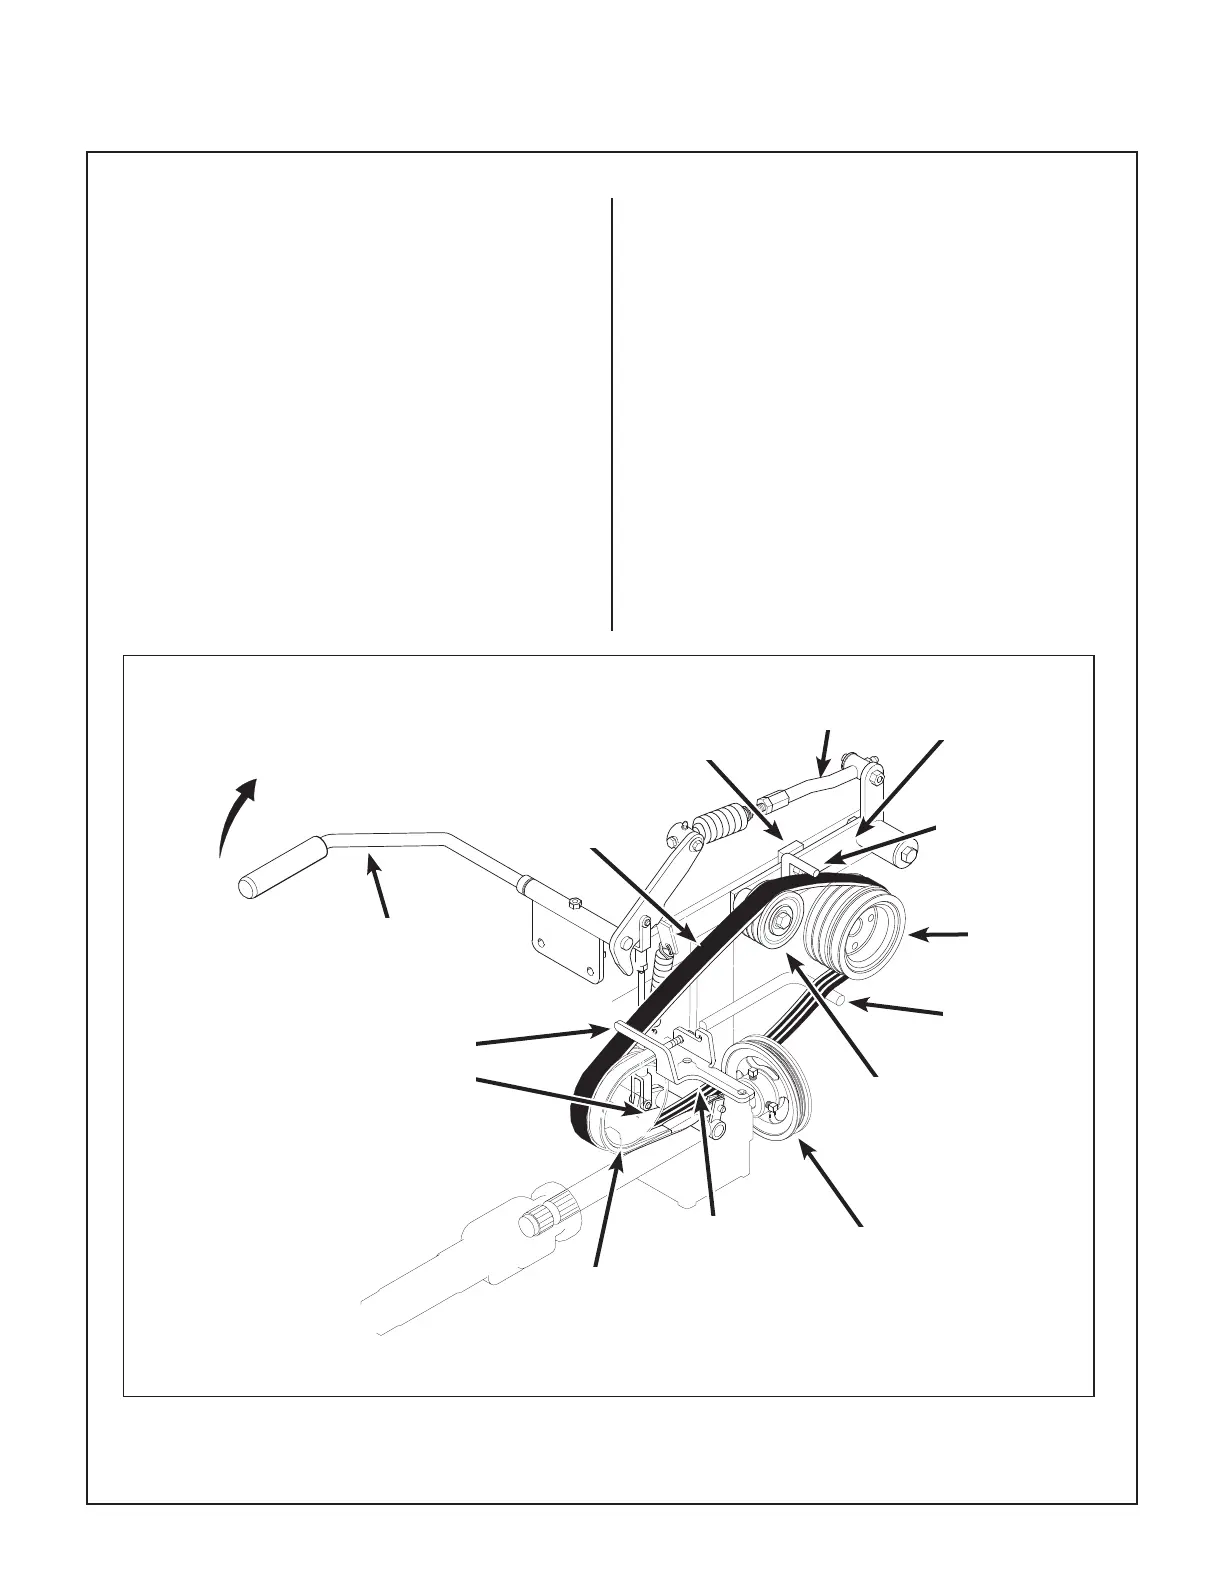
Maintenance Instructions REPLACING/REPAIRING
Engine PTO Drive Belt (3 Groove Power Band)
1. To remove the engine PTO drive belt:
a. Remove the jackshaft drive belt from its
idler pulley (by pushing down on idler pul-
ley) and let the belt drop down out of the
way.
NOTE: Step (a) is not essential to removing the
PTO belt, but it makes more room to work with
the PTO belt.
b. Push the clutch idler pulley down (until the
PTO belt tightener stop block contacts the
frame) and then shift the belt off the idler
pulley (to the inside).
c. Raise the clutch lever (engage position) to
lift the clutch idler away from the belt.
d. Next remove the belt from the engine pulley
and then the PTO drive pulley.
2. Install the PTO drive belt by reversing the re-
moval procedure.
IMPORTANT: Make sure the belt is installed
inside the four (4) belt guide pins.
3. Refer to ADJUSTMENTS of Blade Clutch
(PTO) in this section to check and make the fol-
lowing adjustments:
a. Clutch engagement for proper belt tension.
b. Clutch disengagement and brake action.
Engine PTO Drive Belt Removal
Clutch
Linkage
Micro-V Pulley
(GHS Blower Drive)
Blade Clutch Lever
in the DOWN Position
Pull UP to Engage
Engine
Pulley
PTO Belt Tightener
Stop Block
Belt
Guide
Belt
Guide
PTO Belt
Tightener Arm
Engine
PTO Belt
PTO Drive
Pulley
Brake Band
Mount Bracket
Clutch Idler
Pulley
Belt Guides
(Bottom Guide Not Visible)