91
Maintenance Instructions ADJUSTMENTS
Blade Brake Band Adjustment - Step 3
After the pulley travel is set, make the following ad-
justment as needed:
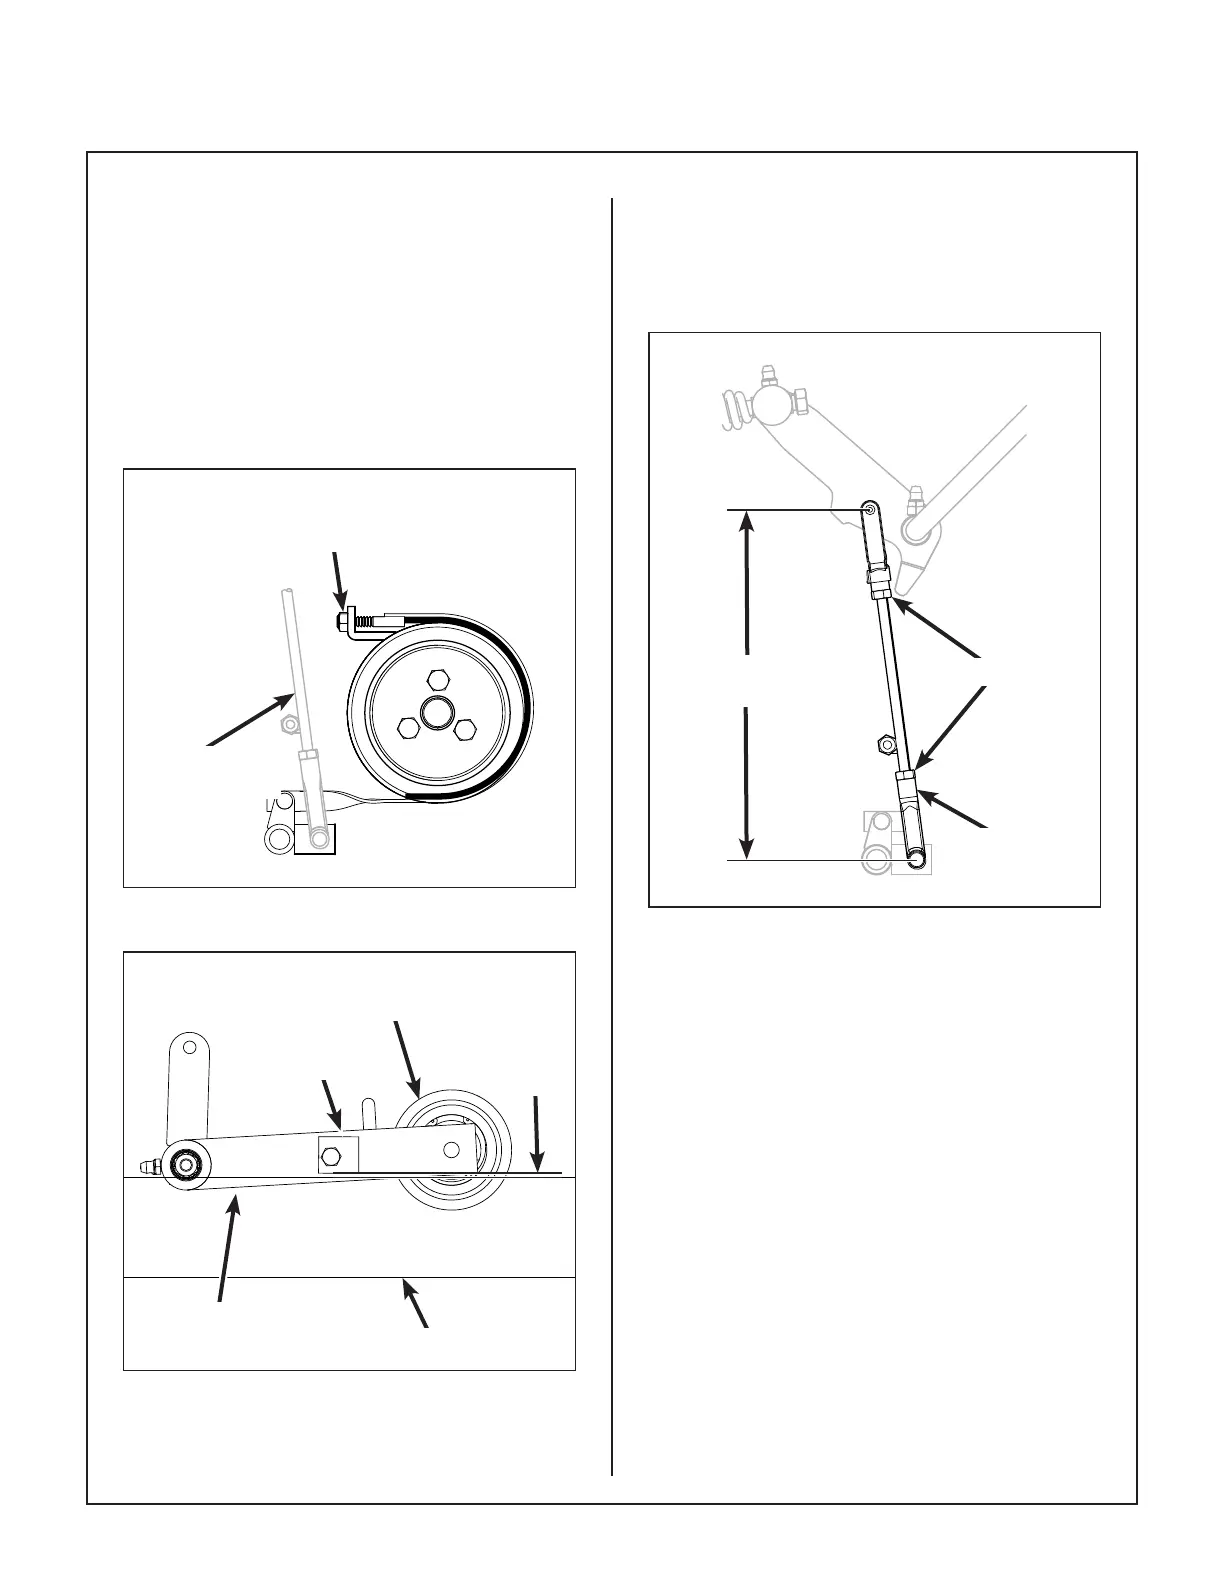
1. Adjust the blade brake band, using the adjust-
ment nut until there is a gap of approximately
1/8 in. (3 mm) between the PTO belt tightener
stop block and chassis. If there are not enough
threads on the brake band for adjustment,
lengthen the brake actuator rod.
Blade Brake Band
Adjustment Nut
Brake Actuator
Rod
Blade Brake Band Adjustment
Blade Clutch
Idler Pulley
Chassis
1/8 in.
(3 mm)
Stop Block
PTO Belt Tightener
Blade Brake Band Adjustment
NOTE: The length of the actuator rod is adjusted by
disconnecting the bottom clevis and shortening or
lengthening accordingly. The standard pre-set
length of the actuator rod is set at the factory at
8-1/4 in. (209 mm).
Locknuts
Bottom
Clevis
8-1/4 in.
(209 mm)
Brake Actuator Rod Adjustment
2. After adjustments are complete, check blade
brake action as described in CHECKING/SER-
VICING the Blade Brake Action in this section.
If blades do not stop within ve (5) seconds,
check the following:
a. Recheck 1/8 in. (3 mm) gap between stop
block and chassis.
b. Make sure clutch and brake linkage are
working freely (no binding).
c. Check the brake band lining.
d. Check the brake drum on the pulley. If ex-
cessive wear is present, it will be necessary
to replace worn parts.