COMMANDER - installation guide en 15
DRILL & MOUNT 3/3
Step 5: confirm the previous four steps.
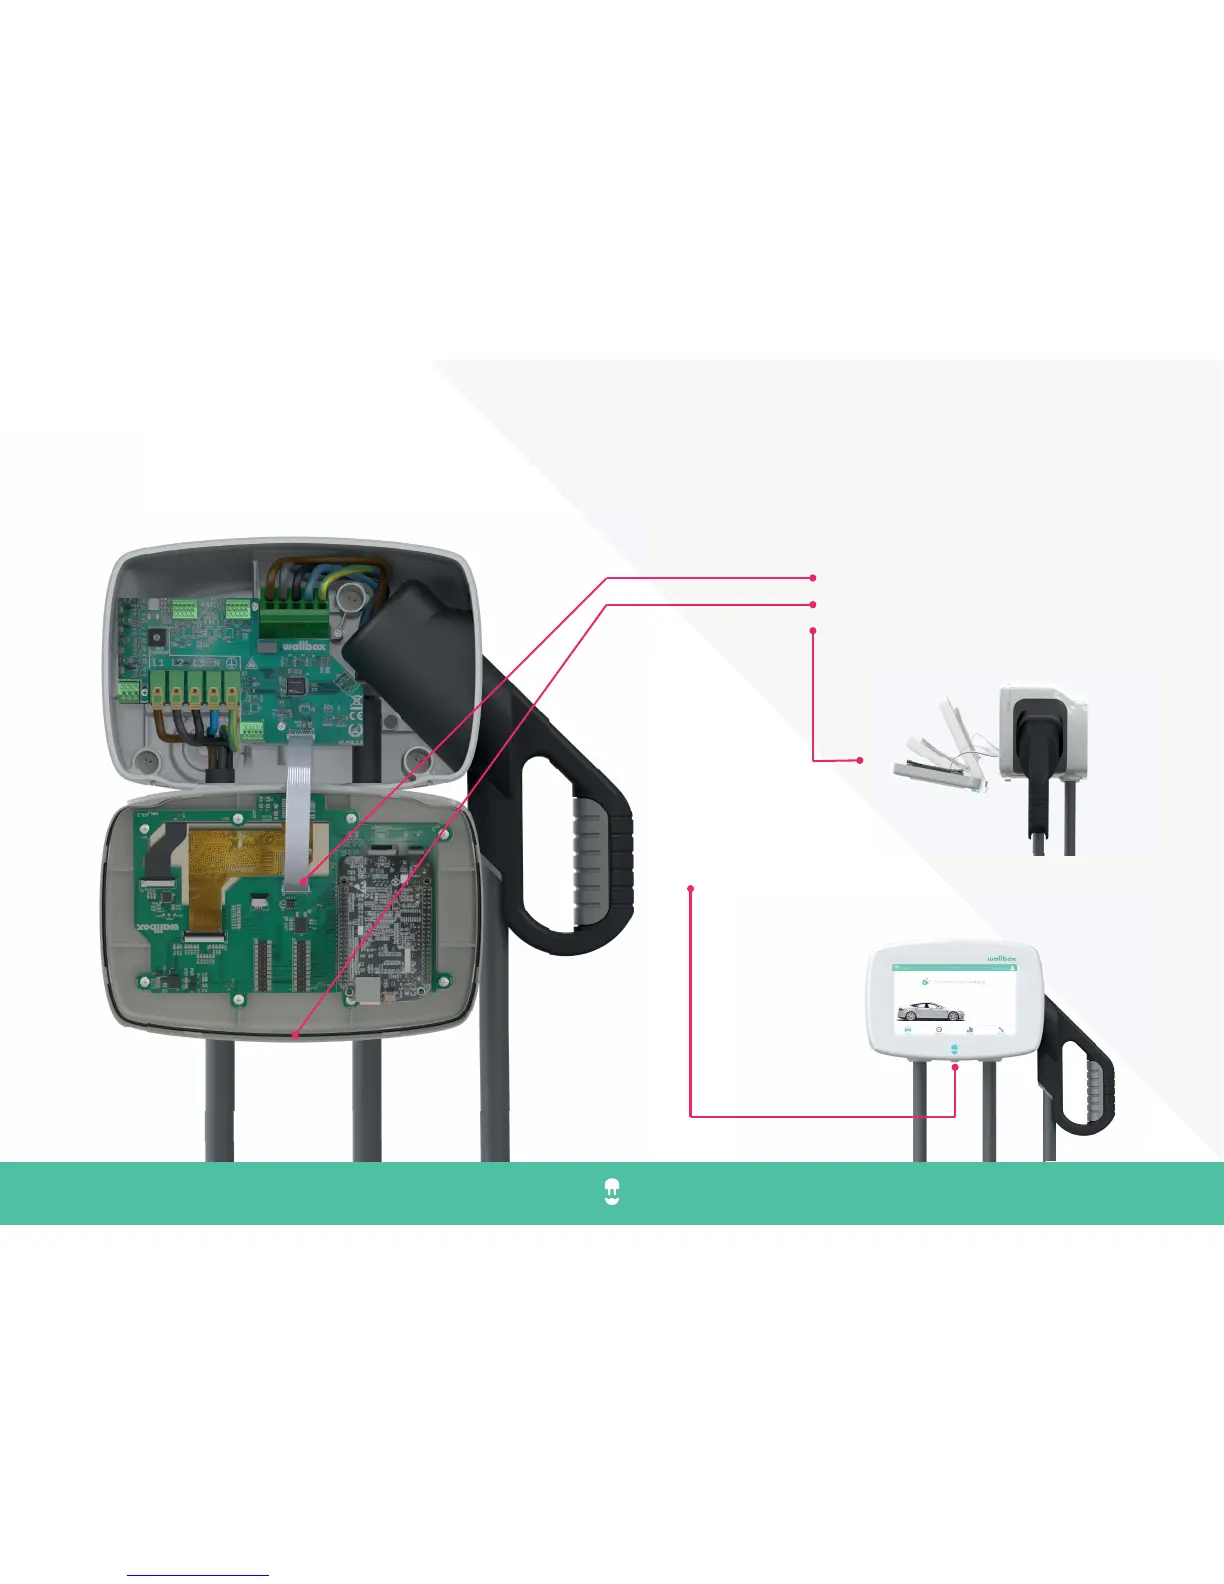
Step 6: reconnect the cover communication cable, and close the front cover taking special care of the fitting and that the O-ring sealing remains in
place.
Cover communication cable
O-ring sealing
Cover close representation
Step 7: Secure the Wallbox Commander cover by screwing the
Torx provided as shown in the picture below.