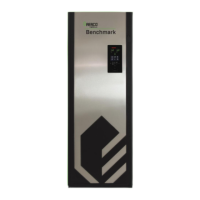
When optional accessories are ordered, they may be packed within the unit’s shipping container,
factory installed on the unit, or packed and shipped in a separate container. Any standard or
optional accessories shipped loose should be identified and stored in a safe place until ready for
installation or use.
2.4 SITE PREPARATION
Ensure that the site selected for installation of the Benchmark Boiler includes access to:
• One of the following AC Input Power as specified in the Benchmark Pre-Installation
Electrical Power Guide (TAG-0048, GF-2060):
o 208 VAC, Three-Phase, 60 Hz @ 30 Amps
o 460 VAC, Three-Phase, 60 Hz @ 20 Amps
o 575 VAC, Three-Phase, 60 Hz @ 20 Amps
• Access to a natural gas and/or propane gas supply that conforms to the pressures
specified in the Benchmark Pre-Installation Gas Supply Guide (TAG-0047, GF-2030):
o NATURAL GAS – standard pressure models: Access to a 2 inch (5.08 cm) line
with a minimum pressure of 14 inches W.C. (3.49 kPa) with the unit at full fire
o NATURAL GAS – Low Gas Pressure (LGP) models: Access to a 3 inch (7.62 cm)
line with a minimum pressure of 4 inches W.C. (1.0 kPa) with the unit at full fire
o PROPANE GAS (Dual Fuel and Propane only units): Access to a 1-1/2 inch (3.81
cm) line with a minimum pressure of 14 inches W.C. (3.49 kPa) with the unit at
full fire
• A level concrete housekeeping pad, as described below:
Benchmark 750/1000 units must be installed on a level 4 to 6 inch (10.2 to 15.2 cm) a concrete
“housekeeping” pad. Benchmark 1500 – 6000 units must be installed on a level 4 to 8 inch
(10.2 to 20.3 cm) concrete housekeeping pad to ensure proper condensate drainage.
In addition, to ensure proper condensate drainage, you must ensure that the unit is positioned
such that the condensate assembly is not located over the housekeeping pad, as shown in
Figures 2-1a – 2-1d.
2.4.1 Installation Clearances
All Benchmark models are the same height, but vary in depth by model. The unit must be installed
with the prescribed clearances for service as shown in Figure 2-1a through 2-1d. The minimum
clearance dimensions, required by AERCO, are listed below for all models. However, if Local
Building Codes require additional clearances, these codes shall supersede AERCO’s
requirements.
The minimum acceptable clearances required are as follows:

 Loading...