CHAPTER 11 CLICK 120/121 131
devices. To remove a Click 120/121 from the DIN rail, insert a small screwdriver into the
notch at the upper back corner of the device and pull the screwdriver down to lever the
snap-on foot o the rail.
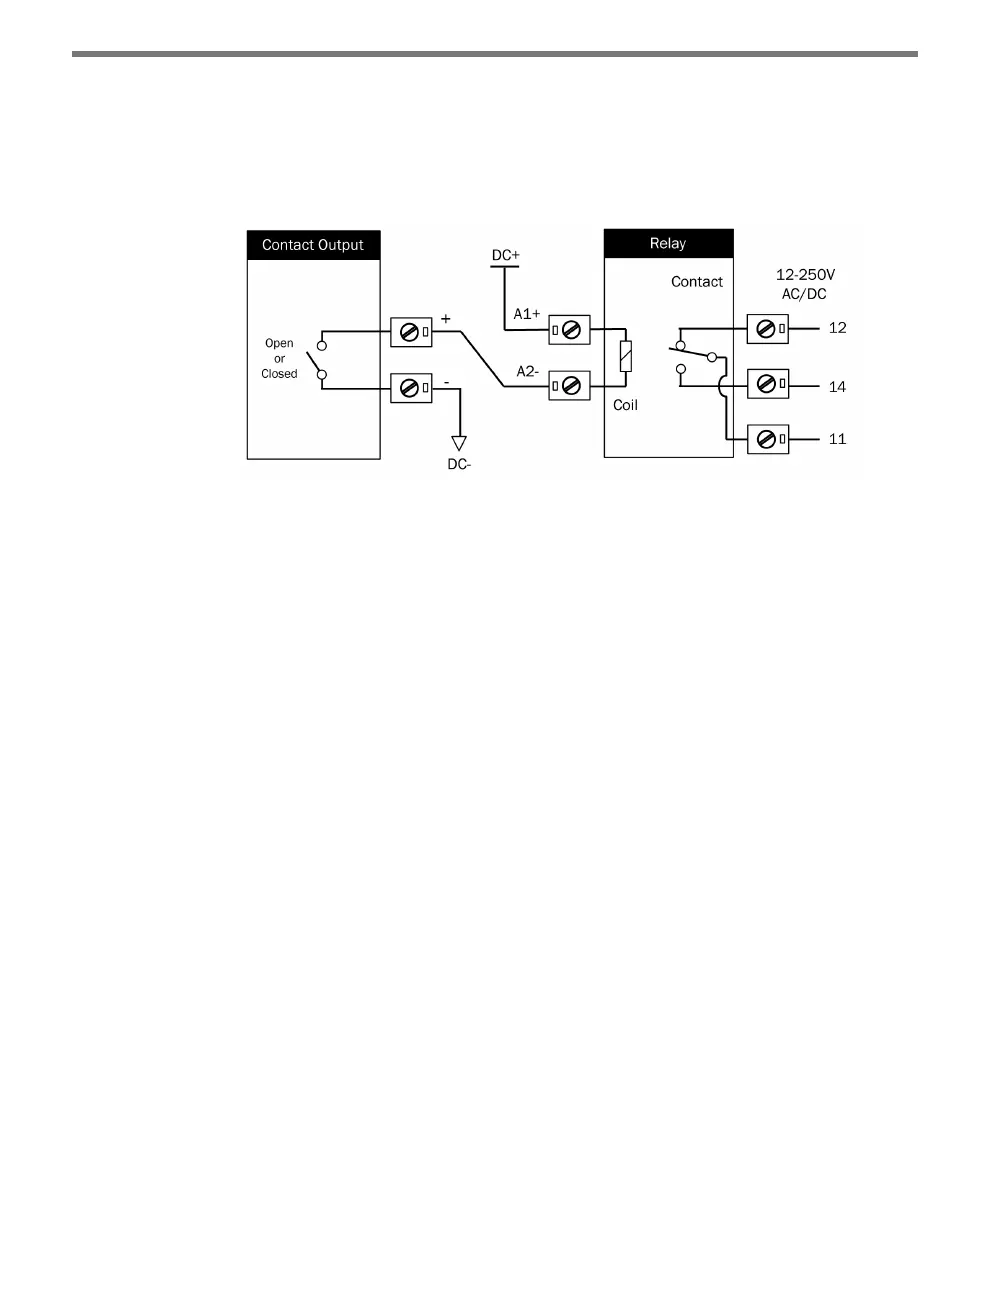
Follow the steps below to wire the relay device (see Figure 11.3):
Figure 11.3 – Wiring from a Contact Output to the Relay
1 Wire 24 VDC into the A1+ terminal on the coil side of the relay.
2 Wire from the A2– terminal on the coil side of the relay to the appropriate contact
closure terminal on the contact closure device.
3 Wire from the ground or common terminal on the contact closure device to a conve-
nient ground or common terminal elsewhere (for instance, on a power supply).
4 Wire power (12–250 V, either AC or DC) to the terminal marked 11 on the contact side
of the device. As this is the power that will run the load or loads, it needs to be the type
of current and the voltage that the loads use.
5 Wire your loads into the terminals marked 12 and 14:
If you are using one load and want it to turn on whenever there’s a current across the
contact closure device, wire it to 14.
If you are using one load and want it turn on whenever there is not a current across the
contact closure device, wire it to 12.
If you are using two loads and want the relay to switch back and forth between which
one is being powered, wire them into 12 and 14. Wire the load you want turned on
when there’s a current across the contact closure device to terminal 14.
Example: Click 120/121 to Trac Signal
Here is an example of how relays might be used to control a single trac light. Follow the
steps below to set the example up:
1 Mount three relays onto a DIN rail, one for the red light, one for the yellow and one
for the green.
2 Wire from the A1+ terminal on the coil side of each relay to 24 VDC.