CHAPTER 4 CLICK 104 69
Press and release Configuration parameter selected;
autobaud commences (will show
intermediate LED states); auto-
baud finishes and normal operation
resumes
Table 8.3 – Menu Operation Example
Inactivity of one minute on the mode switch will exit menu mode.
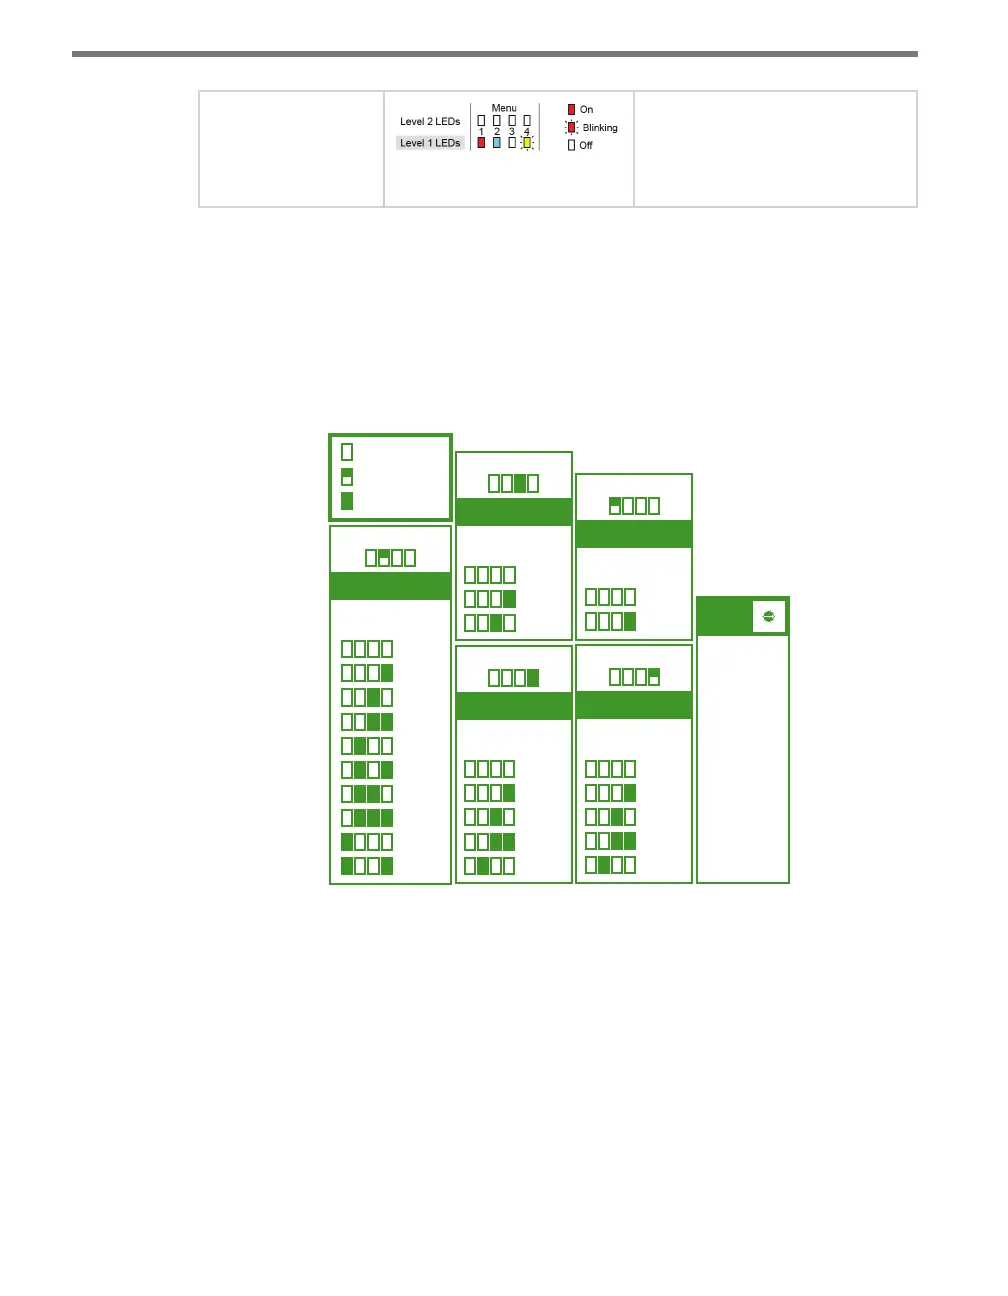
Front Panel Menu Options
e following gure documents the menu and conguration options available from the
front panel menu. is label is also printed on the side of the device.
Input Mapping
Menu LEDs
Cancel
1-4
5-8
9-12
13-16
17-20
21-24
25-28
29-32
33-36
1 2 3 4
R B G Y
Rotary
Switch
= SW0
= 1-4
= 5-8
= 9-12
= 13-16
= 17-20
= 21-24
= 25-28
= 29-32
= 33-36
1
2
3
4
5
6
7
8
9
Bus 1 Baud Rate
R B G Y
Menu LEDs
Cancel
9600
19200
38400
57600
1 2 3 4
Bus 2 Baud Rate
R B G Y
Menu LEDs
Cancel
9600
19200
38400
57600
1 2 3 4
Autobaud
R B G Y
Menu LEDs
Cancel
Bus 1
Bus 2
1 2 3 4
Reset to Default
= LED O
= LED Flashing
= LED On
R B G Y
Menu LEDs
Cancel
Reset
1 2 3 4
PUSH and HOLD Mode Switch to
cycle through menus and options.
• PUSH and
RELEASE
Mode Switch
to make
selections.
• 1 minute of
inactivity exits
menu.
5
4
3
2
1
0
9
8
7
6
Figure 8.5 – Front Panel Menu Label
e menu options are displayed on the Level 1 LEDs (multicolored) and the conguration
parameters are displayed on the Level 2 LEDs (all red).
Channel Input Map
e rst conguration parameter that comes up when you’re cycling through the front
panel menu is the channel input map. To select this parameter, release the push-button
when the blue LED ashes.