Do you have a question about the Weber E-415 and is the answer not in the manual?
Defines DANGER, WARNING, CAUTION and outlines general use safety rules.
Covers actions for gas smells and warnings about flammable liquids.
Discusses installation codes, electrical grounding, and assembly requirements.
Provides critical safety rules for grill operation, clearance, and hot surfaces.
Step-by-step guide for igniting the main burners using the electronic ignition system.
Provides instructions on how to properly turn off all burners and the gas supply.
Covers cleaning the lid, cooking grates, and FLAVORIZER BARS.
Diagnoses issues when burners fail to ignite with electronic ignition.
Procedure to check for gas flow using a match when ignition fails.
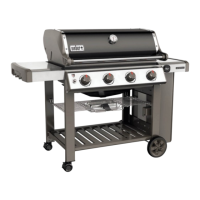
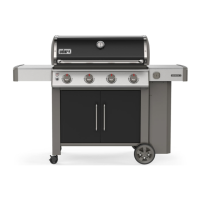
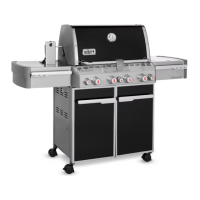
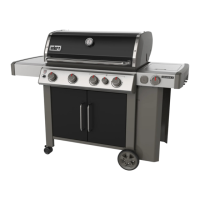
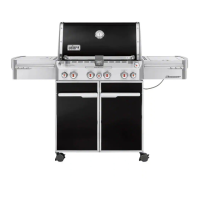
This document describes the GENESIS and SMART series of LP gas grills, including their functions, usage, and maintenance.
The primary function of these devices is outdoor cooking using liquid propane gas. They are designed for grilling various foods, with specific models featuring a "sear zone" for high-temperature searing. The grills are intended for outdoor use only, in well-ventilated areas, and are not to be installed in or on recreational vehicles or boats. They are also not designed for use with charcoal or lava rock.
The grills are fueled by a liquid propane (LP) tank. Users must ensure the tank is approximately 18.5 inches high and 12.5 inches in diameter, with a marked 20-pound LP capacity. The tank must be constructed and marked in accordance with U.S. Department of Transportation (D.O.T.) or Canadian Standard for Cylinders, Spheres and Tubes for Transportation of Dangerous Goods and Commission (CAN/CSA-B339) specifications. It must also be equipped with a listed Overfilling Prevention Device (OPD) and a Type 1 (CGA 791) tank connection. The tank must have a D.O.T. certification and a testing date within five years of current use.
When installing the LP tank, it is hung onto a hook inside the cabinet. The tank valve must be fully closed and inspected for damage or debris before connection. The regulator coupling is then screwed onto the tank valve clockwise and hand-tightened only. Using a wrench can damage the coupling and cause leaks. For models with a tank scale, a metal hose retention clip is secured into a slot on the underside of the scale, and the tank lock is used to secure the tank.
After LP tank installation, a leak check is crucial. This involves wetting fittings (where the regulator connects to the tank, where the gas hose connects to the bulkhead, and where the bulkhead connects to the corrugated gas line) with a soap and water solution. Bubbles indicate a leak. If a leak is found at the cylinder, the gas must be turned off, the tank disconnected, and returned to the retailer. If at the regulator, the gas must be turned off, and customer service contacted. If at other fittings, the fitting should be re-tightened and rechecked. If a leak persists, the gas must be turned off, and customer service contacted. No flames or sparks should be present during a leak check.
To ignite the grill, the lid must be open, and all burner control knobs must be in the "off" position. The LP tank valve is then slowly turned counterclockwise and allowed 60 seconds for gas to flow. Starting with the leftmost burner, the control knob is pushed in and turned counterclockwise to the "start/high" position. The electronic ignition button is then pushed and held, producing a ticking sound. The burner's flame should be visible through the cooking grates and the cutout in the FLAVORIZER bar. If a burner does not ignite within four seconds, its control knob should be turned to "off," and five minutes allowed for accumulated gas to dissipate before reattempting.
For models with a side burner, the side burner lid must be open, and its control knob, along with all main burner control knobs, must be in the "off" position. The LP tank valve is slowly turned counterclockwise and allowed 60 seconds for gas to flow. The side burner control knob is pushed in and turned counterclockwise to the "start/high" position. The electronic ignition button is pushed and held. If the side burner does not ignite within four seconds, its control knob should be turned to "off," and five minutes allowed for accumulated gas to dissipate before reattempting.
Available on select models, the sear zone is used for high-temperature searing. All burners, including the sear burner, are ignited and preheated with the lid closed on the "start/high" position for 15 minutes. After preheating, the sear burner and adjacent burner control knobs remain on "start/high," while other burners can be turned to "off" or "low." Meat is placed directly over the sear zone and seared for one to four minutes per side, depending on the type and thickness. The lid should remain closed during cooking to achieve maximum heat and avoid flare-ups.
To extinguish any burner, its control knob is pushed in and turned clockwise all the way to the "off" position. The gas supply from the LP tank is then turned off.
Preheating is essential for successful grilling. It prevents food from sticking, ensures proper searing, and burns off residue from previous meals. The grill lid is opened, burners are ignited, the lid is closed, and the grill is preheated with all burners on the "start/high" position for 15 minutes.
Users are warned against storing or using flammable liquids or vapors near the grill, or storing an unconnected LP cylinder in its vicinity. The grill is not to be used within 24 inches of combustible materials. The cooking area must be clear of flammable vapors and liquids. Grill covers or flammable items should not be placed on or under the grill while it is in operation or hot. In case of a grease fire, all burners should be turned off, and the lid left closed until the fire is out. Accessible parts of the grill can become very hot, and young children should be kept away. The use of alcohol, prescription drugs, non-prescription drugs, or illegal drugs may impair the user's ability to safely operate the grill. The grill should never be left unattended during pre-heating or use. The appliance should not be moved during use. Electrical supply cords and fuel supply hoses must be kept away from heated surfaces.
Regular cleaning is necessary to maintain grill performance. Low temperatures, uneven heat, and food sticking are signs that cleaning is overdue. A thorough cleaning is recommended at least twice a year, with more frequent cleaning for consistent use.
"Paint-like" flakes on the inside of the lid are carbonized grease and smoke deposits that peel off over time. These deposits are non-toxic but can fall onto food. To clean, brush the carbonized grease from the inside of the lid with a stainless steel bristle grill brush. Wiping the inside of the lid with a paper towel after grilling while it is still warm can minimize build-up.
Cleaned grates prevent food from sticking. Brush debris off the cooking grates with a stainless steel bristle grill brush. The grates should then be removed and set aside.
FLAVORIZER BARS catch drippings, which smoke and sizzle, adding flavor to food. They also funnel unvaporized drippings away from the burners, preventing flare-ups and protecting burners from clogging. Scrape the FLAVORIZER BARS with a plastic scraper. If necessary, brush them with a stainless steel bristle grill brush. The FLAVORIZER BARS are then removed and set aside.
Optimal burner performance relies on clean ports (small raised openings along the length of the burners) and spider/insect screens on the ends of the burner. Clean the outside of the burners by brushing across the top of the burner ports with a clean stainless steel bristle grill brush, being careful not to damage the ignition electrode. Clean the spider/insect screens on the ends of the burners (located on the underside of the control panel where they meet the valves) using a soft bristle brush.
Heat deflectors, located under the burners, distribute heat evenly. Keeping them clean enhances cooking performance. Scrape the heat deflectors with a plastic scraper. If necessary, brush them with a stainless steel bristle grill brush. The heat deflectors are then removed and set aside.
Inspect the cookbox for grease accumulation or leftover food particles, as excessive build-up can cause a fire. Use a plastic scraper to scrape debris off the sides and bottom of the grill into the opening, which leads to the slide-out grease tray.
The grease management system, consisting of an angled slide-out grease tray and a catch pan, is designed for easy removal, cleaning, and replacement. This is an essential step before each grilling session.
For stainless steel surfaces, use a non-toxic, non-abrasive stainless steel cleaner or polish with a microfiber cloth, cleaning in the direction of the grain. Avoid abrasive pastes, which can scratch the surface or change its color. For painted, porcelain-enameled, and plastic components, use warm soapy water and paper towels or a cloth, rinsing and drying thoroughly. For grills in harsh environments (acid rain, pool chemicals, salt water), clean the outside more often with warm soapy water, rinse, and dry thoroughly. Weekly application of a stainless steel cleaner may also be beneficial.
The grill should be turned off and allowed to cool before cleaning. Gloves are recommended when handling FLAVORIZER BARS due to rough surfaces. FLAVORIZER BARS or cooking grates should not be cleaned in a sink, dishwasher, or self-cleaning oven. When cleaning burners, a brush previously used for cooking grates should not be used, and sharp objects should not be inserted into burner port holes. Grill components should not be placed on side tables to avoid scratching paint or stainless steel surfaces. Abrasive stainless steel polishes or paints, cleaners containing acid, mineral spirits or xylene, oven cleaner, abrasive cleansers (kitchen cleansers), or abrasive cleaning pads should not be used to clean the grill. Any repairs to gas-carrying, gas-burning, ignition, or structural components should only be performed by contacting Weber-Stephen Products LLC Customer Service. The burner tube openings must be properly positioned over the valve orifices.
| Type | Gas Grill |
|---|---|
| Model | E-415 |
| Fuel Type | Liquid Propane |
| Burners | 4 |
| Cooking Area | 610 square inches |
| Dimensions | 44.5 x 48 x 29 inches |
| Weight | 112 lbs |
| Warranty | 10 years |
| BTU Output | 48, 000 BTU |
| Ignition | Electronic |
| Grill Material | Porcelain-enameled cast iron |