27
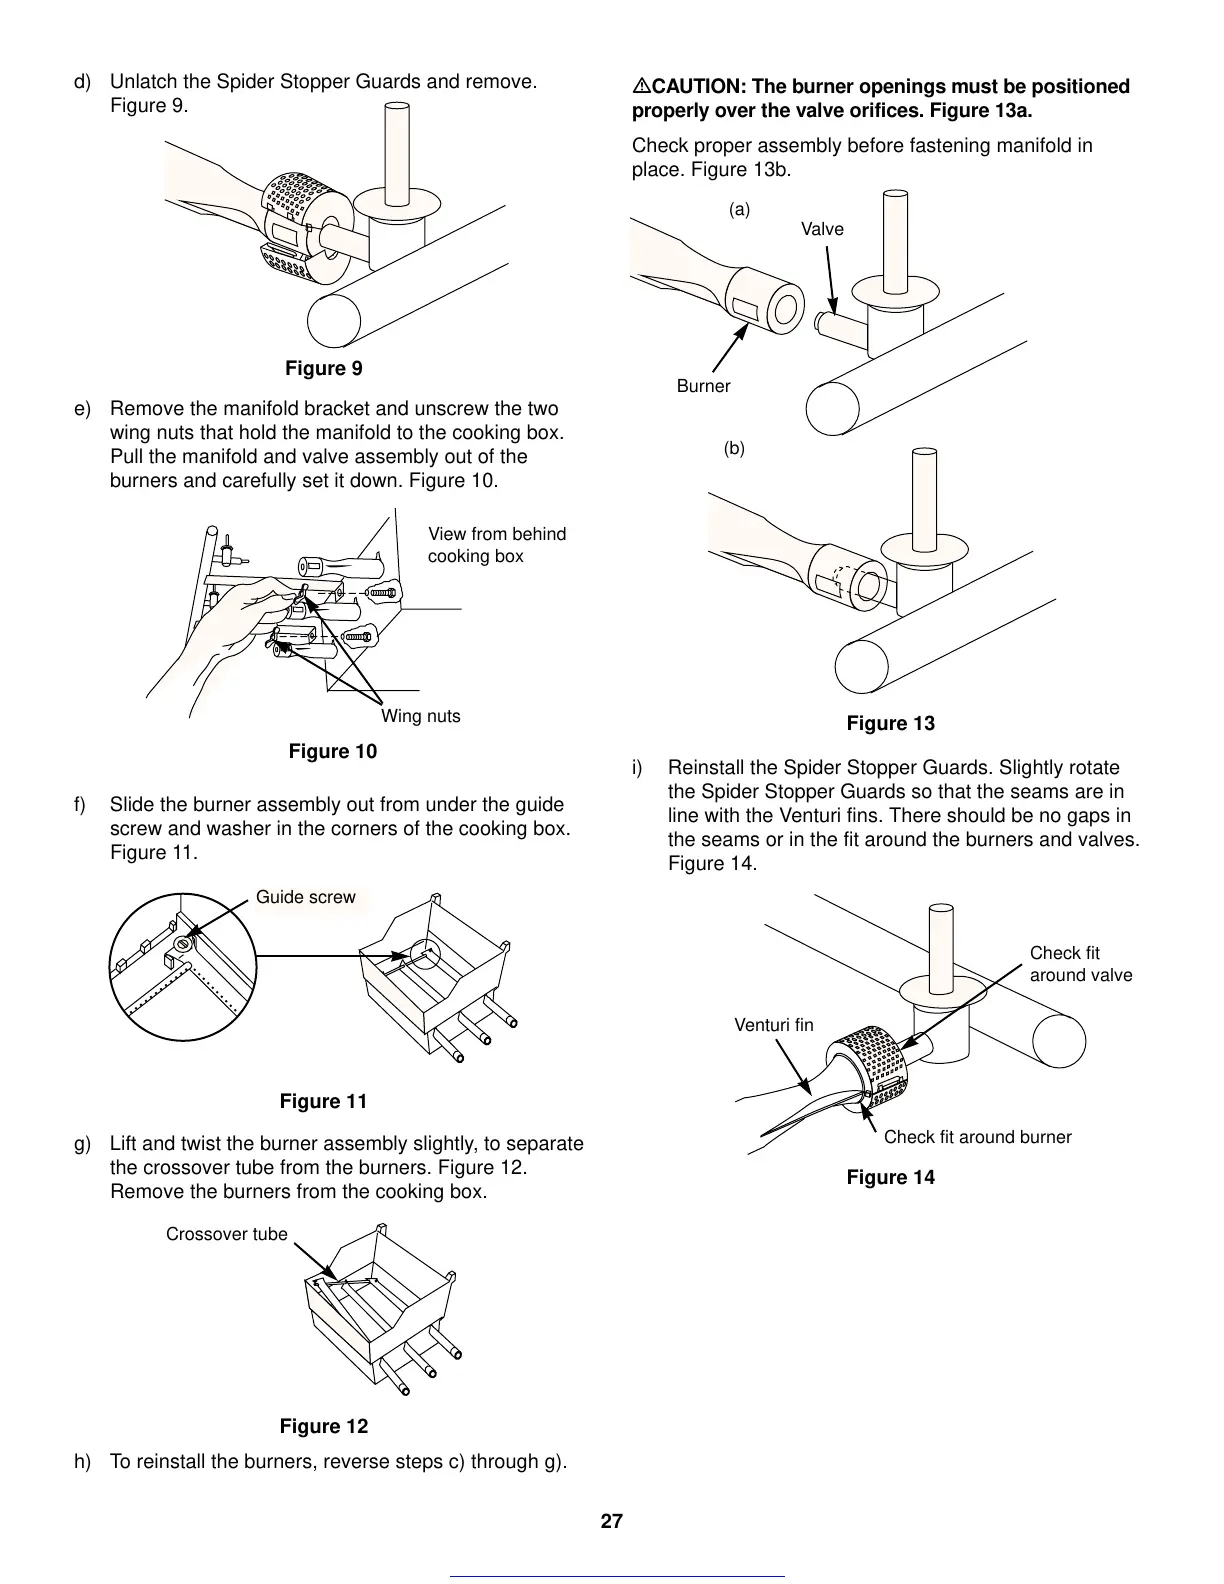
e) Remove the manifold bracket and unscrew the two
wing nuts that hold the manifold to the cooking box.
Pull the manifold and valve assembly out of the
burners and carefully set it down. Figure 10.
View from behind
cooking box
Wing nuts
Figure 10
Guide screw
Figure 11
Crossover tube
Figure 12
i) Reinstall the Spider Stopper Guards. Slightly rotate
the Spider Stopper Guards so that the seams are in
line with the Venturi fins. There should be no gaps in
the seams or in the fit around the burners and valves.
Figure 14.
Venturi fin
Figure 14
Check fit
around valve
Check fit around burner
Figure 9
d) Unlatch the Spider Stopper Guards and remove.
Figure 9.
f) Slide the burner assembly out from under the guide
screw and washer in the corners of the cooking box.
Figure 11.
g) Lift and twist the burner assembly slightly, to separate
the crossover tube from the burners. Figure 12.
Remove the burners from the cooking box.
h) To reinstall the burners, reverse steps c) through g).
CAUTION: The burner openings must be positioned
properly over the valve orifices. Figure 13a.
Check proper assembly before fastening manifold in
place. Figure 13b.
Figure 13
Valve
Burner
(a)
(b)
 Loading...