12
Figure 3
(a)
Tab on the inside
of frame tube
Figure 4
Weber nameplate facing out
Step 3
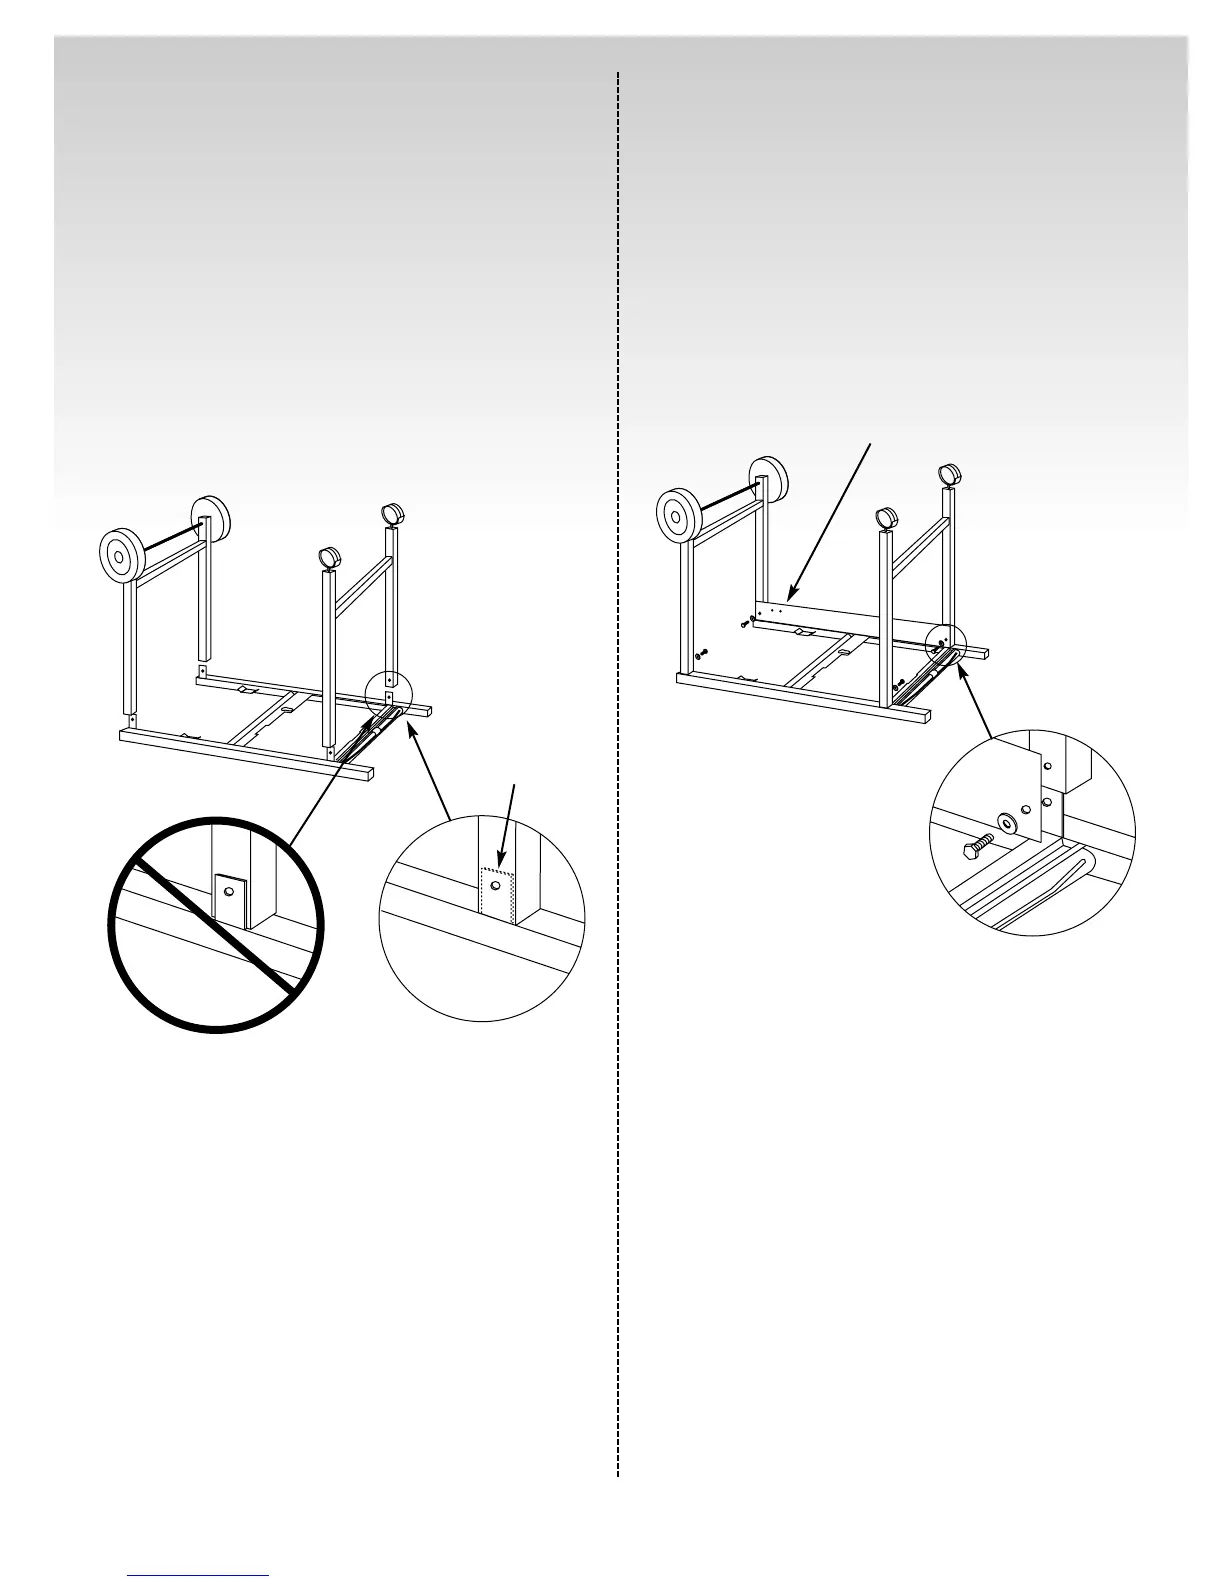
Assemble the frame
You will need: top frame assembly, wheel frame
assembly and caster frame assembly.
Note - Work on soft surface (grass, or carton inserts) to
protect the finish during frame assembly.
Set the top frame on the ground so the leg tabs point up.
Fit the wheel frame assembly onto the leg tabs at the
open end of the top frame. Figure 3.
Fit the caster frame assembly onto the leg tabs at the
other end of the top frame. Figure 3.
The tabs must be on the inside of the frame tubes when
the joints are closed. Figure 3 (a).
Step 4
Continue frame assembly
You will need: frame assembly, front panel, four 1/2 inch
bolts, four nylon washers and a 7/16 inch open-end or an
adjustable wrench.
Place front panel along inside edge of frame assembly
with Weber logo on the side closest to the wheel
frame and facing out. Slip washers on bolts, insert
bolts through the front panel and screw into the frame
assembly. Figure 4.
Add the remaining bolts and washers to the other side of
the frame and tighten. Figure 4.
 Loading...