11
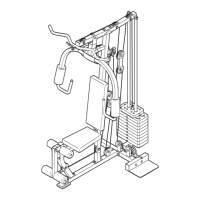
20. Wrap the High Cable (45) under a 90mm Pulley
(38). Attach the Pulley and a pair of Pulley
C
overs (44) to the second set of holes from the
top of the two Pulley Plates (36) with an M10 x
5
3mm Bolt (61) and an M10 Nylon Locknut (71).
Make sure that the small tabs on the Pulley
Covers are on top.
44
38
45
Small
Tabs
36
3
6
61
71
44
20
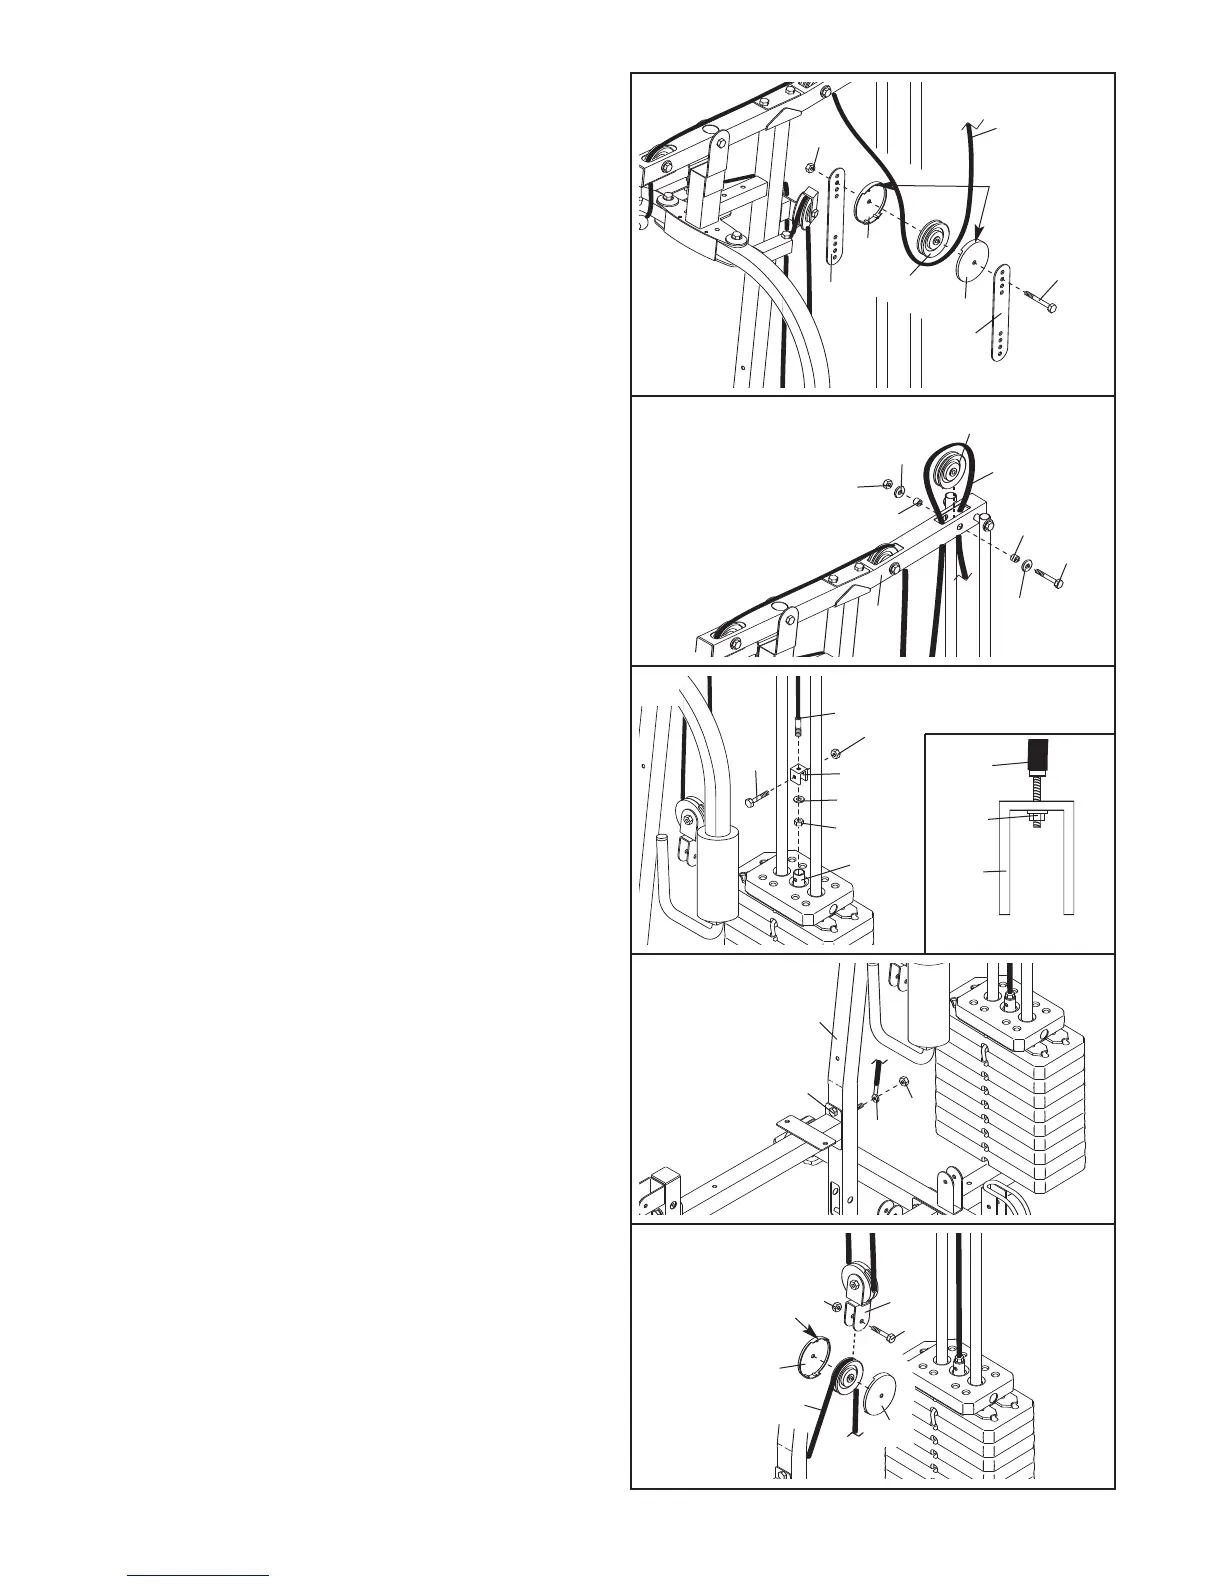
21. Wrap the High Cable (45) over a 90mm Pulley
(38). Attach the Pulley inside the Top Frame (8)
with an M10 x 68mm Bolt (59), two M10 Washers
(26), two 13mm Spacers (34), and an M10 Nylon
Locknut (71).
38
59
45
34
34
8
26
26
71
21
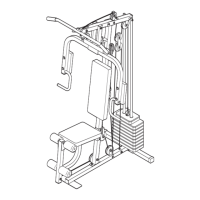
22. Attach the High Cable (45) to the “U”-bracket (77)
with an M8 Washer (62), and an M8 Nylon
Locknut (70).
Do not completely tighten the
Locknut; it should be tightened so that only
two threads of the Cable show past the
Locknut, as shown in the inset drawing.
Attach the “U”-bracket (77) to the Weight Tube
(20) with an M8 x 43mm Bolt (56) and an M8
Nylon Locknut (70). Do not overtighten the
Locknut; the Weight Tube must be able to
pivot easily.
23. Locate the Short Cable (83). Remove the M10
Nylon Locknut (71) from the indicated M10 x
77mm Bolt (60). Attach the Cable to the Bolt with
the Locknut.
45
45
20
56
70
70
70
62
77
77
22
6
83
60
71
23
44
44
37
71
83
61
24
Large Tab
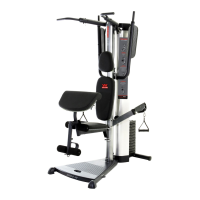
24.
Wrap the Short Cable (83) over a 90mm Pulley
(38). Attach the Pulley and a pair of Pulley
Covers (44) to the Double “U”-bracket (37) with
an M10 x 53mm Bolt (61) and an M10 Nylon
Locknut (71). Make sure that the large tabs on
the Pulley Covers are on top.