9
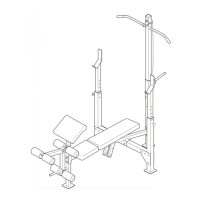
8. Attach an Arm Pad (20) to the Left Butterly Arm
(7) with two M6 x 58mm Screws (65) and two
M6 Washers (73).
Apply grease to the post on top of the Left Arm
(7). Orient a 25mm x 68mm Bushing (28) with
the lip in the position shown, and slide the
Bushing onto the post.
Repeat this step with the Right Butterfly Arm
(6).
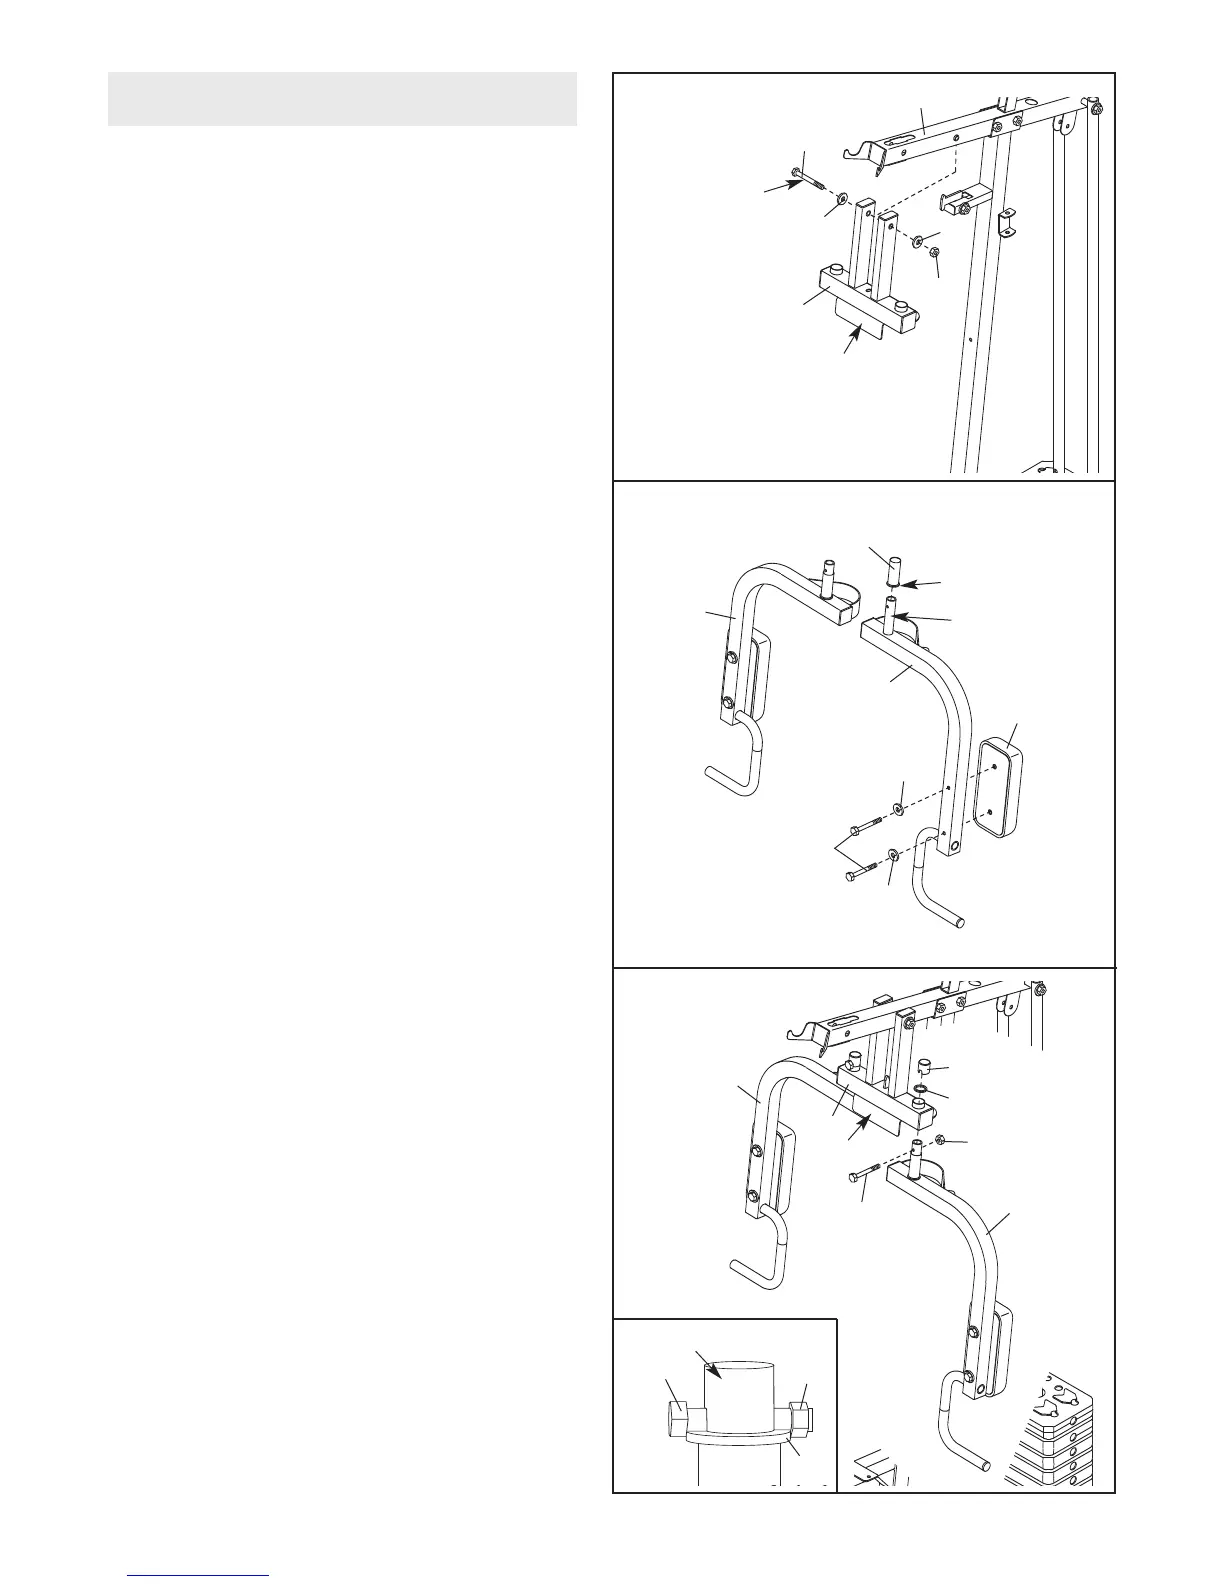
7. Apply grease to an M10 x 125mm Bolt (64).
Orient the Press Frame (5) with the bracket on
the side shown. Attach the Press Frame to the
Top Frame (4) with the Bolt, two M10 Washers
(
70), and an M10 Nylon Locknut (68). D
o not
overtighten the Nylon Locknut; the Press
Frame must pivot easily.
64
70
70
68
4
5
8
20
28
Lip
7
65
6
73
73
Grease
Bracket
ARM ASSEMBLY
G
rease
7
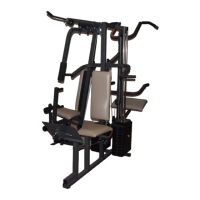
9. Insert the post on the Left Butterfly Arm (7) into
the left hole in the Press Frame (5). Make sure
that the Left
Arm is behind the indicated
bracket on the Press Frame.
Slide a 25mm Washer (29) onto the post on the
Left Arm (7). Attach an M6 x 43mm Bolt (61) to
the post with an M6 Nylon Locknut (72). Make
sure that the Nylon Locknut and the head of
the Bolt are overlapping the edge of the
W
asher
, as shown in the inset drawing.
Press a 25mm Round Outer Cap (27) onto the
post on the Left Arm (7).
Repeat this step with the Right
Arm (6).
27
29
72
7
6
5
61
29
61
72
Post
Bracket
9