13
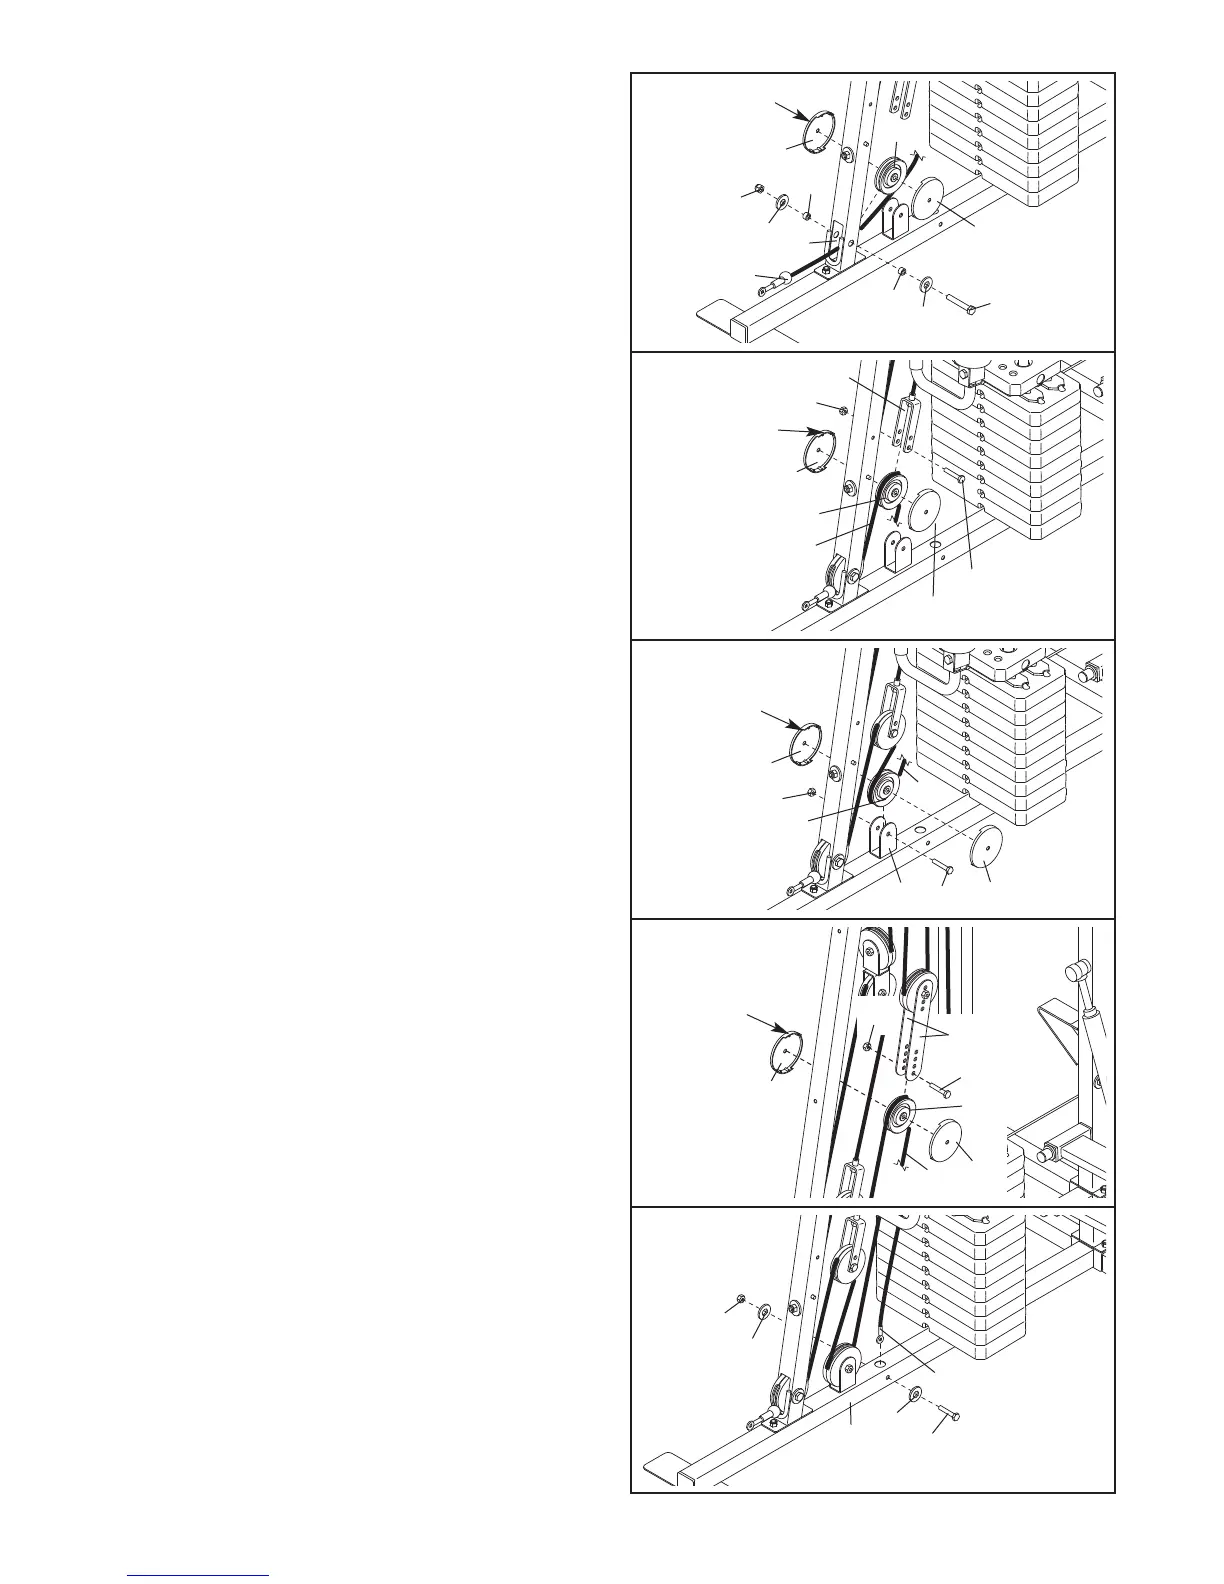
26. Locate the Low Cable (56). Route the Cable
through the Front Upright (4) and under a 90mm
P
ulley (46). Attach the Pulley and two Pulley
Covers (49) inside the Upright with an M10 x
6
8mm Bolt (87), two M10 Washers (71), two
10mm Spacers (45), and an M10 Nylon Locknut
(72). Make sure the large tabs on the Pulley
Covers are in the indicated position.
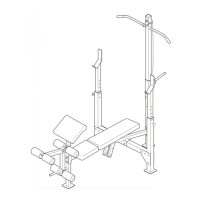
27. Route the Low Cable (56) over a 90mm Pulley
(46). Attach the Pulley and two Pulley Covers (49)
to the bottom set of holes in the “U”-bracket (53)
with an M10 x 53mm Bolt (88) and an M10 Nylon
Locknut (72).
Make sure the large tabs on the
Pulley Covers are on the top.
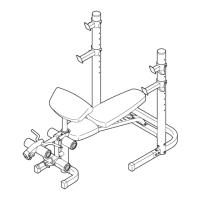
29. Route the Low Cable (56) over a 90mm Pulley
(46). Attach the Pulley and two Pulley Covers (49)
to the first set of holes from the bottom of the
Pulley Plates (50) with an M10 x 53mm Bolt (88)
and an M10 Nylon Locknut (72). Make sure the
large tabs on the Pulley Covers are on the
top.
30.
Attach the Low Cable (56) inside the Base (1)
with an M10 x 68mm Bolt (87), two M10 W
ashers
(71), and an M10 Nylon Locknut (72).
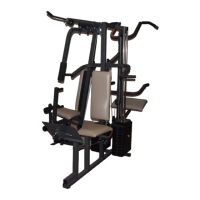
28. Wrap the Low Cable (56) under a 90mm Pulley
(46). Attach the Pulley and two Pulley Covers (49)
to the Base (1) with an M10 x 53mm Bolt (88)
and an M10 Nylon Locknut (72).
Make sure the
small tabs on the Pulley Covers are on the
top.
29
49
49
46
56
72
88
50
30
Large
Tab
Large
Tab
87
4
56
4
9
56
46
49
88
49
4
9
46
72
71
71
4
5
45
26
27
28
Large
Tab
Small
Tab
72
1
46
49
88
49
56
87
71
71
72
56
1
72
53