Do you have a question about the Weider E8001 and is the answer not in the manual?
Information needed for assembly: model number, part name, ordering number, and quantity.
Toll-free number and operating hours for product assistance and missing parts.
Emphasizes reading all safety precautions and instructions before use.
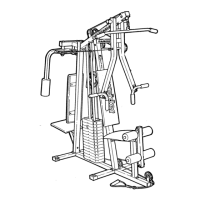
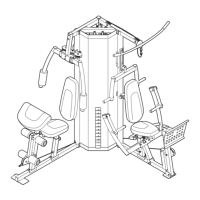
Lists parts with diagram numbers, names, quantities, and ordering numbers for assembly.
Unpack all parts, group similar items, and identify them against the parts list.
Tips for following steps, managing hardware, and handling warnings during assembly.
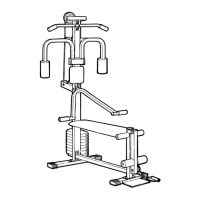
Connecting base frames and attaching uprights using specific bolts and nuts.
Securing the top frame to stepper and arm press uprights with specified hardware.
Stacking weight plates, inserting selector tube, and attaching guide rods.
Attaching mounting plates, seat, and backrest to the frame using bolts and screws.
Connecting leg extension tube, pad bars, and foam rollers with specified hardware.
Assembling the arm press frame with pivot tubes and bushings.
Attaching pec-deck arms to the frame using pins, bolts, and caps.
Installing handles, foam grips, and rollers onto the arm press assembly.
Routing the pec-deck cable through pulleys and securing with bolts and spacers.
Mounting pulley brackets to the arm press upright and pec-deck arms.
Installing pulleys, trapping cables, and securing with bolts and cable trap brackets.
Routing weight stack and leg extension cables through lower pulleys and trap brackets.
Attaching brace, pedals, resistance cylinder, and mounting brackets.
Instructions for attaching grips and connecting the lat bar for exercises.
Connecting the ankle strap to the base pulley for leg exercises.
Connecting the dumbbell handle to the base pulley for arm exercises.
Guidance on determining target heart rate zones for effective exercise.
Recommended components of a workout session including warm-up and cool-down.
Static stretches for warm-up and cool-down, focusing on major muscle groups.
Details on information required when ordering parts from customer service.
Recommendations to consult a physician and train with a partner for safety.
| Type | Home Gym |
|---|---|
| Dimensions | 66" L x 37" W x 76" H |
| Exercises | Chest Press, High Pulley, Low Pulley, Abdominal Pulley, Leg Extension, Preacher Curl |
| Resistance System | Weight Stack |
| Stations | 6 |
| Resistance Type | Weight Stack |
| Pulley System | High and Low Pulleys |