21
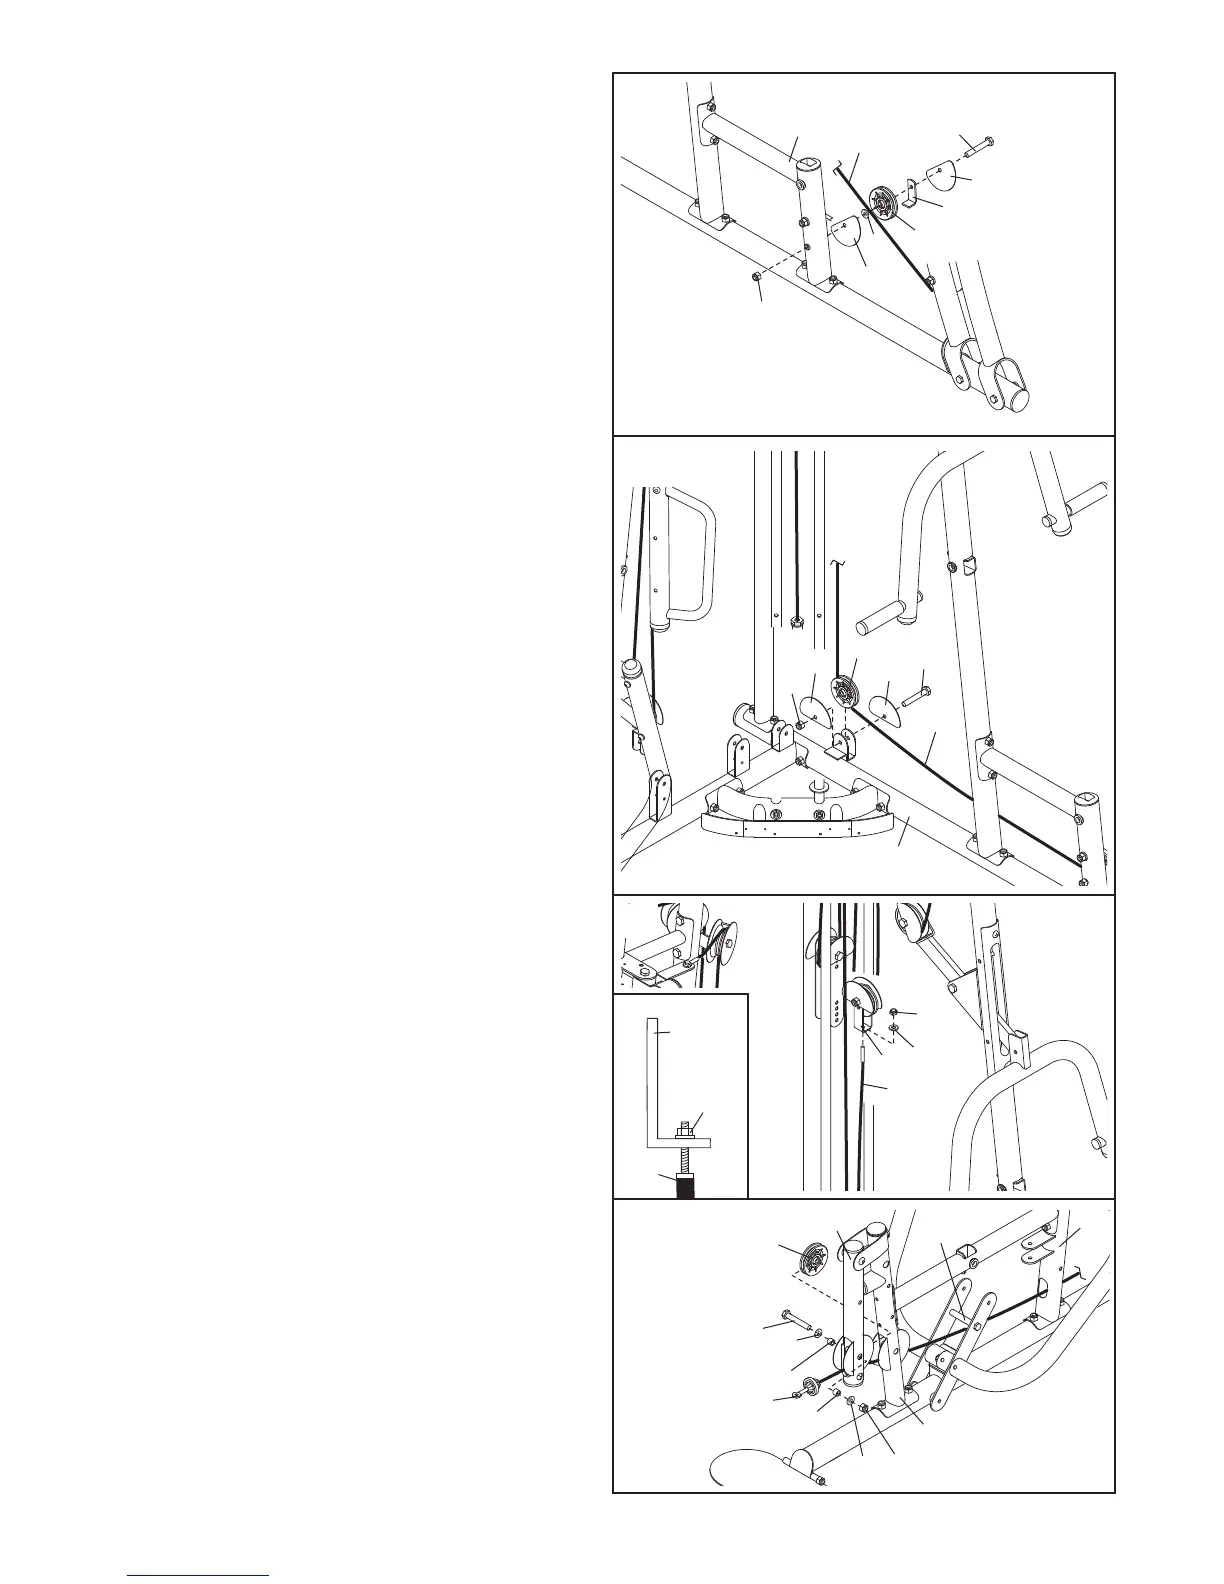
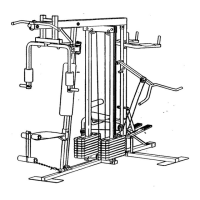
42. Route the Press Cable (133) under a 90mm
Pulley (48). Attach the Pulley and a Cable Trap
(
56) to the Left Frame (122) with an M10 x
116mm Bolt (107), two Half Guards (55), an
M
10 Washer (80), and an M10 Nylon Locknut
(77). Make sure the Cable Trap and the Half
Guards are oriented as shown.
43. Route the Press Cable (133) under a 90mm
Pulley (48). Attach the Pulley to the Left Base
(119) with an M10 x 50mm Bolt (97), two Half
Guards (55), and an M10 Nylon Locknut (77).
Make sure the Half Guards are oriented as
shown.
44. Attach the Press Cable (133) to the “U”-bracket
(151) with an M8 Washer (103) and an M8
Nylon Locknut (78).
See the inset drawing. Do
not completely tighten the Nylon Locknut; it
should be tightened so that only two
threads of the Cable show past the Nylon
Locknut.
42
43
119
133
77
55
55
48
97
122
133
107
77
55
5
5
80
48
5
6
44
78
103
151
133
45. Identify the Leg Lever Cable (51). Route the
Cable through the Leg Lever (12) and the Front
Leg (10), under the indicated bar, and through
the Right Upright (2).
Insert a 90mm Pulley (48) into the Leg Lever
(12) from the indicated direction.
Attach the
Pulley to the Leg Lever with an M10 x 68mm
Bolt (85), two M10 Washers (80), two 13mm
Steel Spacers (109), and an M10 Nylon
Locknut (77).
45
77
10
2
Bar
48
12
85
80
80
109
109
51
133
78
151