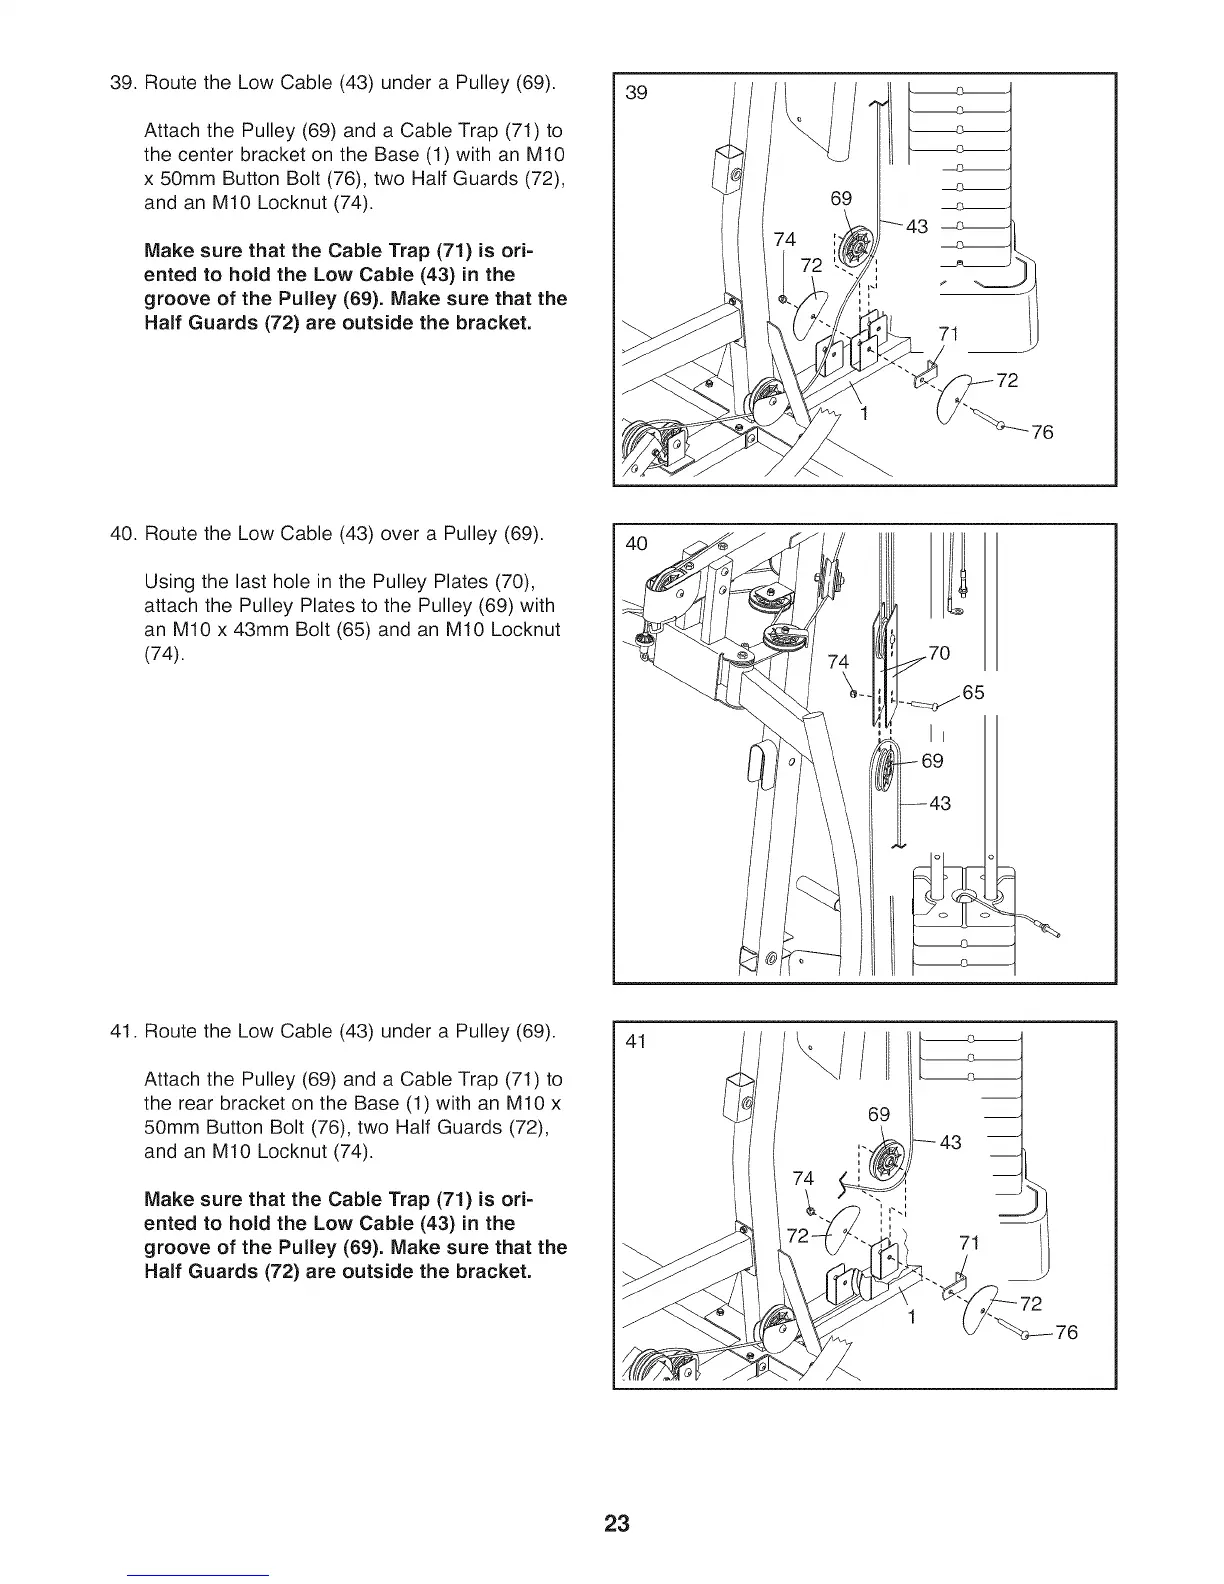
39. Route the Low Cable (43) under a Pulley (69).
Attach the Pulley (69) and a Cable Trap (71) to
the center bracket on the Base (1) with an M10
x 50mm Button Bolt (76), two Half Guards (72),
and an M10 Locknut (74).
Make sure that the Cable Trap (71) is ori-
ented to hold the Low Cable (43) in the
groove of the Pulley (69). Make sure that the
Half Guards (72) are outside the bracket.
39
69
1
71
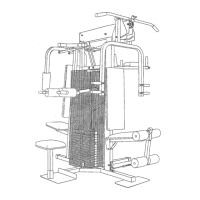
40. Route the Low Cable (43) over a Pulley (69).
Using the last hole in the Pulley Plates (70),
attach the Pulley Plates to the Pulley (69) with
an M10 x 43mm Bolt (65) and an M10 Locknut
(74).
9
43
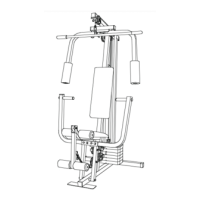
41. Route the Low Cable (43) under a Pulley (69).
Attach the Pulley (69) and a Cable Trap (71) to
the rear bracket on the Base (1) with an M10 x
50mm Button Bolt (76), two Half Guards (72),
and an M10 Locknut (74).
Make sure that the Cable Trap (71) is ori-
ented to hold the Low Cable (43) in the
groove of the Pulley (69). Make sure that the
Half Guards (72) are outside the bracket.
41
23