Stripping and crimping machine Crimpfix 2.5 M
08-09-19-DK-Operating Manual_gb.doc / 2008-09-19 13
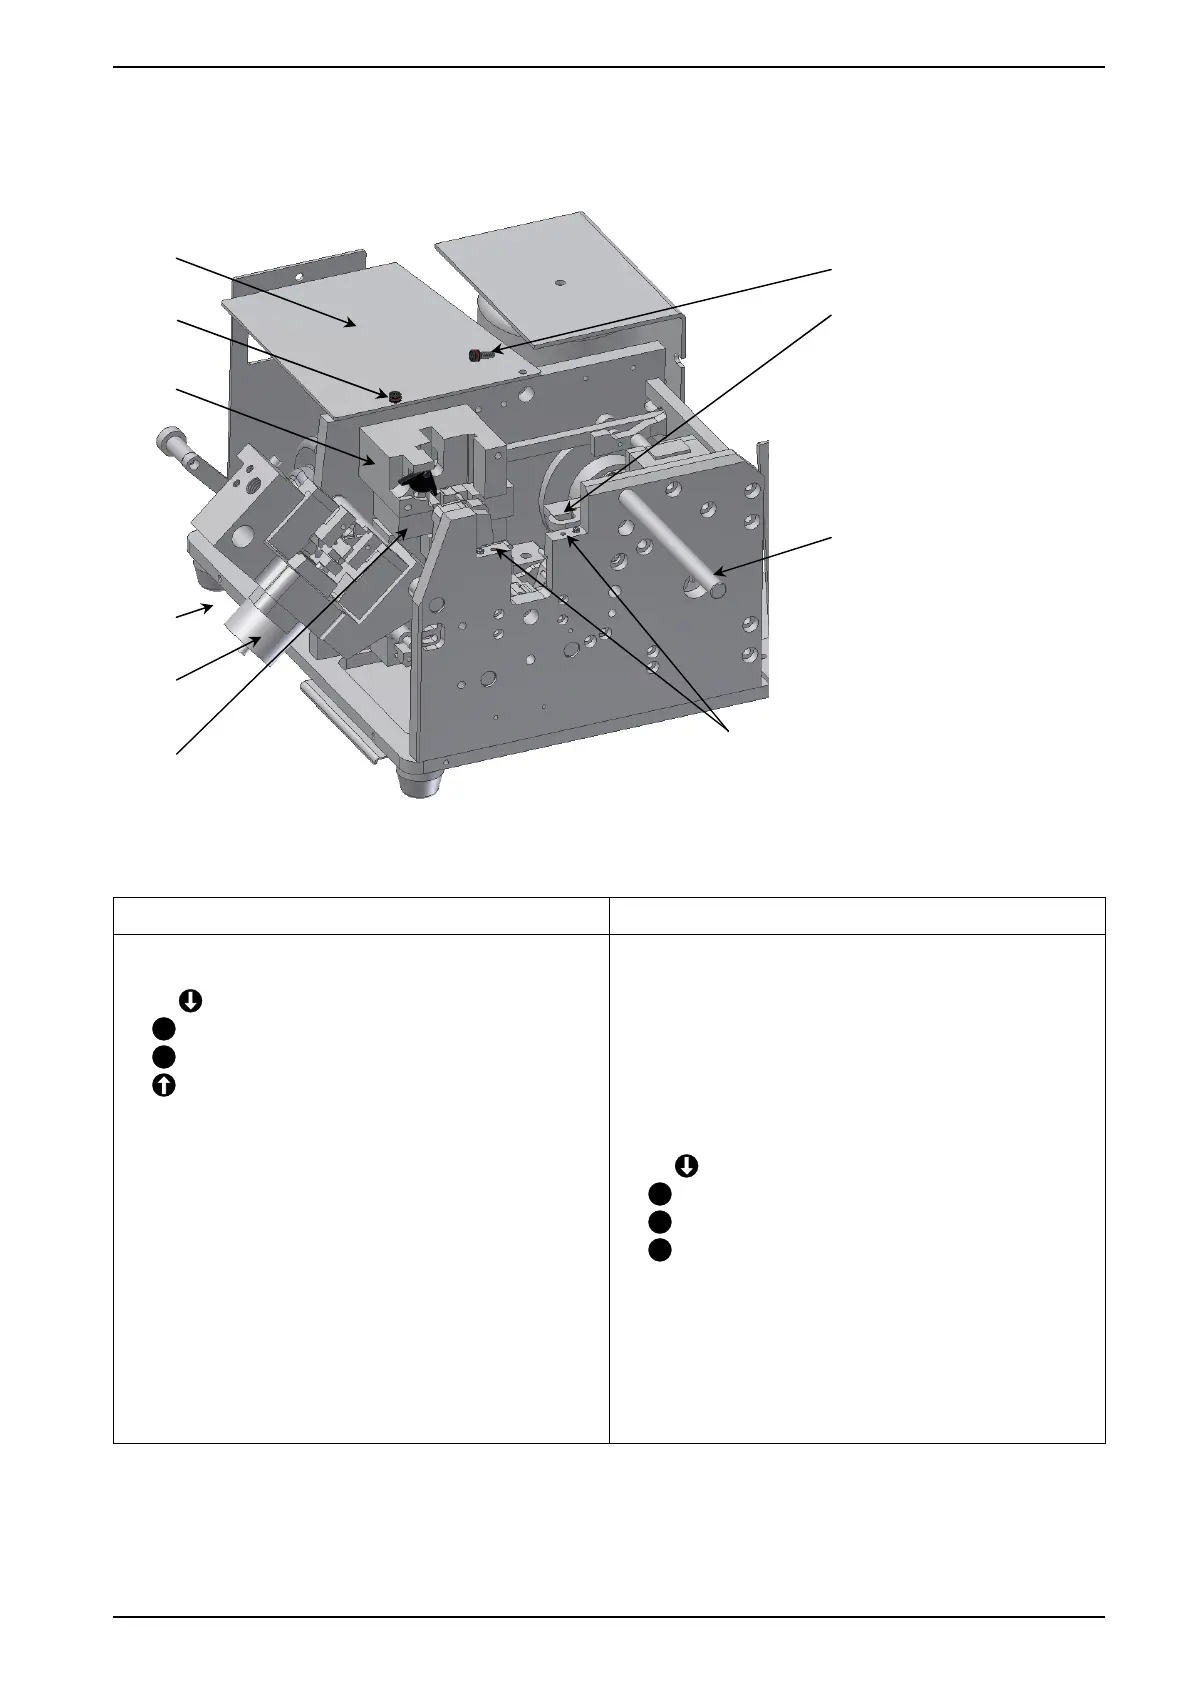
10.3 Striping blades changing position
Figure 8: Striping blades changing position
→ Striping blades changing position → Basic position
• Remove the magazine
• Unscrew and remove the feeding funnel
• 3x
M.Motor
•
E
5s Confirm
•
C
Starting position
•
Press until Motor stops.
• Switch off the machine and unplug it.
• Remove the stripping waste container
• Unscrew and remove the reel holder
• Unscrew and remove the flap
• Remove the cover. (Screws at the bottom plate
and at the line filter)
• Remove right, red marked screw (3).
• Push the shaft (1) to the front and remove it.
• Loosen the plug connection at the S-Motor (8).
• Remove the two fixing screws of the key
attachment (10) and take it out to the front with
the key.
• Turn the stripping slide (7) to the left.
• Take care that the pin at the bottom side of the
stripping slide (7) snaps into the groove (2) of the
driving lever when it swings back.
• Push the shaft (1) back and fix it with the right, red
marked screw (3). Take care that the screw (3)
snaps into the groove of the shaft(1).
• Assembly the cover, the reel holder and the flap.
• Put the stripping waste container in.
• Put the machine into operation again.
• 3x
M.Motor
•
E
5s Confirm
•
C
Start position
•
E
Quit menu and back to main menu.
• Put in the magazine again.
• Control the stripping quality.
2
1
3
5
9
1 Shaft
2 Groove – driving lever
3 Right screw, red marked
4 Protection plate
5 Left screw, red marked
6 Magazine holder
7 Stripping slide
8 S-Motor
9 Table guidance
10 Fixing screw – key
10
4
8
6
7



 To Next Page