Stripping and crimping machine Crimpfix 2.5 M
08-09-19-DK-Operating Manual_gb.doc / 2008-09-19 8
7. Operating instructions
7.1 Putting into operation
• Put in the stripping-waste container. Take care that the container is completely inserted.
• Connect the mains cable to the machine and to the electrical supply. (The data on the type plate must agree
with the mains supply.)
7.2 Starting the machine
• Actuate the main switch on the back side of the unit.
• The operating-menu appears on the display and the last selected program is loaded.
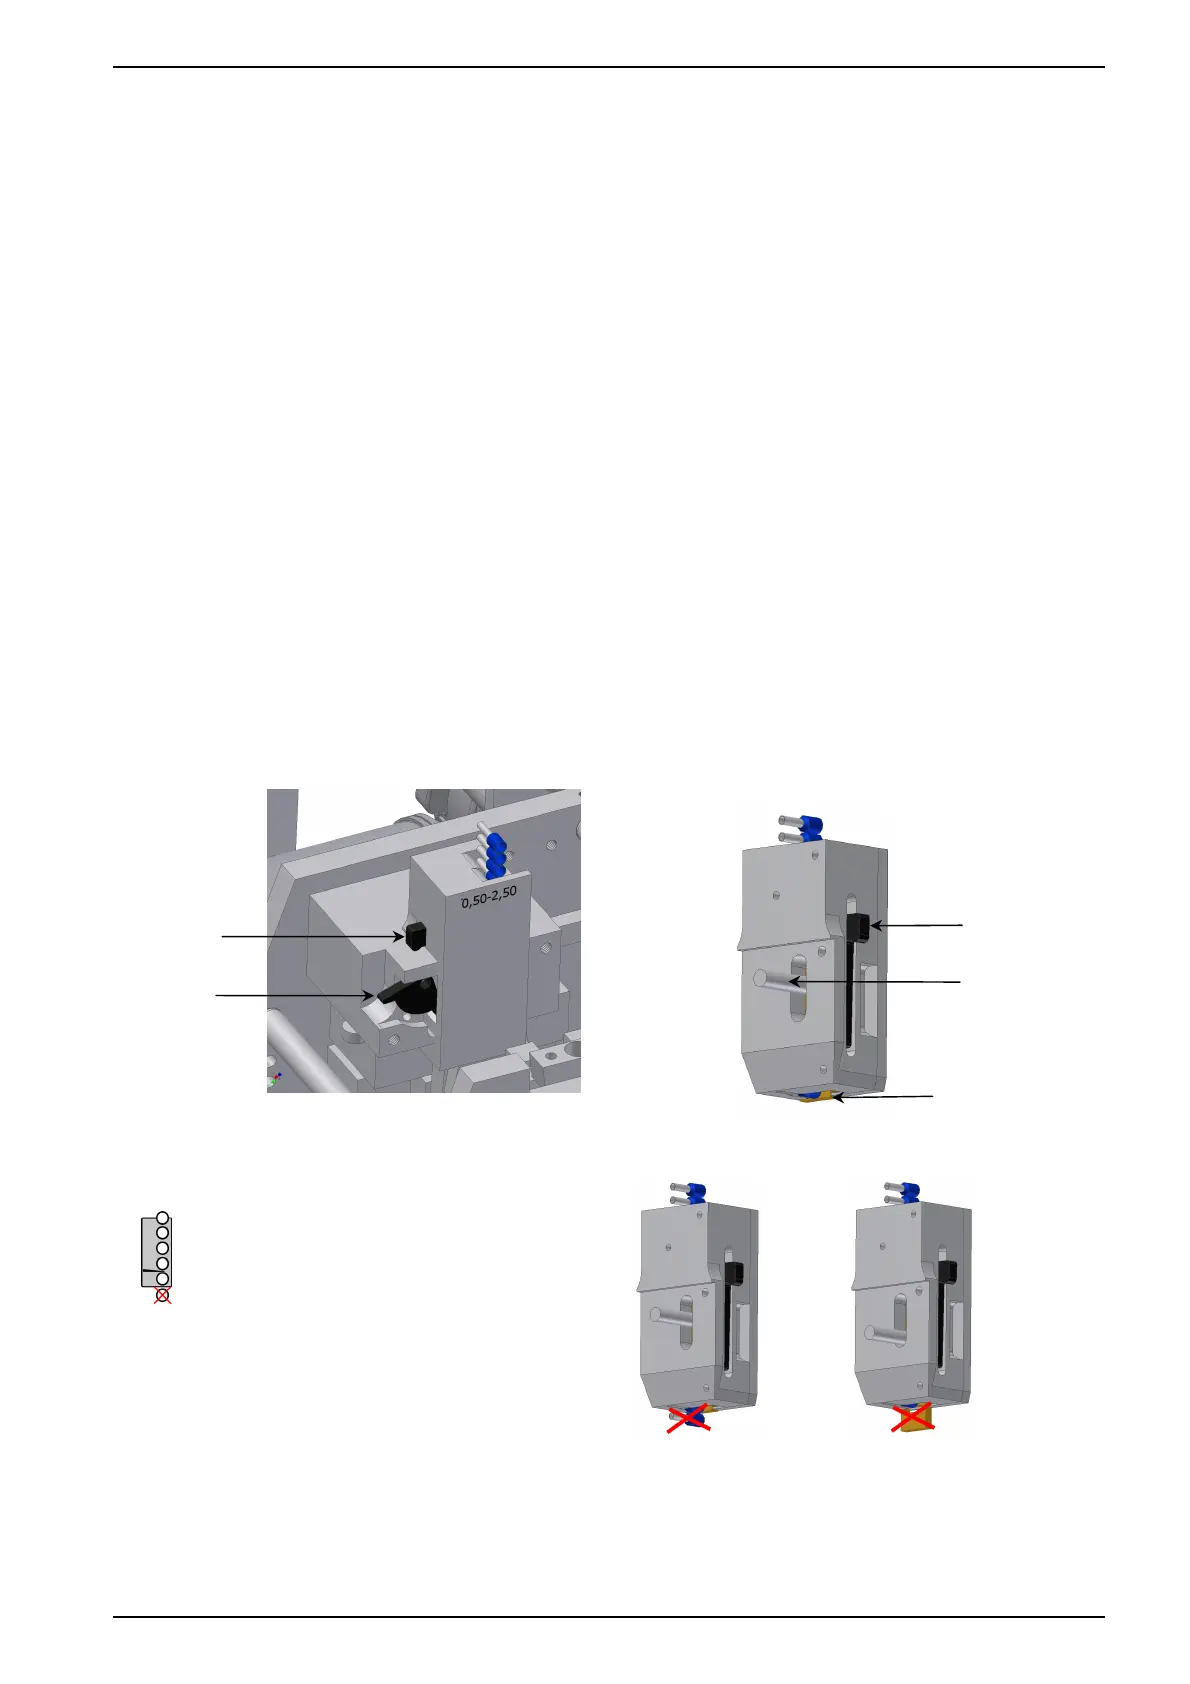
7.3 Inserting ferrules
• Open the flap.
• Release the locking pin (see Figure 3) and remove the magazine.
• Put on the ferrule reel, so that it rotates in clockwise direction.
• While inserting the ferrules, the transporting pusher must be retracted. If the pusher juts out, you have to
press it back.
• Insert the belt until the first ferrule is snapped in. Be careful that no ferrule sticks out of the magazine.
• If the locking lever was pressed, the transporting pusher must be retracted and the ferrule belt must be
reloaded again.
• Put in the magazine until it snaps in and close the flap.
Figure 3: Magazine
9
Tansporting pin
Locking pin
Locking lever
Locking lever
Tansporting pusher
Be careful that no ferrule sticks
out and the transporting pusher
is retracted while inserting